Please Note: This article is written for users of the following Microsoft Excel versions: 2007, 2010, 2013, 2016, 2019, and Excel in Microsoft 365. If you are using an earlier version (Excel 2003 or earlier), this tip may not work for you. For a version of this tip written specifically for earlier versions of Excel, click here: Creating Add-Ins.
Written by Allen Wyatt (last updated February 26, 2024)
This tip applies to Excel 2007, 2010, 2013, 2016, 2019, and Excel in Microsoft 365
Any Excel workbook can be converted to an add-in. The steps you need to follow to create an add-in are very precise, and may seem a bit overwhelming (particularly the first couple of times you do it). To create a protected add-in file, you need to do a little work in the VBA Editor and in Excel itself. First, here are the steps to follow to get the settings correct in the VBA Editor:
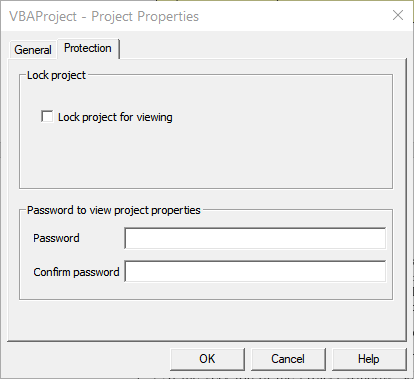
Figure 1. The Protection tab of the project�s Properties dialog box.
Now it is time to do a little work in Excel. Follow these steps if you are using Excel 2010 or a later version:
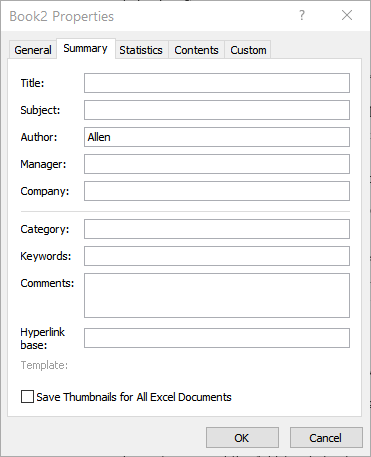
Figure 2. The Summary tab of the workbook�s Properties dialog box.
The steps are slightly different in Excel 2007:
Note:
ExcelTips is your source for cost-effective Microsoft Excel training. This tip (8528) applies to Microsoft Excel 2007, 2010, 2013, 2016, 2019, and Excel in Microsoft 365. You can find a version of this tip for the older menu interface of Excel here: Creating Add-Ins.
Program Successfully in Excel! John Walkenbach's name is synonymous with excellence in deciphering complex technical topics. With this comprehensive guide, "Mr. Spreadsheet" shows how to maximize your Excel experience using professional spreadsheet application development tips from his own personal bookshelf. Check out Excel 2013 Power Programming with VBA today!
Page breaks not appearing where you expect them in your subtotaled data? It could be because of a setting you made in ...
Discover MoreWant to know what is happening in certain cells in your worksheet? Using the Watch Window is a great way to keep an eye ...
Discover MoreCells that use the information in a particular cell are called dependent cells. Excel provides auditing tools that allow ...
Discover MoreFREE SERVICE: Get tips like this every week in ExcelTips, a free productivity newsletter. Enter your address and click "Subscribe."
2020-04-07 08:44:15
Richard Curtis
This is all interesting but why would I want or need to create an Add-In? If I open a blank workbook and list available Add-Ins, the first is Analysis ToolPak. There is a brief description but what does it do? How does it work?
Got a version of Excel that uses the ribbon interface (Excel 2007 or later)? This site is for you! If you use an earlier version of Excel, visit our ExcelTips site focusing on the menu interface.
FREE SERVICE: Get tips like this every week in ExcelTips, a free productivity newsletter. Enter your address and click "Subscribe."
Copyright © 2024 Sharon Parq Associates, Inc.
 Please Note:
This article is written for users of the following Microsoft Excel versions: 2007, 2010, 2013, 2016, 2019, and Excel in Microsoft 365. If you are using an earlier version (Excel 2003 or earlier), this tip may not work for you. For a version of this tip written specifically for earlier versions of Excel, click here:
Please Note:
This article is written for users of the following Microsoft Excel versions: 2007, 2010, 2013, 2016, 2019, and Excel in Microsoft 365. If you are using an earlier version (Excel 2003 or earlier), this tip may not work for you. For a version of this tip written specifically for earlier versions of Excel, click here:
Comments