Written by Allen Wyatt (last updated May 6, 2023)
This tip applies to Excel 2007, 2010, 2013, 2016, 2019, 2021, and Excel in Microsoft 365
Tawna can configure Excel to move in any of four directions when she presses Enter. She wonders if it is possible to make Excel move a specific number of cells to the right upon pressing Enter.
As Tawna notes, Excel allows you to configure the program so that when you press Enter, you'll move in any of four directions.
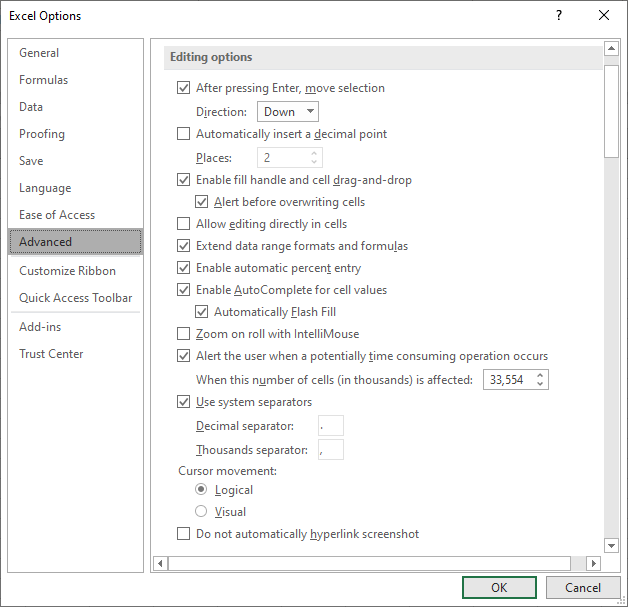
Figure 1. The Advanced options of the Excel Options dialog box.
Note that the configuration is for direction only; you cannot specify how many cells you want to move in any particular direction—which is what Tawna wants to do.
There are several ways that you can accomplish the task at hand. Let's say that you want, when pressing Enter, to move 4 cells to the right. One way is configure Excel to move to the right (using the steps above) and then hide columns you want to skip over. So, for instance, let's say that after entering something in column C you want to skip over column D:F and make your next entry in column G. All you would need to do is to hide columns D:F, then when you press Enter, you'll end up in column G.
This approach is great if you always know where you will start and you always want to skip a set number of columns. It is not so great if you aren't entering information in such a structured manner. Instead, you may want to utilize a cell (and worksheet) protection approach. Follow these steps:
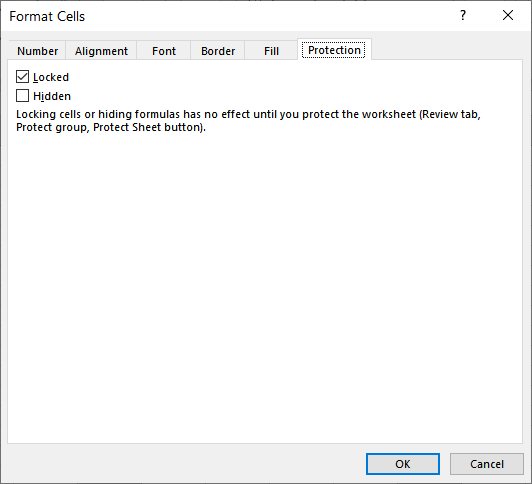
Figure 2. The Protection tab of the Format Cells dialog box.
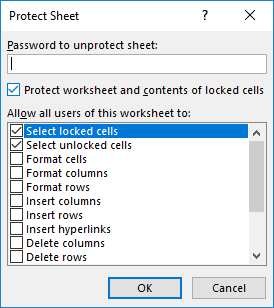
Figure 3. The Protect Sheet dialog box.
Now when you press Enter in the worksheet, you are moved to the next unlocked cell, in the direction you specified in the earlier steps described in this tip. It is only the cells that you unlocked that are selected, in turn.
Finally, you could use a macro to handle the movement for you. Here are two that implement a simple approach:
Sub MoveXRight()
    'Enter number > 1 in designated cell
    'Moves that number of cells to the right
    Dim n As Integer

    n = Sheets("Sheet1").Range("A1")
    ActiveCell(0, n + 1).Select
End Sub
Private Sub Workbook_SheetChange(ByVal Sh As Object, ByVal Target As Range)
    If Sheets("Sheet1").Range("A1") > 1 Then
        MoveXRight
    End If
End Sub
Note that the second macro should be placed in the ThisWorkbook module, as it is an event handler. Each time that it is triggered, the other macro (MoveXRight) is executed. It pulls a value from cell A1 on Sheet1 and then moves that number of cells to the right. To use the macro, simply enter a value in cell A1 of Sheet1 that indicates how many cells you want to move. To have Enter work like normal, just place a 0 or 1 into cell A1.
Note:
ExcelTips is your source for cost-effective Microsoft Excel training. This tip (10554) applies to Microsoft Excel 2007, 2010, 2013, 2016, 2019, 2021, and Excel in Microsoft 365.

Solve Real Business Problems Master business modeling and analysis techniques with Excel and transform data into bottom-line results. This hands-on, scenario-focused guide shows you how to use the latest Excel tools to integrate data from multiple tables. Check out Microsoft Excel 2013 Data Analysis and Business Modeling today!
Need to limit the number of characters that can be entered into a cell? One easy way to do it is through the use of Data ...
Discover MoreSometimes, getting numbers from a program into Excel, using the formatting you want, can be a challenge. This tip ...
Discover MoreWouldn't it be great if you could have Excel display some text in a cell only when that cell is empty? Unfortuantely, ...
Discover MoreFREE SERVICE: Get tips like this every week in ExcelTips, a free productivity newsletter. Enter your address and click "Subscribe."
2023-05-08 09:04:40
Tomek
If you select cells to enter your information in, you do not need to use the protection trick described above. Instead use ENTER or TAB keys to move the cursor within the selection. The selection does not need to be contiguous.
You can create a named range with that selection, to be able to select it repeatedly. When creating the named range, make sure that the cell you want to start in is the active cell.
Just do not use arrow keys to move the cursor - it will reset the selection to just one cell. This applies also to using TAB and ENTER as described in my previous comment - it will break the row as Excel remembers it..
2023-05-08 08:47:47
Tomek
By default ENTER moves cursor one cell down and TAB - one cell to the right.
Did you know that when you use the TAB key when entering data into a table row, when you reach the end of the row and press ENTER, the cursor will move to the first cell of the next row, rather than just to the cell below the current one.
2023-05-07 18:46:38
Vince Lord
By time you operate these macros or hide cells, you could just punch enter 4 times. Creative solutions but seem like overkill.
Love your newsletter and the new Macros book and the other related offer are great. Thanks for publishing this great information.
Got a version of Excel that uses the ribbon interface (Excel 2007 or later)? This site is for you! If you use an earlier version of Excel, visit our ExcelTips site focusing on the menu interface.
FREE SERVICE: Get tips like this every week in ExcelTips, a free productivity newsletter. Enter your address and click "Subscribe."
Copyright © 2025 Sharon Parq Associates, Inc.
Comments