Please Note: This article is written for users of the following Microsoft Excel versions: 2007, 2010, 2013, 2016, 2019, 2021, and Excel in Microsoft 365. If you are using an earlier version (Excel 2003 or earlier), this tip may not work for you. For a version of this tip written specifically for earlier versions of Excel, click here: Preparing a Chart Sheet for Printing.
Written by Allen Wyatt (last updated January 21, 2023)
This tip applies to Excel 2007, 2010, 2013, 2016, 2019, 2021, and Excel in Microsoft 365
Excel allows you to use two types of charts: embedded charts and chart sheets. Since an embedded chart is included as part of a regular worksheet, you can print one just as you would any other worksheet.
Chart sheets, on the other hand, take a bit more preparation in order to print. To modify how a chart sheet appears, display the Page Layout tab of the ribbon and click the small icon at the lower-right of the Page Setup group. Excel displays the Page Setup dialog box. Make sure you select the Chart tab; there you can select the quality of the printout and specify if you want to print the chart in black and white or not. (See Figure 1.)
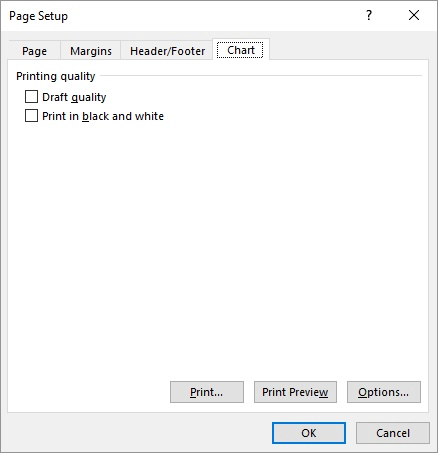
Figure 1. The Chart tab of the Page Setup dialog box.
If you don't see a Chart tab in the Page Setup dialog box, then you don't have a chart sheet displayed. Remember that the chart tab only appears of you have a Chart sheet selected.
As with any other graphics image, you can resize a chart sheet. As you move the mouse pointer over the sizing handles that appear around a selected chart sheet, the mouse pointer changes to a sizing arrow. Click on a sizing handle and drag the border of the chart to reflect the size you want to use. The direction of the arrowheads indicates the direction you can move the border. When you release the mouse button, the chart is resized and redrawn automatically.
ExcelTips is your source for cost-effective Microsoft Excel training. This tip (11915) applies to Microsoft Excel 2007, 2010, 2013, 2016, 2019, 2021, and Excel in Microsoft 365. You can find a version of this tip for the older menu interface of Excel here: Preparing a Chart Sheet for Printing.

Dive Deep into Macros! Make Excel do things you thought were impossible, discover techniques you won't find anywhere else, and create powerful automated reports. Bill Jelen and Tracy Syrstad help you instantly visualize information to make it actionable. You�ll find step-by-step instructions, real-world case studies, and 50 workbooks packed with examples and solutions. Check out Microsoft Excel 2019 VBA and Macros today!
Macros allow you to make changes to virtually anything you can see in Excel. This tip examines how to make changes (even ...
Discover MoreWant the title of your chart to change based upon what is placed in a worksheet cell? It's easy; just add a formula to ...
Discover MoreWhen formatting a chart, you select elements and then change the properties of those elements until everything looks just ...
Discover MoreFREE SERVICE: Get tips like this every week in ExcelTips, a free productivity newsletter. Enter your address and click "Subscribe."
There are currently no comments for this tip. (Be the first to leave your comment—just use the simple form above!)
Got a version of Excel that uses the ribbon interface (Excel 2007 or later)? This site is for you! If you use an earlier version of Excel, visit our ExcelTips site focusing on the menu interface.
FREE SERVICE: Get tips like this every week in ExcelTips, a free productivity newsletter. Enter your address and click "Subscribe."
Copyright © 2026 Sharon Parq Associates, Inc.
 Please Note:
This article is written for users of the following Microsoft Excel versions: 2007, 2010, 2013, 2016, 2019, 2021, and Excel in Microsoft 365. If you are using an earlier version (Excel 2003 or earlier), this tip may not work for you. For a version of this tip written specifically for earlier versions of Excel, click here:
Please Note:
This article is written for users of the following Microsoft Excel versions: 2007, 2010, 2013, 2016, 2019, 2021, and Excel in Microsoft 365. If you are using an earlier version (Excel 2003 or earlier), this tip may not work for you. For a version of this tip written specifically for earlier versions of Excel, click here:
Comments