Please Note: This article is written for users of the following Microsoft Excel versions: 2007, 2010, 2013, 2016, 2019, and 2021. If you are using an earlier version (Excel 2003 or earlier), this tip may not work for you. For a version of this tip written specifically for earlier versions of Excel, click here: Importing Huge Data Files.
Written by Allen Wyatt (last updated August 29, 2025)
This tip applies to Excel 2007, 2010, 2013, 2016, 2019, and 2021
Damodar has a CSV file he needs to import into Excel. Normally this wouldn't be a problem, but this CSV file has well over a million rows in it. He wonders if there is any way to get such a huge file into Excel.
Excel has a limit on the number of rows you can have in a worksheet—up to 1,048,576. As Damodar has discovered, it is very possible to have a raw data file that has more than this number of rows. If you need to import that file into Excel, then doing so can appear almost impossible. There are a couple of things you can do, however.
One possibility is to make copies of the raw text file (the one you want to import) and then cut the size of each file down. For instance, if you have a total of 1.5 million rows you need to import into Excel, you could make two copies of the raw text file. Delete the second half of the first text file and the first half of the second. Thus, you can import the first file (now 750,000 rows) into one worksheet and the second file (also 750,000 rows) into the second.
If you don't want to break up your input files, you might consider importing the file into Access. Unlike Excel, Access has virtually no limit on the number of rows you can import. You could then either work with the file in Access, or export portions of the file to use in Excel.
You could also use a macro to import the records in the large source file. There are many ways you can do this, but the basic idea behind any approach is to fetch each row from the source file and place it in a new row of a worksheet. The macro must keep track of how many rows it's placed, and switch to a new worksheet, if necessary.
Public Sub LoadFile()
    Dim strLine As String
    Dim I As Long
    Dim J As Long
    Dim iLen As Integer
    Dim iSh As Integer
    Dim lL As Long
    Dim sDelim As String
    Dim MaxSize As Long

    sDelim = Chr(9)
    MaxSize = 1048000
    I = 0
    Open "C:\MyDir\MyFile.txt" For Input As #5
    Do While Not EOF(5)
        iSh = (I / MaxSize) + 1
        lL = I Mod MaxSize
        Line Input #5, strLine
        If Right(strLine, 1) <> sDelim Then
           strLine = Trim(strLine) & sDelim
        End If
        J = 0
        Do While Len(strLine) > 1
            iLen = InStr(strLine, sDelim)
            Worksheets("Sheet" & iSh).Offset(lL, J).Value = _
              Trim(Left(strLine, iLen - 1))
            strLine = Trim(Right(strLine, Len(strLine) - iLen))
            J = J + 1
        Loop
        I = I + 1
    Loop
    Close #5
End Sub
The macro assumes you have enough worksheets already in your workbook to contain the data, and that they are numbered Sheet1, Sheet2, Sheet3, etc. Two variables you'll want to check in the program are the settings of sDelim and MaxSize. The first specifies what character is used as a field delimiter in the information that is being read. The second specifies the maximum number of rows you want on each worksheet. You should also note that the macro opens the text file MyFile.txt. You'll want to change this Open statement so that it opens the real source file you want to import.
There are a couple of potential gotchas that you need to be aware of when running a macro like this. The first is that it is going to run rather slowly—as in "take a break for lunch" or "go home overnight" slowly. The length of time it takes is directly related to the number of rows of data and the number of fields in each row. The second thing to be aware of is it is entirely possible that you will crash your system. This, again, depends on the amount of data you are importing. That data requires memory, and the amount of memory required increases with each imported row. If you run out of memory, well... (you get the idea).
Finally, if you are using the version of Excel provided with Microsoft 365, you could work with your data using Power Query. This will only work, though, if you can �'transform�" your data in some way. This means that you could identify ways in which your data could be segregated to differing worksheets based on a value that can be identified in the data you need to import. Perhaps, for instance, you might be able to separate data based on department, region, sales person, or some other value.
In this case, follow these steps:
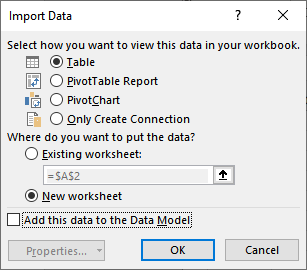
Figure 1. The Import Data dialog box.
Working with Power Query is (as the name implies) powerful. It will take you a bit of getting used to, however, to make sure that you import everything you need from the source CSV file.
ExcelTips is your source for cost-effective Microsoft Excel training. This tip (13876) applies to Microsoft Excel 2007, 2010, 2013, 2016, 2019, and 2021. You can find a version of this tip for the older menu interface of Excel here: Importing Huge Data Files.

Best-Selling VBA Tutorial for Beginners Take your Excel knowledge to the next level. With a little background in VBA programming, you can go well beyond basic spreadsheets and functions. Use macros to reduce errors, save time, and integrate with other Microsoft applications. Fully updated for the latest version of Office 365. Check out Microsoft 365 Excel VBA Programming For Dummies today!
Excel keeps track of the most recent workbooks you've used. If you want to access that information in a macro, you'll ...
Discover MoreImport data into a worksheet (or paste it there) and you may find that you end up with a group of blank cells you need to ...
Discover MoreYou can use Excel for all types of data processing. You may want to work with filenames in a worksheet, but the first ...
Discover MoreFREE SERVICE: Get tips like this every week in ExcelTips, a free productivity newsletter. Enter your address and click "Subscribe."
2025-08-29 07:29:55
Rene
Load into Power Query and link to the data model only. Hereby you can load as many rows as you want. Add a Power Pivot table linked to the data model, it is faster than a normal pivot table. The file size remains relatively small and you won't have issues with too many rows, unless the pivot table is poorly designed. If you are not intending to use all the data, use Power Query to filter out rows and/or columns.
2025-08-29 06:56:02
jamies
Another possibly useful technique
with a script (macro)
load up 1,000,000 rows with data, and then load more data into those rows, offset by an appropriate number of columns -
so you can have multiple tables in one worksheet -
and do remember to not have the data worksheet selected with screen updating allowed !
Also - maybe breakpoints - as in every 100,000 input records processed - save the processed data -
and have a restart - continue from item n,000,000 pointer .
remembering the Excel data processing memory allocation is, well certainly was to sequentially handle all the rows of a set range of blocks of columns of the data
so much faster processing to work down a limited number of columns at a time.
So - in VBA - maybe a collection would avoid any limitations on the number of array entries.
Assuming you have enough RAM so that you can hold and access the data you hold in RAM rather than reading it from the worksheet cell detail storage - where excel will be allowing for recording all the attributes possible for a cell.
That would also allow and selection of data to be indicated by an index type set of entries with just a pointer to each of the selected array entries, rather than assembling a separate array of the selected entries.
And - as indicated - you can setup the data in tables in worksheets, and save them to an (access) database -
using SQL to SELECT the wanted data effectively with UNION of several tables entries
maybe - for bulk data - see <https://thectoclub.com/tools/best-relational-database-software>
and <https://support.microsoft.com/en-gb/office/migrate-an-access-database-to-sql-server>
and - microsoft sql-server
Processing large volume data brings a whole lot of extra annoying considerations to work arount.
2025-08-29 05:48:25
Edward Hook
Can you just import All the CSV data to "Power Pivot" and go from there.
2021-06-26 05:50:31
Rohn S, MVP 2012-2018
Loading large data to a "traditional" DB is an option Then use powerquery to connect to the DB to extract into the data model.
.
PowerQuery is not limited to 365. I've been using it in Excel 2010. The old version obviously won't have all of the features in the 365 version, but it works for the "fundamentals".
.
2016/2019/365 PowerQuery is "built in" on the ribbon
.
The Complete Guide to Installing Power Query (2013 2010)
https://www.excelcampus.com/install-power-query/
Power Query is a “free” add-in from Microsoft for Excel 2010 and 2013. This guide explains which versions of Excel you need, and how to install it.
.
Got a version of Excel that uses the ribbon interface (Excel 2007 or later)? This site is for you! If you use an earlier version of Excel, visit our ExcelTips site focusing on the menu interface.
FREE SERVICE: Get tips like this every week in ExcelTips, a free productivity newsletter. Enter your address and click "Subscribe."
Copyright © 2026 Sharon Parq Associates, Inc.
 Please Note:
This article is written for users of the following Microsoft Excel versions: 2007, 2010, 2013, 2016, 2019, and 2021. If you are using an earlier version (Excel 2003 or earlier), this tip may not work for you. For a version of this tip written specifically for earlier versions of Excel, click here:
Please Note:
This article is written for users of the following Microsoft Excel versions: 2007, 2010, 2013, 2016, 2019, and 2021. If you are using an earlier version (Excel 2003 or earlier), this tip may not work for you. For a version of this tip written specifically for earlier versions of Excel, click here:
Comments