Please Note: This article is written for users of the following Microsoft Excel versions: 2007 and 2010. If you are using an earlier version (Excel 2003 or earlier), this tip may not work for you. For a version of this tip written specifically for earlier versions of Excel, click here: Pulling Formulas from a Worksheet.
Excel allows you to display the formulas in a worksheet simply by making sure the Formulas check box is selected on the View tab of the Options dialog box. This can be a handy way to print a worksheet that shows the formulas used to create the worksheet.
However, this approach only works well if the formulas used in the worksheet are rather short. If the formulas are longer, then understanding a worksheet with formulas displayed can quickly become a bothersome chore.
One solution is to pull the formulas from Excel and place them in a program such as Word. Why Word? Because you can easily format text attributes (such as typeface and point size) to best display your formulas. You can also add additional text to explain the formulas, if desired.
The simplest way to get formulas from Excel into Word is to follow these steps:
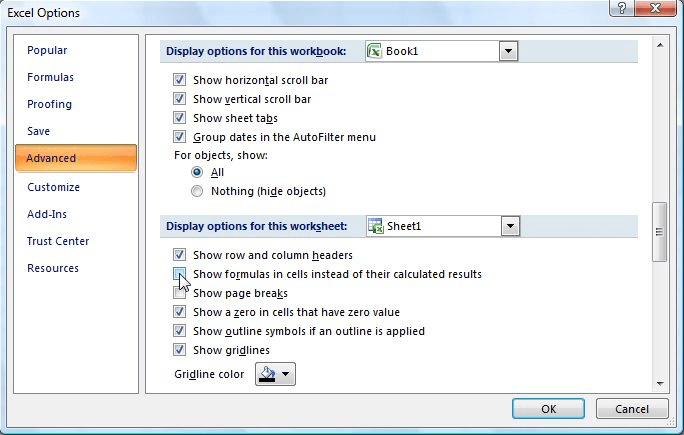
Figure 1. The Advanced options of the Excel Options dialog box.
At this point your formulas are in Word, and you can do with them as you see fit. While this approach works well, it can become bothersome to do this over and over again if you have a large number of formulas to copy. If you are in such a situation, you would benefit from having a macro that actually pulled the formulas and placed them in a Word document for you. The following Excel macro will do just that:
Sub WriteFormulasToWord()
    Dim Wrd As New Word.Application
    Dim CellTxt As String
    Dim CellAddr As String
    Dim SRow As Long
    Dim SCol As Long

    Wrd.Visible = True
    Wrd.Documents.Add

    Wrd.Selection.TypeText Text:="List of the Formulas of Sheet """ _
      & ActiveSheet.Name & """ in Workbook """ _
      & ActiveWorkbook.Name & """."
    Wrd.Selection.TypeText Text:=vbCrLf & vbCrLf

    'Change the following line to pick the number of columns
    For SCol = 1 To 5
        'Change the following line to pick the number of rows
        For SRow = 1 To 10
            If Cells(SRow, SCol).HasFormula Then
                CellAddr = Chr(64 + SCol) & Trim(Str(SRow)) & vbTab
                CellTxt = ActiveSheet.Cells(SRow, SCol).Formula
                Wrd.Selection.TypeText Text:=CellAddr & CellTxt
                Wrd.Selection.TypeText Text:=vbCrLf
            End If
        Next SRow
        Wrd.Selection.TypeText Text:=vbCrLf
    Next SCol
End Sub
There are a couple of things to note in this macro. First of all, you can change the range of rows and columns over which the macro works by changing the noted For statements that use both SCol and SRow. In the example shown above, the macro pulls formulas from columns 1 through 5 (A through E) and rows 1 through 10.
In addition, this macro will not work properly unless you set up Excel macros to handle references to Word objects. You do that by following these steps within the VBA Editor:
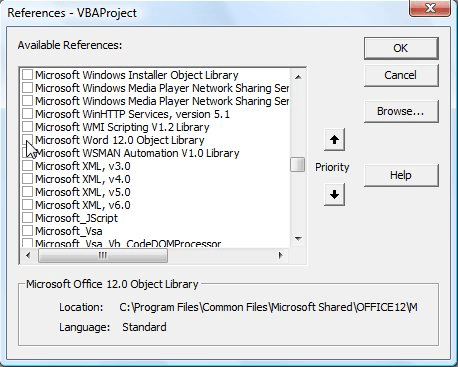
Figure 2. The References dialog box.
An advantage to using a macro to actually pull your formulas is that you can customize exactly what is placed in the Word document. In the case of this macro, the address of the cell is inserted, followed by a tab character, and then the actual formula. You could just as easily change the information inserted to be anything you need in your particular instance.
Note:
ExcelTips is your source for cost-effective Microsoft Excel training. This tip (6233) applies to Microsoft Excel 2007 and 2010. You can find a version of this tip for the older menu interface of Excel here: Pulling Formulas from a Worksheet.

Dive Deep into Macros! Make Excel do things you thought were impossible, discover techniques you won't find anywhere else, and create powerful automated reports. Bill Jelen and Tracy Syrstad help you instantly visualize information to make it actionable. You�ll find step-by-step instructions, real-world case studies, and 50 workbooks packed with examples and solutions. Check out Microsoft Excel 2019 VBA and Macros today!
When you need to determine an average based on a very small selection of cells from a large dataset, based on multiple ...
Discover MoreExcel works with decimal values very easily. It is more difficult for the program to work with non-decimal values, such ...
Discover MoreCircular references occur when a formula includes a reference to the cell in which the formula appears. Here's how you ...
Discover MoreFREE SERVICE: Get tips like this every week in ExcelTips, a free productivity newsletter. Enter your address and click "Subscribe."
2022-12-20 14:38:45
J. Woolley
The ListFormulas function described in my previous comment has been updated as follows:
=ListFormulas(Target,[WithValues],[SkipConstants],[SkipHeader])
When SkipConstants is TRUE only formulas that begin with = will be returned.
2022-12-19 12:10:00
J. Woolley
My Excel Toolbox includes the following dynamic array function to return all non-blank formulas with optional values from a Target range of cells:
=ListFormulas(Target,[WithValues],[SkipHeader])
Target might represent cells on a different worksheet, for example. Expect 2 columns (Cell, Formula) or 3 columns (Cell, Formula, Value) and N rows (plus header).
My Excel Toolbox's SpillArray function simulates a dynamic array in older versions of Excel:
=SpillArray(ListFormulas(...))
That function is described in UseSpillArray.pdf.
See https://sites.google.com/view/MyExcelToolbox
2013-04-03 00:26:17
venkat
I highlight the formula in FORMULA BAR
control+C
hit ESC key(this is important)
go to any location even within excel same sheet or some some other location,
contrl+v
2013-04-02 19:22:24
Bob Davey
One can simply insert a space before an individual formula then copy and past the cell contents to wherever. Don't forget to return to the cell and delete the space.
Michael's approach looks nice but is incomplete and impractical. For example it adds comments to cells that do not actually contains formulae. Additionally a worksheet containing zillions of lengthy formula is going to cause a lot of clutter when creating the comments and demand a lot of formatting if a printout is required. Testing Michaal's macros proved this to be the case when I managed to actually make the thing work. It also does not like large selections. This code needs a lot of work before it can be considered practical. Also needed here is a simple macro to remove the commments....
Sunil's comment is fine but one cannot copy the relative formula. In any case the content of the cell is already visible in the Formula Bar.
The original Word idea works well where one wishes to print the results in a readily formatted style.
However at the end of the day one presumes that this type of facility would be needed for illustration or investigation purposes. What would be more practical is a macro that merely extracts unique formulae only, adds the relative cell reference so that it can be located and plonks the results into a table in a new worksheet. The table could then be formatted, printed or exported as necessary.
2013-04-02 11:20:18
Michael (micky) Avidan
To my opinion - showing Formulas results and/or copying them to "Word" does not achieve its purpose.
A better way is used by me, for the last 10 years – with which I have tutored lot of students.
It involves 2 Macros to be placed within the PERSONAL Workbook and associated to 2 Icons in the "Quick Access Toolbar" (or to one of the bars in "2003" and older versions).
After the user selects one cell or range of cells – he executes the Add_Comments_With_Cell_Formulas Macro.
Although it is obvious – those comments can be, easily, printed while printing the Sheet.
----------------------------------------
Sub Add_Comments_With_Cell_Formulas()
On Error Resume Next
For Each comt In Selection.Cells
If Not IsEmpty(comt) Then
comt.AddComment
comt.Comment.Text Text:=comt.Formula
End If
Next
Application.DisplayCommentIndicator = xlCommentAndIndicator
Format_Comments
End Sub
Sub Format_Comments()
For Each cmt In ActiveSheet.Comments
With cmt.Shape.TextFrame
.AutoSize = True
.HorizontalAlignment = xlCenter
.VerticalAlignment = xlCenter
End With
With cmt.Shape.TextFrame.Characters.Font
.Name = "Arial"
.Size = 10
.Bold = True
End With
Set rngComments = ActiveSheet.Range("a:iv").SpecialCells(xlCellTypeComments)
ActiveWindow.Zoom = 100
For Each rngTemp In rngComments
rngTemp.Comment.Shape.Fill.BackColor.RGB = RGB(204, 255, 255)
rngTemp.Comment.Shape.Fill.OneColorGradient msoGradientHorizontal, 4, 0.36
rngTemp.Comment.Shape.Shadow.Visible = msoTrue
rngTemp.Comment.Shape.Fill.BackColor.SchemeColor = 41
Next
Next
End Sub
----------
Michael Avidan
“Microsoft®” MVP – Excel
ISRAEL
2013-04-02 06:44:55
Sunil Gupta
Instead of doing this much thing you can just press "ctrl+`" button only and you can view the formulas.
Got a version of Excel that uses the ribbon interface (Excel 2007 or later)? This site is for you! If you use an earlier version of Excel, visit our ExcelTips site focusing on the menu interface.
FREE SERVICE: Get tips like this every week in ExcelTips, a free productivity newsletter. Enter your address and click "Subscribe."
Copyright © 2025 Sharon Parq Associates, Inc.
 Please Note:
This article is written for users of the following Microsoft Excel versions: 2007 and 2010. If you are using an earlier version (Excel 2003 or earlier), this tip may not work for you. For a version of this tip written specifically for earlier versions of Excel, click here:
Please Note:
This article is written for users of the following Microsoft Excel versions: 2007 and 2010. If you are using an earlier version (Excel 2003 or earlier), this tip may not work for you. For a version of this tip written specifically for earlier versions of Excel, click here:
Comments