Please Note: This article is written for users of the following Microsoft Excel versions: 2007, 2010, 2013, 2016, 2019, 2021, and Excel in Microsoft 365. If you are using an earlier version (Excel 2003 or earlier), this tip may not work for you. For a version of this tip written specifically for earlier versions of Excel, click here: Moving Cells Using the Mouse.
As you edit your worksheet, you can use the mouse to move cells from one location to another. You do this by following these steps:
If there is anything already at the target location, Excel may ask you if you want to overwrite the existing cells. You can respond according to your desires.
If you cannot seem to edit this way, or if no heavy border (step 2) appears around your selected range, then drag-and-drop editing is probably turned off on your system. To check this, follow these steps:
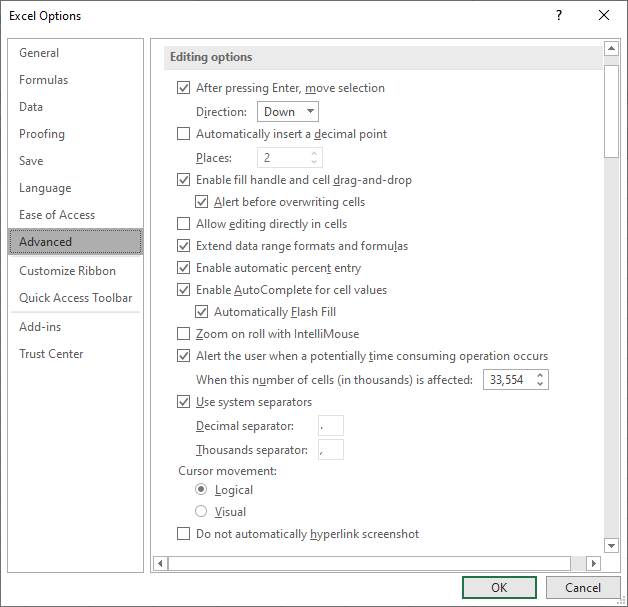
Figure 1. The Advanced option of the Excel Options dialog box.
ExcelTips is your source for cost-effective Microsoft Excel training. This tip (12351) applies to Microsoft Excel 2007, 2010, 2013, 2016, 2019, 2021, and Excel in Microsoft 365. You can find a version of this tip for the older menu interface of Excel here: Moving Cells Using the Mouse.

Excel Smarts for Beginners! Featuring the friendly and trusted For Dummies style, this popular guide shows beginners how to get up and running with Excel while also helping more experienced users get comfortable with the newest features. Check out Excel 2019 For Dummies today!
What do you do if a keypress you know worked correctly before all of a sudden stops working as you expect? This tip ...
Discover MoreWhen you cut and paste rows using Ctrl+X and Ctrl+V, Excel leaves empty the rows where the cut information was previously ...
Discover MoreReferring to a range of cells on the current worksheet is easy. But what if you want to refer to a range on a number of ...
Discover MoreFREE SERVICE: Get tips like this every week in ExcelTips, a free productivity newsletter. Enter your address and click "Subscribe."
2022-07-07 08:47:52
Michael
Willy,
Can that be done even if Enable fill and drag and drop is disabled?
Because I never use move cells feature but it sometimes gets activated when I grab call corner, or thereabouts, to pull down and copy formulas.
Michael
2022-05-14 05:45:29
Willy Vanhaelen
If you want to copy the range instead of moving it:
- in step 2. press and hold down the Ctrl key.
- The four-headed arrow changes in a + sign
- proceed with steps 3. and 4.
Got a version of Excel that uses the ribbon interface (Excel 2007 or later)? This site is for you! If you use an earlier version of Excel, visit our ExcelTips site focusing on the menu interface.
FREE SERVICE: Get tips like this every week in ExcelTips, a free productivity newsletter. Enter your address and click "Subscribe."
Copyright © 2026 Sharon Parq Associates, Inc.
 Please Note:
This article is written for users of the following Microsoft Excel versions: 2007, 2010, 2013, 2016, 2019, 2021, and Excel in Microsoft 365. If you are using an earlier version (Excel 2003 or earlier), this tip may not work for you. For a version of this tip written specifically for earlier versions of Excel, click here:
Please Note:
This article is written for users of the following Microsoft Excel versions: 2007, 2010, 2013, 2016, 2019, 2021, and Excel in Microsoft 365. If you are using an earlier version (Excel 2003 or earlier), this tip may not work for you. For a version of this tip written specifically for earlier versions of Excel, click here:
Comments