Jacob wants to format a cell so that when he enters a value, if it is above a predetermined threshold, it will show the threshold. For example, if the cell is formatted so that 50 is the highest number he can enter, should he enter 60, the cell will display 50.
If all you want to do is to modify what is displayed in the cell, you could create a simple custom format in this manner:
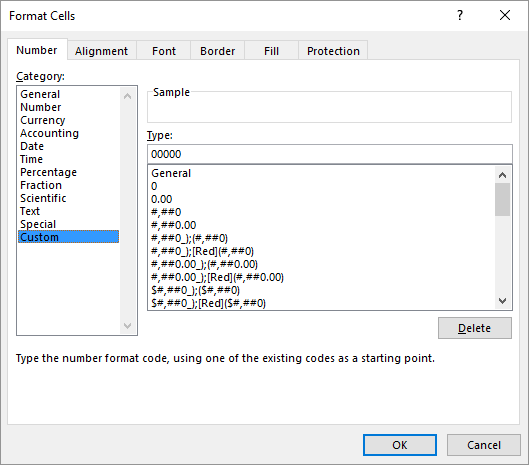
Figure 1. The Number tab of the Format Cells dialog box.
This approach doesn't modify what is stored in the cell; it simply changes what is displayed in the cell—the largest value it displays is 50, and it will display it in red. The fact that the over-threshold value is still stored in the cell may cause other problems for your worksheet, which may be more trouble than it is worth.
Jacob's situation is typically handled through the use of the Data Validation capabilities of Excel. You would simply set up a rule that indicates what to do if the value in the cell is outside of whatever bounds you want:

Figure 2. The Settings tab of the Data Validation dialog box.
This ensures that someone can only enter a value between 0 and 50 in the cell. If they try to enter a value outside of this range, then whatever error message you specified (step 7) is displayed and the user has the chance to enter a different value.
This approach may not fulfill Jacob's desires, however, as he would simply like to have the value in the cell be changed to the threshold value. In this case, you would need to resort to using a macro. Here's a simple one that could be used:
Private Sub Worksheet_Change(ByVal Target As Range)
    If Not Intersect(Target, Range("B7")) Is Nothing Then
        If Target > 50 Then Target = 50
    End If
End Sub
This macro is implemented as an event handler. To use it, right-click on the worksheet's tab and choose Code from the resulting Context Menu. The above macro then can be pasted into that code window. You will also need to modify which cell it is that you want the macro to pay attention to; as written, it only kicks into action if you try to enter the value into cell B7.
Note:
ExcelTips is your source for cost-effective Microsoft Excel training. This tip (13638) applies to Microsoft Excel 2007, 2010, 2013, 2016, 2019, 2021, 2024, and Excel in Microsoft 365.

Program Successfully in Excel! This guide will provide you with all the information you need to automate any task in Excel and save time and effort. Learn how to extend Excel's functionality with VBA to create solutions not possible with the standard features. Includes latest information for Excel 2024 and Microsoft 365. Check out Mastering Excel VBA Programming today!
Enter some data in a cell, and Excel typically moves to the next cell when you press Enter. If you want to move more than ...
Discover MoreIf you want to get rid of the contents of a range of cells, a quick way to do it is with the Fill handle. Yes, you can ...
Discover MoreDo you need to flag duplicate values in your data? This tip shows three different ways you can do the flagging you need.
Discover MoreFREE SERVICE: Get tips like this every week in ExcelTips, a free productivity newsletter. Enter your address and click "Subscribe."
2025-06-01 09:53:28
J. Woolley
@Tomek
Good catch. How would you modify the setting to insure a 0 to 50 restriction?
2025-05-31 21:39:08
Tomek
Re: This ensures that someone can only enter a value between 0 and 50 in the cell. If they try to enter a value outside of this range, then whatever error message you specified (step 7) is displayed and the user has the chance to enter a different value.
Actually, with the setting suggested in the tip, the user can enter also negative numbers.
Got a version of Excel that uses the ribbon interface (Excel 2007 or later)? This site is for you! If you use an earlier version of Excel, visit our ExcelTips site focusing on the menu interface.
FREE SERVICE: Get tips like this every week in ExcelTips, a free productivity newsletter. Enter your address and click "Subscribe."
Copyright © 2026 Sharon Parq Associates, Inc.
Comments