Please Note: This article is written for users of the following Microsoft Excel versions: 2007, 2010, 2013, 2016, 2019, and 2021. If you are using an earlier version (Excel 2003 or earlier), this tip may not work for you. For a version of this tip written specifically for earlier versions of Excel, click here: Pulling Filenames into a Worksheet.
Carol has a directory with about 1,000 files with names such as YR1905-LIC12345-Smith,Harry-Brown,Mary. She would like to bring all of these filenames (not the files themselves) into a worksheet and separate the names at the dash. Thus, the example filename would actually occupy four cells in a single row. Carol figures this will take a macro to accomplish, but she's not sure how to access the filenames in that macro.
You can, of course, use a macro to do this, but you don't need to use a macro. You can, instead, use an old DOS-era trick to get what you need. To access the command prompt if you are using a later version of Excel, simply type "command prompt" (without the quotes) in the search box next to the Windows icon in the task bar. If you are using an older version of Excel, the command prompt is accessible through Windows: Start | All Programs | Accessories | Command Prompt. At the command prompt navigate until you are in the directory that contains the files. Let's assume, for this example, that you are trying to get a listing of the files in this directory:
c:\Users\e07482\My Documents\rnp
To navigate to that directory, enter in this command at the command prompt:
chdir "\Users\e07482\My Documents\rnp"
You need to use the quote marks around the directory because of the space in the path name. Then, type the following command to see, on-screen, what the file listing is:
dir /b /a-d
The "/a-d" part means "don't list directories." If you are satisfied with what you see on the screen, then you can send it to the file by using the following:
dir /b /a-d > filelist.txt
This creates a text file (filelist.txt) that contains a list of all the files within the current directory. Now, within Excel, you can follow these steps:
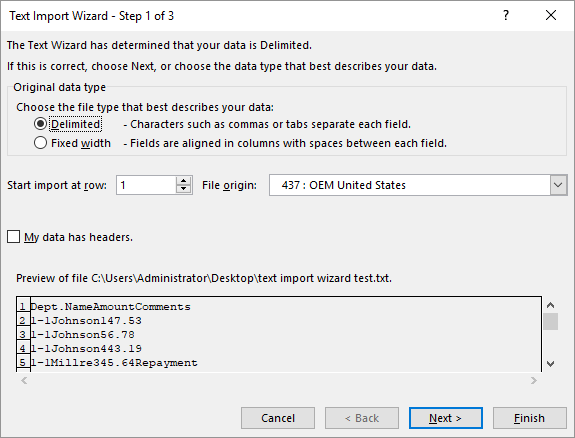
Figure 1. The Text Import Wizard.
The above steps are fairly easy to accomplish, particularly if you only need to get the file listing into Excel once in a while. If you need to do it more routinely, then you should probably seek a way to do it using a macro. The following macro will work very quickly:
Sub GetFileNames()
    Dim sPath As String
    Dim sFile As String
    Dim iRow As Integer
    Dim iCol As Integer
    Dim splitFile As Variant

    'specify directory to use - must end in "\"
    sPath = "C:\"

    iRow = 0
    sFile = Dir(sPath)
    Do While sFile <> ""
        iRow = iRow + 1
        splitFile = Split(sFile, "-")
        For iCol = 0 To UBound(splitFile)
            Sheet1.Cells(iRow, iCol + 1) = splitFile(iCol)
        Next iCol
        sFile = Dir     ' Get next filename
    Loop
End Sub
When you run the macro, make sure that there is nothing in the current worksheet. (Anything there will be overwritten.) Also, you should change the directory path that is assigned to the sPath variable near the beginning of the macro.
Note:
ExcelTips is your source for cost-effective Microsoft Excel training. This tip (11144) applies to Microsoft Excel 2007, 2010, 2013, 2016, 2019, and 2021. You can find a version of this tip for the older menu interface of Excel here: Pulling Filenames into a Worksheet.

Solve Real Business Problems Master business modeling and analysis techniques with Excel and transform data into bottom-line results. This hands-on, scenario-focused guide shows you how to use the latest Excel tools to integrate data from multiple tables. Check out Microsoft Excel Data Analysis and Business Modeling today!
Need to get your data into a format that can be easily read by other programs? Chances are good that a simple CSV file ...
Discover MoreIf you get errors in Excel that your filenames are too long, it can be confusing and frustrating. Applying the ideas ...
Discover MoreMRU (most recently used) files can be a great help when you work with a given set of common workbooks. Excel allows you ...
Discover MoreFREE SERVICE: Get tips like this every week in ExcelTips, a free productivity newsletter. Enter your address and click "Subscribe."
2021-11-02 02:25:24
Philip
For the Mac users : in MacOS, in any Finder window listing files and/or folders, just "select all" (command+A), press command+C, then go into Excel and press command+V and the entire list of file/folder names of the selected items in the Finder window will be pasted in the worksheet.
2021-10-31 04:54:08
Mike
If one is going to go the command prompt way, it's much easier first to navigate to the correct directory in windows explorer, then typencmdn in the main top bar (not the search bar); this will open a command prompt window in the desired directory.nnThen typendir /b /a-d | clipnand the file list will be sent to the clipboard. Just paste into excel.
2021-10-30 10:04:07
J. Woolley
My Excel Toolbox includes this dynamic array function:nListFiles([RootFolder],[SkipSubfolders],[SkipHidden],[SkipHeader])nIn older versions of Excel you can use it with the SpillArray function like this:n=SpillArray(ListFiles([RootFolder],[SkipSubfolders],...))nSee https://sites.google.com/view/MyExcelToolbox/
Got a version of Excel that uses the ribbon interface (Excel 2007 or later)? This site is for you! If you use an earlier version of Excel, visit our ExcelTips site focusing on the menu interface.
FREE SERVICE: Get tips like this every week in ExcelTips, a free productivity newsletter. Enter your address and click "Subscribe."
Copyright © 2026 Sharon Parq Associates, Inc.
 Please Note:
This article is written for users of the following Microsoft Excel versions: 2007, 2010, 2013, 2016, 2019, and 2021. If you are using an earlier version (Excel 2003 or earlier), this tip may not work for you. For a version of this tip written specifically for earlier versions of Excel, click here:
Please Note:
This article is written for users of the following Microsoft Excel versions: 2007, 2010, 2013, 2016, 2019, and 2021. If you are using an earlier version (Excel 2003 or earlier), this tip may not work for you. For a version of this tip written specifically for earlier versions of Excel, click here:
Comments