Written by Allen Wyatt (last updated March 7, 2020)
This tip applies to Excel 2007, 2010, 2013, 2016, 2019, and Excel in Microsoft 365
Bruce would like to know if there is a simple way of inserting a standard calendar into a spreadsheet so that dates can be easily selected. Fortunately, there are a couple of ways you can implement calendars.
Excel includes a built-in calendar control, but you need to be aware that the support for the calendar control has been a bit spotty between versions. In other words, you may implement the control in Excel 2007, but that same control may not work properly in Excel 2010 or later versions. Backwards compatibility between versions may be questionable, as well. (Why? Only Microsoft knows, and they are not saying.)
Even so, here's how you can insert the built-in calendar control, in this case in an Excel 2010 worksheet. (I really wouldn't try this in a later version of Excel; you more than likely won't be happy with the results.)
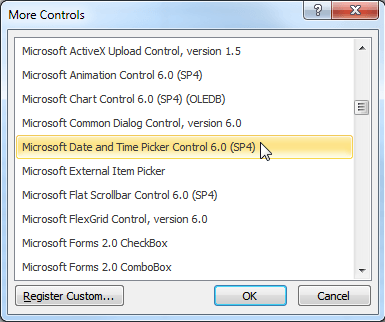
Figure 1. The More Controls dialog box.
At this point the Date Picker control should be active in your workbook. Click on the down-arrow at the right of it and you'll see a calendar with which you can select a date. When you leave the control (by clicking someplace else on the worksheet), the linked cell (step 8) is changed to reflect the date you selected using the control.
You may notice some funky behavior with the Date Picker control, even in Excel 2010. When I first added it to my worksheet and turned off Design Mode, Excel displayed an active control in the upper-left corner of the worksheet and a non-active control at the point where I drew the control. (It happened on two different machines using both Excel 2007 and Excel 2010.) I had to hop back into Design Mode (at which point the control in upper-left corner of the worksheet disappeared), click the control I drew to select it, and then stretch it to be very large. When I turned off Design Mode, the spurious copy of the control at the upper left of the worksheet was gone and I could use the version I drew just fine. Strange behavior, indeed—and part of the frustration of working with Microsoft's calendar controls.
If you are using Excel 2013 or a later version, there is a very good chance that the Date Picker control won't be on your system. (It isn't with all later versions of Excel, but if you have some of the higher-priced versions that include Access, it may be there.) If it is not on your system, you can try installing the correct control, but the process is not for the timid or faint of heart. And, besides, Bruce said he wanted something that allowed dates to be "easily selected," a definition which seems at odds with going through the convoluted steps necessary to install the correct control. If you would rather install it, you'll want to read the following web page carefully, even though it is quite old:
http://stackoverflow.com/questions/15816014/how-to-install-mscomct2-ocx-file-from-cab-file-excel-user-form-and-vba
Note that because the page is quote old, the link in the initial post to where you can download the control is no longer valid (you'll get a 404 error if you click on it). You can, however, simply do a web search for "mscomct2.ocx" and find places you can download it.
In addition, Ron de Bruin provides some good advice on installing and using date pickers in various versions of Excel, including this latest version:
http://www.rondebruin.nl/win/s8/win003.htm
ExcelTips is your source for cost-effective Microsoft Excel training. This tip (13254) applies to Microsoft Excel 2007, 2010, 2013, 2016, 2019, and Excel in Microsoft 365.

Comprehensive VBA Guide Visual Basic for Applications (VBA) is the language used for writing macros in all Office programs. This complete guide shows both professionals and novices how to master VBA in order to customize the entire Office suite for their needs. Check out Mastering VBA for Office 2010 today!
Want to get rid of all the zero values in a range of cells? This tip provides a couple of different ways you can ...
Discover MoreWhen creating a workbook to be used by others, you may want any worksheets they add to the workbook to contain some ...
Discover MoreMacros can make your use of Excel much more powerful. If you have a macro that is triggered by an on-screen button, you ...
Discover MoreFREE SERVICE: Get tips like this every week in ExcelTips, a free productivity newsletter. Enter your address and click "Subscribe."
There are currently no comments for this tip. (Be the first to leave your comment—just use the simple form above!)
Got a version of Excel that uses the ribbon interface (Excel 2007 or later)? This site is for you! If you use an earlier version of Excel, visit our ExcelTips site focusing on the menu interface.
FREE SERVICE: Get tips like this every week in ExcelTips, a free productivity newsletter. Enter your address and click "Subscribe."
Copyright © 2024 Sharon Parq Associates, Inc.
Comments