Displaying Excel's Developer Tab

Written by Allen Wyatt (last updated December 31, 2022)
This tip applies to Excel 2007, 2010, 2013, 2016, 2019, 2021, and Excel in Microsoft 365


The user interface in Excel uses a "ribbon" type of interface, visible at the top of the screen. The ribbon is made up of different tabs, each of which contains a collection of related tools. The tabs that are visible often depend on what you are doing in Excel at the moment.

One tab that is especially necessary for advanced users is the Developer tab. This tab contains a variety of tools that allow you to "develop" and customize Excel. Of particular importance is the fact that the Developer tab contains tools that allow you to create and access macros.

The Developer tab is not contextual in nature; it should always be visible on the ribbon. If it is not visible, that means you have not configured Excel to display it. (The Developer tab is not visible in a default installation of Excel.) To display the tab if you are using Excel 2010 or a later version of the the program, follow these steps:

  1. Display the File tab of the ribbon.
  2. Click Options. Excel displays the Excel Options dialog box.
  3. Click Customize Ribbon at the left side of the dialog box.
  4. Using the Customize the Ribbon drop-down list (right side of the dialog box, near the top), choose Main Tabs. (See Figure 1.)
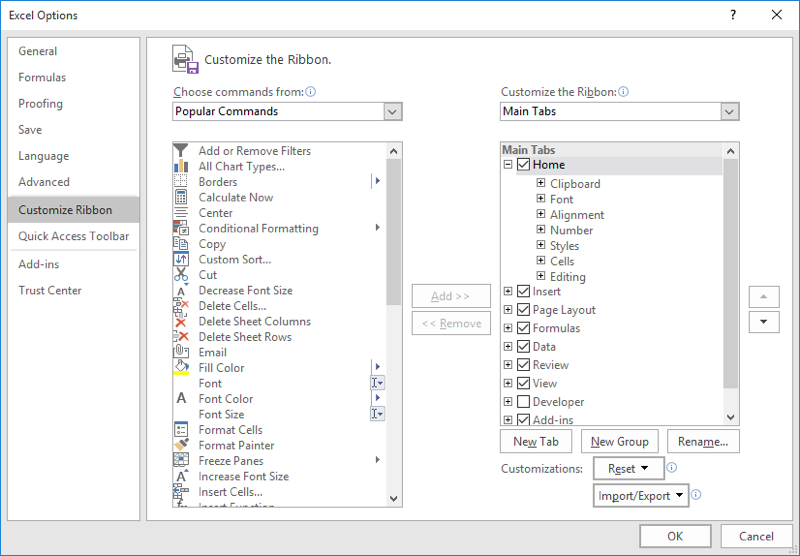
  5. Figure 1. The options for customizing the ribbon.

  6. At the right side of the dialog box make sure a check mark appears in the checkbox to the left of the Developer option.
  7. Click OK.

If you are still using Excel 2007, the steps are different:

  1. Click the Office button and then click Excel Options. Excel displays the Excel Options dialog box.
  2. Make sure that Popular is selected at the left side of the dialog box. (See Figure 2.)
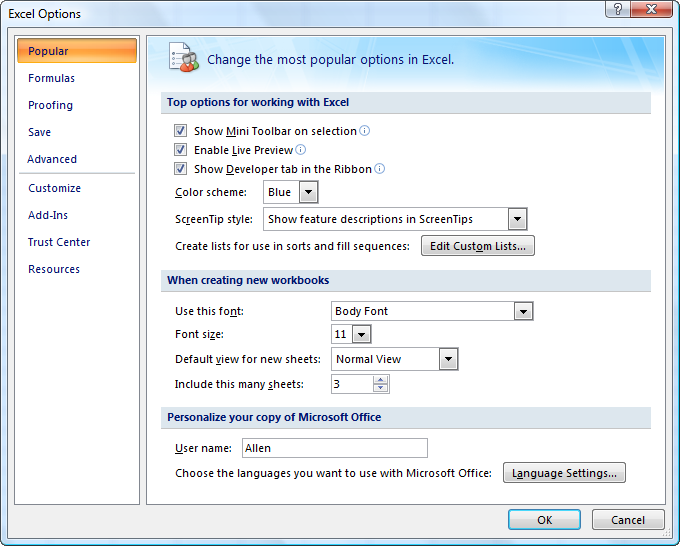
  3. Figure 2. The Popular options of the Excel Options dialog box.

  4. Ensure the Show Developer Tab in Ribbon check box is selected.
  5. Click OK.

The Developer tab should now be visible on the ribbon.

Note:

If you would like to know how to use the macros described on this page (or on any other page on the ExcelTips sites), I've prepared a special page that includes helpful information. Click here to open that special page in a new browser tab.

ExcelTips is your source for cost-effective Microsoft Excel training. This tip (6747) applies to Microsoft Excel 2007, 2010, 2013, 2016, 2019, 2021, and Excel in Microsoft 365.

Author Bio

Allen Wyatt

With more than 50 non-fiction books and numerous magazine articles to his credit, Allen Wyatt is an internationally recognized author. He is president of Sharon Parq Associates, a computer and publishing services company. ...

MORE FROM ALLEN

Determining the Current Directory

When creating macros, it is often necessary to know which directory is the default. Here's how you can find out by using ...

Discover More

Printing a Bookmark List

Need to know what bookmarks are defined in a document? Here's a macro that creates a list of all your bookmarks so that ...

Discover More

Turning Off the 'Welcome Back' Notice

When you open a document that you previously edited, Word displays a message the right side of the screen about jumping ...

Discover More

Best-Selling VBA Tutorial for Beginners Take your Excel knowledge to the next level. With a little background in VBA programming, you can go well beyond basic spreadsheets and functions. Use macros to reduce errors, save time, and integrate with other Microsoft applications. Fully updated for the latest version of Office 365. Check out Microsoft 365 Excel VBA Programming For Dummies today!

More ExcelTips (ribbon)

Adjusting Status Bar Font Size

Excel can helpfully display some statistical information in the program's Status Bar. If you cannot see all the ...

Discover More

Setting the AutoRecover Directory

Excel, by default, periodically writes information to AutoRecover files that can help protect your data in case Excel is ...

Discover More

Changing Error Checking Rules

Excel can check the data and formulas in your worksheet to see if it detects any errors. The rules used for this checking ...

Discover More
Subscribe

FREE SERVICE: Get tips like this every week in ExcelTips, a free productivity newsletter. Enter your address and click "Subscribe."

View most recent newsletter.

Comments

If you would like to add an image to your comment (not an avatar, but an image to help in making the point of your comment), include the characters [{fig}] (all 7 characters, in the sequence shown) in your comment text. You’ll be prompted to upload your image when you submit the comment. Maximum image size is 6Mpixels. Images larger than 600px wide or 1000px tall will be reduced. Up to three images may be included in a comment. All images are subject to review. Commenting privileges may be curtailed if inappropriate images are posted.

What is one more than 6?

There are currently no comments for this tip. (Be the first to leave your comment—just use the simple form above!)


This Site

Got a version of Excel that uses the ribbon interface (Excel 2007 or later)? This site is for you! If you use an earlier version of Excel, visit our ExcelTips site focusing on the menu interface.

Newest Tips
Subscribe

FREE SERVICE: Get tips like this every week in ExcelTips, a free productivity newsletter. Enter your address and click "Subscribe."

(Your e-mail address is not shared with anyone, ever.)

View the most recent newsletter.