Please Note: This article is written for users of the following Microsoft Excel versions: 2007, 2010, 2013, 2016, 2019, and 2021. If you are using an earlier version (Excel 2003 or earlier), this tip may not work for you. For a version of this tip written specifically for earlier versions of Excel, click here: Changing How Arrows Look.
Written by Allen Wyatt (last updated December 23, 2024)
This tip applies to Excel 2007, 2010, 2013, 2016, 2019, and 2021
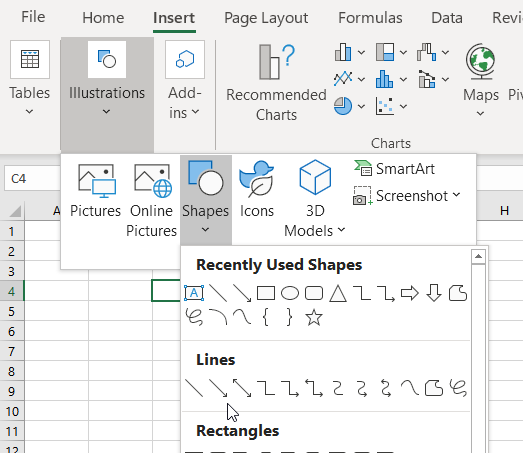
The Insert tab of the ribbon (click Shapes in the Illustrations group) allows you to place arrows within your workbook. (See Figure 1.)

Figure 1. The Shapes tool on the Insert tab of the ribbon.
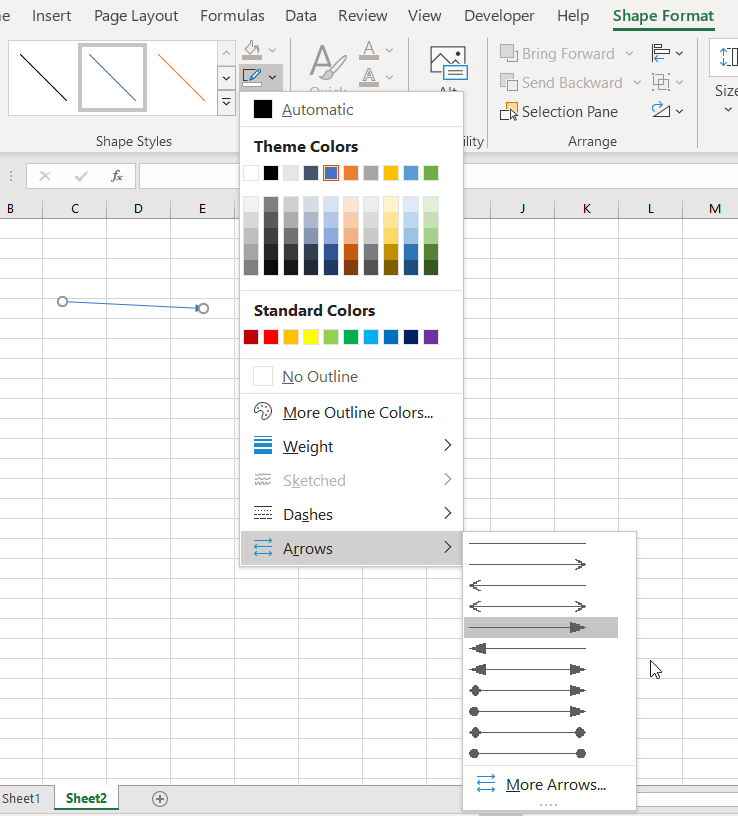
Once an arrow is placed where you want it, you can easily change the way the arrow looks by following these steps:

Figure 2. The Arrows option within the Shape Outline tool.
ExcelTips is your source for cost-effective Microsoft Excel training. This tip (9456) applies to Microsoft Excel 2007, 2010, 2013, 2016, 2019, and 2021. You can find a version of this tip for the older menu interface of Excel here: Changing How Arrows Look.

Program Successfully in Excel! This guide will provide you with all the information you need to automate any task in Excel and save time and effort. Learn how to extend Excel's functionality with VBA to create solutions not possible with the standard features. Includes latest information for Excel 2024 and Microsoft 365. Check out Mastering Excel VBA Programming today!
When you add multiple graphic objects in a worksheet, it can often be beneficial to group those objects together. Here's ...
Discover MoreGot some images that you want to appear in a worksheet based on the result displayed in a cell? Figuring out how to ...
Discover MoreThe WordArt program has been available in Office for a long, long time. It allows you to (as the name implies) create art ...
Discover MoreFREE SERVICE: Get tips like this every week in ExcelTips, a free productivity newsletter. Enter your address and click "Subscribe."
There are currently no comments for this tip. (Be the first to leave your comment—just use the simple form above!)
Got a version of Excel that uses the ribbon interface (Excel 2007 or later)? This site is for you! If you use an earlier version of Excel, visit our ExcelTips site focusing on the menu interface.
FREE SERVICE: Get tips like this every week in ExcelTips, a free productivity newsletter. Enter your address and click "Subscribe."
Copyright © 2026 Sharon Parq Associates, Inc.
Comments