Please Note: This article is written for users of the following Microsoft Excel versions: 2007, 2010, 2013, 2016, 2019, and 2021. If you are using an earlier version (Excel 2003 or earlier), this tip may not work for you. For a version of this tip written specifically for earlier versions of Excel, click here: Using Excel for Timing.
You may want to use Excel to record the elapsed time for different events. There are two ways that this can be approached: either native, within Excel, or with a macro.
If you don't want to use a macro, you can easily set up three columns for your timing. The first column can be used to record the start time, the second column the end time, and then the third column the elapsed time (calculated by using a formula that subtracts the start time from the end time). In order to record times, you select a cell in either the start time or end time columns and press Ctrl+Shift+: (the colon). Excel enters the current time in that cell.
If you want to use a macro that simply returns the elapsed time, then you can use the following:
Public Sub TimeIt()
    Dim vStartTime As Date

    vStartTime = Time
    MsgBox Prompt:="Press the button to end the timing" & vbCrLf _
      & "Timing started at " & Format(vStartTime, "hh:mm:ss"), _
      Buttons:=vbOKOnly, _
      Title:="Time Recording Macro"
    ActiveCell.Value = Time - vStartTime
End Sub
This macro records a start time (in vStartTime), and then displays a message box. When you click on the message box button, the difference between the current time and the start time is stored in the current cell. (You need to make sure the current cell is formatted with one of the time formats.)
The above macro works very well for recording short events during which you don't need to use Excel for other tasks. If you need to record longer events, then a different approach is in order. The following macros work in tandem. The first one records a start time; that is all it does. The second one uses that recorded time to calculate an elapsed time which is placed in the currently selected cell.
Global vStTime

Sub StartTiming()
    vStTime = Time
End Sub

Sub EndTiming()
    ActiveCell.Value = Time - vStTime
End Sub
You could easily assign these two macros to the Quick Access Toolbar or to different toolbar buttons that would, respectively, start and stop the timing process.
Note:
ExcelTips is your source for cost-effective Microsoft Excel training. This tip (11193) applies to Microsoft Excel 2007, 2010, 2013, 2016, 2019, and 2021. You can find a version of this tip for the older menu interface of Excel here: Using Excel for Timing.

Excel Smarts for Beginners! Featuring the friendly and trusted For Dummies style, this popular guide shows beginners how to get up and running with Excel while also helping more experienced users get comfortable with the newest features. Check out Excel 2019 For Dummies today!
Need to know if a cell contains a time value? Excel doesn't contain an intrinsic worksheet function to answer the ...
Discover MoreYou know what time it is, right? (Quick; look at your watch!) What if you want to know what time it is in Greenwich, ...
Discover MoreWhen using Excel to calculate elapsed time, there can be all sorts of criteria that affect the formulas you would ...
Discover MoreFREE SERVICE: Get tips like this every week in ExcelTips, a free productivity newsletter. Enter your address and click "Subscribe."
2026-04-16 08:35:21
jamies
Time to milliseconds ?
But modern systems tend to be sub millisecond so needing to be shown in nanoseconds -
Also it could be that most of the time recorded is that of displaying the start message -
getting the data byte value formatted, and inserted into the data of the sheet, with the image from the Excel App handled by the OS and for the viewer to actually get to interpret the visual display's representation
And - re the display format - maybe Custom
[ss].000
2021-11-09 11:00:32
Tomek Dluzniewski
@J. Woolley,
I apologize for my misspelling of your name many times.
2021-11-09 10:07:21
J. Woolley
@Kiwerry
Thank you for spelling my name correctly (and the Red Baron's).
2021-11-09 07:27:49
Kiwerry
Just a test of indentation in the tips.net system (See comment by Tomek)
Public Sub testindentation_in_tips()
Dim Cel As Range, NewRange As Range
For Each Cel In Selection
If IsNumeric(Cel) Then
If NewRange Is Nothing Then
Set NewRange = Cel
Else
Set NewRange = Union(Cel, NewRange)
End If
End If
Next
NewRange.Select
End Sub
2021-11-08 12:57:24
Further to my previous comment:
each of the   characters is actually posted as a nonbreakable space. You can test this by copying that section into Word and displaying non-printing characters. Luckily, when pasting into VBA code, the hard spaces are lost, converted to regular ones, so the code will still work. so what's bad for posting comments is good for getting the tip's code into your VBA.
Cheers!
2021-11-08 12:45:15
@Kiwerry,
I had varying success using hard spaces (unbreakable spaces) for this. This probably has to do with the fact that generally they are not clearly distinguishable from regular spaces, except in Word, when you display non-printing characters. Sometimes they are lost in copy and paste operation. The problem is, you cannot put hard spaces directly in VBA code as this breaks the code. So you need to copy the code to another program, preferably Notepad, do replacement as J. Wooley suggested, then copy the code again and paste it into the comments box on Tips website. Ufff...
Additional problem is that if you do this using Word, where you can see the hard spaces, copying from there and pasting it into the comment box (or Notepad) seems to convert the non-breakabke spaces back to regular ones. So, once posted all indentations are lost, but you cannot see which spaces you posted. Ughh...
I found a different solution, albeit a rather ugly one: Using HTML code for the non-breakable space. It is an ampersand followed by "nbsp;". I cannot write it here exactly as it would be transposed into an non-breakable space, but not if I put a zerospace after the ampersand ( )
If you use this approach, you can do the replacement of four paces by four   in Word. After that, the code will become very ugly, see (see Figure 1 below) , but the HTML non-breakable space will not be lost in copy/paste operation as Word treats it as just text. Upon posting the comment, the four   indentations will be resolved to white space.
I'll try it on a sample code posted below, hopefully it will look good after posting.
@Kiwerry: if you like to discuss this further, we probably should not do it inside this Tip. Send me an e-mail, my address is unhidden.
----------------
Public Sub testcode()
Dim Cel As Range, NewRange As Range
For Each Cel In Selection
If IsNumeric(Cel) Then
If NewRange Is Nothing Then
Set NewRange = Cel
Else
Set NewRange = Union(Cel, NewRange)
End If
End If
Next
NewRange.Select
End Sub
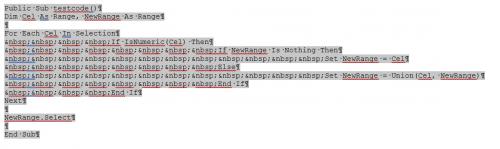
Figure 1. a code after adding HTML nbsps
2021-11-08 12:38:27
Kiwerry
@ J. Woolley: Thanks very much for your tips.
I have been doing timing with and without VBA - your first hint will help with the former.
The second tip will also be useful, thank you. I should have thought of trying the non-breaking space; I have been using it in Word and Excel for quite a while, particularly with surnames which have a prefix, like von Richthofen.
2021-11-07 09:45:23
J. Woolley
@Kiwerry
My Excel Toolbox includes the function VBAResult(Expression), where the text argument is a VBA expression (right side of equal sign). For example, this cell formula will return the number of seconds since midnight:
=VBAResult("Timer")
For Windows, the VBA function Timer returns fractional portions of a second. For Macintosh, Timer resolution is one second.
The VBA function Time returns the current system time as a Date serial number, so this cell formula returns the current hh:mm:ss when formatted appropriately:
=VBAResult("Time")
See https://sites.google.com/view/MyExcelToolbox/
Re. indenting, see David Bonin's 2021-01-18 comment here:
https://excelribbon.tips.net/T011598_Limiting_Who_Can_Delete_Data.html
I use Ctrl+H in Notepad to replace leading space chars with Alt+0160 non-breaking space chars. You can also use Ctrl+Shift+Space in Word for a non-breaking space char, which is visible when toggled with Ctrl+Shift+*.
2021-11-06 13:29:38
Kiwerry
P.S. I have seen comments with indented text - how is this done?
My attempt at indentation in the comment below failed.
2021-11-06 13:26:42
Kiwerry
Thanks, Allen.
The problem with using the hotkey Ctrl-Shift-: (the colon) to get Excel to enter the current time in a cell is that, in my experience, the time is truncated to the minute. If you are after seconds or decimals of a second you have a problem if you want to stick to a solution that doesn't require VBA.
One solution which occurred to me is to format the relevant cells as you would like them, e.g. hh:mm:ss.00. Then for each target cell
1) Enter the formula =NOW() into your target cell and press Enter; you should see
the time of entry with a resolution of 1/100 of a second.
2) Press F9 at the instant you would have hit Ctrl-Shift-:
this will update the time in the target cell
3) Immediately copy this cell and use Paste Special to paste the value back into it.
This method is very clunky and unsuitable for measuring a short time interval because of the time involved in replacing the formula in the target cell with its value and then entering the formula in the next target cell. The latter can be shortened if you are able to use your clipboard's history, or by filling a helper column with the =NOW() formula, and copying a nearby helper cell into the target cell and pressing Ctrl-V at the required instant before replacing the formula with its value.
If anyone knows a way of changing the "truncation" behaviour of the hotkey Ctrl-Shift-:
or can suggest a less unsatisfactory way of entering the current time into a cell at a particular instant than the one I described I would be very pleased to hear it.
Got a version of Excel that uses the ribbon interface (Excel 2007 or later)? This site is for you! If you use an earlier version of Excel, visit our ExcelTips site focusing on the menu interface.
FREE SERVICE: Get tips like this every week in ExcelTips, a free productivity newsletter. Enter your address and click "Subscribe."
Copyright © 2026 Sharon Parq Associates, Inc.
 Please Note:
This article is written for users of the following Microsoft Excel versions: 2007, 2010, 2013, 2016, 2019, and 2021. If you are using an earlier version (Excel 2003 or earlier), this tip may not work for you. For a version of this tip written specifically for earlier versions of Excel, click here:
Please Note:
This article is written for users of the following Microsoft Excel versions: 2007, 2010, 2013, 2016, 2019, and 2021. If you are using an earlier version (Excel 2003 or earlier), this tip may not work for you. For a version of this tip written specifically for earlier versions of Excel, click here:
Comments