Steven needs to ensure that nobody enters information into a worksheet between 4:00 pm and 6:30 pm each day. He wonders if it is possible to use Data Validation to prevent a user from entering information in a worksheet during a particular time each day.
There are two general ways you can go about this. One approach is to use Data Validation to check the time and either allow or disallow data entry.
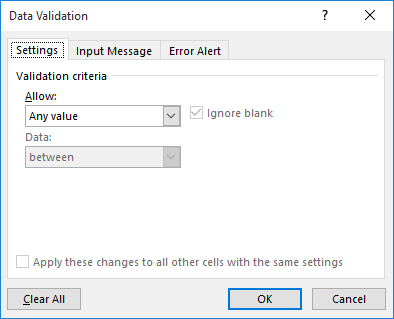
Figure 1. The Data Validation dialog box.
=OR(24*MOD(NOW(),1)<16,24*MOD(NOW(),1)>18.5)
The problem with this approach is in the very first step: You need to select all the cells in the worksheet in order to prevent data being entered in any of them. Plus, if you already are using Data Validation in any of the cells, this approach will overwrite those settings.
For these reasons, it may be better to use a macro-based approach. All such approaches can utilize event handlers to check for any changes. The following relies on the Worksheet_Change event, which means it is triggered only when Excel detects a change in the worksheet.
Private Sub Worksheet_Change(ByVal Target As Range)
    Dim sMsg As String

    sMsg = "No entries allowed between 4:00 pm and 6:30 pm!"
    If Time >= "4:00:00 PM" And Time <= "6:30:00 PM" Then
        MsgBox sMsg, vbCritical
        With Application
            .EnableEvents = False
            .Undo   ' This undoes the change the person made
            .EnableEvents = True
        End With
    End If
End Sub
Essentially, every time there is a change in the worksheet, the handler checks to see if it is between 4:00 pm and 6:30 pm. If it is, then a message box is displayed to indicate the error, and then the .Undo method is used to roll back any change that was attempted.
If you prefer, you could take a different approach and protect the worksheet if it is within the banned time:
Private Sub Worksheet_Activate()
     If Time >= "4:00:00 PM" And Time <= "6:30:00 PM" Then
        ActiveSheet.Protect
        MsgBox "Worksheet is protected."
    Else
        ActiveSheet.Unprotect
        MsgBox "You are free to edit now."
    End If
End Sub
The Worksheet_Activate event handler is invoked every time the worksheet is activated (selected). If the worksheet is activated anytime outside of the banned time, then it is unprotected. Of course, the user could still manually unprotect the worksheet even during the banned time, so it is a good idea to use this approach in conjunction with an approach that is triggered every time a change is attempted, as discussed earlier.
ExcelTips is your source for cost-effective Microsoft Excel training. This tip (13503) applies to Microsoft Excel 2007, 2010, 2013, 2016, 2019, 2021, and Excel in Microsoft 365.

Create Custom Apps with VBA! Discover how to extend the capabilities of Office 365 applications with VBA programming. Written in clear terms and understandable language, the book includes systematic tutorials and contains both intermediate and advanced content for experienced VB developers. Designed to be comprehensive, the book addresses not just one Office application, but the entire Office suite. Check out Mastering VBA for Microsoft Office 365 today!
Need to protect a lot of worksheets? Rather than protect the sheets individually, you'll appreciate the macros discussed ...
Discover MoreYou can protect various parts of your worksheets by using the tools built into Excel. One thing you can protect is the ...
Discover MoreWant to stop other people from changing the names of your worksheets? You can provide the desired safeguard by using the ...
Discover MoreFREE SERVICE: Get tips like this every week in ExcelTips, a free productivity newsletter. Enter your address and click "Subscribe."
There are currently no comments for this tip. (Be the first to leave your comment—just use the simple form above!)
Got a version of Excel that uses the ribbon interface (Excel 2007 or later)? This site is for you! If you use an earlier version of Excel, visit our ExcelTips site focusing on the menu interface.
FREE SERVICE: Get tips like this every week in ExcelTips, a free productivity newsletter. Enter your address and click "Subscribe."
Copyright © 2026 Sharon Parq Associates, Inc.
Comments