Please Note: This article is written for users of the following Microsoft Excel versions: 2007, 2010, 2013, 2016, 2019, 2021, and Excel in Microsoft 365. If you are using an earlier version (Excel 2003 or earlier), this tip may not work for you. For a version of this tip written specifically for earlier versions of Excel, click here: Choosing Direction after Enter On a Workbook Basis.
Written by Allen Wyatt (last updated August 27, 2022)
This tip applies to Excel 2007, 2010, 2013, 2016, 2019, 2021, and Excel in Microsoft 365
When you press Enter after typing information into a cell, Excel normally saves your information and then moves to the next cell beneath the one where you pressed Enter. You can modify this behavior, however:
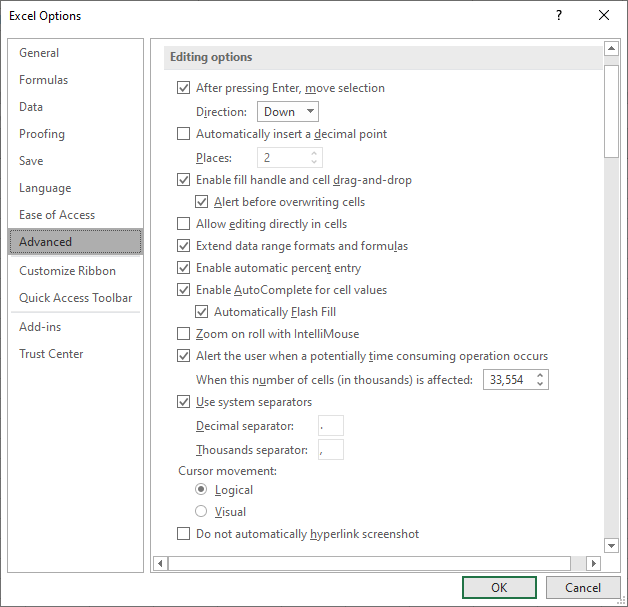
Figure 1. The Advanced options of the Excel Options dialog box.
If you have a need to vary the Enter key behavior on a workbook-by-workbook basis, you might think you are out of luck. You can, however, use a little creative macro code to specify which direction you want to go after Enter, and have that code run whenever a workbook is activated.
For instance, let's say that you had a particular workbook, and you always want to move the selection up after pressing Enter. In this particular workbook, you can add the following code to the thisWorkbook object in the VBA editor:
Private Sub Workbook_WindowActivate(ByVal Wn As Excel.Window)
    bMove = Application.MoveAfterReturn
    lMoveDirection = Application.MoveAfterReturnDirection

    Application.MoveAfterReturn = True
    Application.MoveAfterReturnDirection = xlUp
End Sub

Private Sub Workbook_WindowDeactivate(ByVal Wn As Excel.Window)
    Application.MoveAfterReturn = bMove
    Application.MoveAfterReturnDirection = lMoveDirection
End Sub
There are two separate subroutines here. The first one runs whenever the window for the workbook is activated. In this case, it stores the settings associated with the MoveAfterReturn and MoveAfterReturnDirection properties into variables. (You will learn about these variables shortly.) The macro then sets the MoveAfterReturn property to True and sets the direction to xlUp. If you want to go a different direction by default in this particular workbook, simply use a different Excel constant, such as xlDown, xlToLeft, or xlToRight.
The second subroutine runs whenever the workbook window is deactivated. In this case, the values of the MoveAfterReturn and MoveAfterReturnDirection properties are reset to what they were before the workbook was first activated.
The two variables used in these routines, lMoveDirection and bMove, need to be defined in the declaration portion of any module. This allows the variables to be accessed from both of the above routines.
Public lMoveDirection As Long
Public bMove As Boolean
Note:
ExcelTips is your source for cost-effective Microsoft Excel training. This tip (7220) applies to Microsoft Excel 2007, 2010, 2013, 2016, 2019, 2021, and Excel in Microsoft 365. You can find a version of this tip for the older menu interface of Excel here: Choosing Direction after Enter On a Workbook Basis.

Solve Real Business Problems Master business modeling and analysis techniques with Excel and transform data into bottom-line results. This hands-on, scenario-focused guide shows you how to use the latest Excel tools to integrate data from multiple tables. Check out Microsoft Excel 2013 Data Analysis and Business Modeling today!
Excel can check the data and formulas in your worksheet to see if it detects any errors. The rules used for this checking ...
Discover MoreWant to get a little bit of sound with your data? Excel can provide audible feedback that you may find helpful. Here's how.
Discover MoreExcel allows you to display your workbooks using a couple of different views. If you want to disable one of the views, it ...
Discover MoreFREE SERVICE: Get tips like this every week in ExcelTips, a free productivity newsletter. Enter your address and click "Subscribe."
2022-08-28 04:12:11
KIwerry
Thanks, J. Woolley.
Installing your tool in the personal workbook is a good alternative to Allen's solution, which requires that each affected workbook be saved in xlsm format, which is a less desirable option
2022-08-27 10:36:23
J. Woolley
My Excel Toolbox includes the MoveAfterEnter macro (Ctrl+T M O)to set adjacent cell movement after the Enter key is pressed (see Figure 1 below) .
See https://sites.google.com/view/MyExcelToolbox/
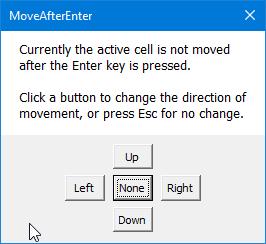
Figure 1.
Got a version of Excel that uses the ribbon interface (Excel 2007 or later)? This site is for you! If you use an earlier version of Excel, visit our ExcelTips site focusing on the menu interface.
FREE SERVICE: Get tips like this every week in ExcelTips, a free productivity newsletter. Enter your address and click "Subscribe."
Copyright © 2025 Sharon Parq Associates, Inc.
 Please Note:
This article is written for users of the following Microsoft Excel versions: 2007, 2010, 2013, 2016, 2019, 2021, and Excel in Microsoft 365. If you are using an earlier version (Excel 2003 or earlier), this tip may not work for you. For a version of this tip written specifically for earlier versions of Excel, click here:
Please Note:
This article is written for users of the following Microsoft Excel versions: 2007, 2010, 2013, 2016, 2019, 2021, and Excel in Microsoft 365. If you are using an earlier version (Excel 2003 or earlier), this tip may not work for you. For a version of this tip written specifically for earlier versions of Excel, click here:
Comments