Please Note: This article is written for users of the following Microsoft Excel versions: 2007, 2010, 2013, and 2016. If you are using an earlier version (Excel 2003 or earlier), this tip may not work for you. For a version of this tip written specifically for earlier versions of Excel, click here: Resolving Revisions.
Written by Allen Wyatt (last updated July 20, 2022)
This tip applies to Excel 2007, 2010, 2013, and 2016
Excel allows you to easily track revisions made to your workbooks. At some time you will want to resolve your changes to get rid of the revision marks. This is typically done as you are finalizing a workbook, after you are sure that the changes are something you really want to keep. Excel allows you to automate much of the resolution process.
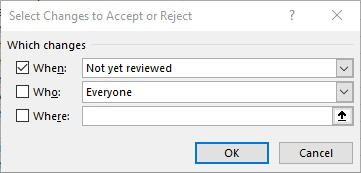
Figure 1. The Select Changes to Accept or Reject dialog box.
You will notice that when you are finished reviewing changes, Excel still shows edited cells with the tracking changes indicator (the blue triangle in the upper-left corner). The only way to get rid of these (after you have reviewed all the changes) is to turn off the revision marking.
ExcelTips is your source for cost-effective Microsoft Excel training. This tip (8152) applies to Microsoft Excel 2007, 2010, 2013, and 2016. You can find a version of this tip for the older menu interface of Excel here: Resolving Revisions.

Solve Real Business Problems Master business modeling and analysis techniques with Excel and transform data into bottom-line results. This hands-on, scenario-focused guide shows you how to use the latest Excel tools to integrate data from multiple tables. Check out Microsoft Excel Data Analysis and Business Modeling today!
Want to know what is happening in certain cells in your worksheet? Using the Watch Window is a great way to keep an eye ...
Discover MoreOnce you've created your custom add-in, you need to know how you or other people can use it. Here are the simple steps to ...
Discover MoreThe Analysis ToolPak is used to add some very handy capabilities to Excel. If you don't have it installed, and you can't ...
Discover MoreFREE SERVICE: Get tips like this every week in ExcelTips, a free productivity newsletter. Enter your address and click "Subscribe."
2026-02-07 22:46:40
Tomek
@J. Woolley:
clever improvement on this tip, it de-clutters the main sheet, but also the cut and paste automatically updates the graph data range. I was trying to find a better place for the mirror data on the same sheet, but it almost always was affected with the column insertion. Your suggestion is better.
2026-02-07 11:12:41
J. Woolley
The Tip's solution is very clever. If the INDIRECT formula in cell H1 includes the source sheet like this
=INDIRECT("Sheet1!B1:F32")
and the chart's data range is
=Sheet1!$H$1:$L$32
then you might cut the range H1:L32 from Sheet1 and paste it into another sheet which you could then hide; the chart will automatically adjust its data range and the solution becomes transparent to the user.
I believe the Tip's solution requires Excel 2021's dynamic array support; otherwise, the INDIRECT formula must be entered as a CSE array:
1. Select H1:L32
2. Type the formula
3. Press Ctrl+Shift+Enter
Got a version of Excel that uses the ribbon interface (Excel 2007 or later)? This site is for you! If you use an earlier version of Excel, visit our ExcelTips site focusing on the menu interface.
FREE SERVICE: Get tips like this every week in ExcelTips, a free productivity newsletter. Enter your address and click "Subscribe."
Copyright © 2026 Sharon Parq Associates, Inc.
 Please Note:
This article is written for users of the following Microsoft Excel versions: 2007, 2010, 2013, and 2016. If you are using an earlier version (Excel 2003 or earlier), this tip may not work for you. For a version of this tip written specifically for earlier versions of Excel, click here:
Please Note:
This article is written for users of the following Microsoft Excel versions: 2007, 2010, 2013, and 2016. If you are using an earlier version (Excel 2003 or earlier), this tip may not work for you. For a version of this tip written specifically for earlier versions of Excel, click here:
Comments