Please Note: This article is written for users of the following Microsoft Excel versions: 2007, 2010, 2013, 2016, 2019, 2021, 2024, and Excel in Microsoft 365. If you are using an earlier version (Excel 2003 or earlier), this tip may not work for you. For a version of this tip written specifically for earlier versions of Excel, click here: Moving Part of a Footer Down a Line.
Written by Allen Wyatt (last updated December 20, 2025)
This tip applies to Excel 2007, 2010, 2013, 2016, 2019, 2021, 2024, and Excel in Microsoft 365
Let's say that you have a custom footer that you want at the bottom of all the pages in your worksheet. Left-justified in the footer, you want the full path name for the worksheet, and centered you want a page indicator in the format of Page X of Y.
Because the full path name can be rather long, it is possible that the path will "overprint" the page indicator. This, obviously, is not something you want to do. A better solution would be to push the page indicator down a line, so that it prints on its own line. Toward that end, you try the following:
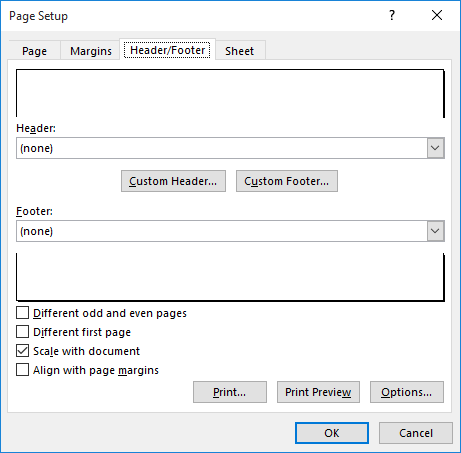
Figure 1. The Header/Footer tab of the Page Setup dialog box.
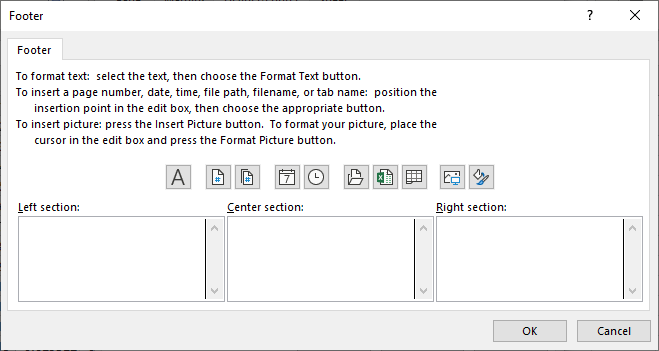
Figure 2. The Footer dialog box.
When you print your worksheet, you think that the Shift+Enter keystroke (step 6) should move the center section of the footer down by a line. Unfortunately, it does not—Excel ignores the keystroke and places the center section of the footer on the first line, where it is overprinted by the left section of the footer. Drats!
The solution to the problem—without using a macro—is to follow these steps:
     &[Path]&[File]
     &CPage &[Page] of &[Pages]
Notice the inclusion of the &C code at the beginning of the second line in step 6. This tells Excel that everything after it should be centered. The cool thing about doing the footer this way is that Excel, if necessary, will move down a line in order to print the centered information. If it can print the left portion of the footer on the same line as the center portion (the part after &C), then it will do so.
It is interesting to note that in my testing, simply putting a carriage return (Shift+Enter) at the end of whatever is in the Left Section area, and then entering information in the Center Section area still produced an overprint. The only way that this technique worked is if I used the &C code to center the page indicator.
ExcelTips is your source for cost-effective Microsoft Excel training. This tip (9778) applies to Microsoft Excel 2007, 2010, 2013, 2016, 2019, 2021, 2024, and Excel in Microsoft 365. You can find a version of this tip for the older menu interface of Excel here: Moving Part of a Footer Down a Line.

Professional Development Guidance! Four world-class developers offer start-to-finish guidance for building powerful, robust, and secure applications with Excel. The authors show how to consistently make the right design decisions and make the most of Excel's powerful features. Check out Professional Excel Development today!
Excel makes it easy to add graphics to a header or footer. Here's the steps to make it happen.
Discover MoreEver wish that you could create nice, long footers that appear at the bottom of each page when you print your worksheet? ...
Discover MoreDo you want to change the headers and footers that appear on different pages of your printout? Here's how you can get ...
Discover MoreFREE SERVICE: Get tips like this every week in ExcelTips, a free productivity newsletter. Enter your address and click "Subscribe."
2025-12-22 04:24:53
Mike J
Putting a normal Return at the end of the left footer also drops the centre footer down one line - in fact that seems to be what excel does when you use the method in this tip (you can see that if you re-edit the footer).
It also puts the Right footer on the second line but strangely, putting an ordinary Return at the end of the right footer pushes it back up to line1.
Very odd?
Got a version of Excel that uses the ribbon interface (Excel 2007 or later)? This site is for you! If you use an earlier version of Excel, visit our ExcelTips site focusing on the menu interface.
FREE SERVICE: Get tips like this every week in ExcelTips, a free productivity newsletter. Enter your address and click "Subscribe."
Copyright © 2026 Sharon Parq Associates, Inc.
 Please Note:
This article is written for users of the following Microsoft Excel versions: 2007, 2010, 2013, 2016, 2019, 2021, 2024, and Excel in Microsoft 365. If you are using an earlier version (Excel 2003 or earlier), this tip may not work for you. For a version of this tip written specifically for earlier versions of Excel, click here:
Please Note:
This article is written for users of the following Microsoft Excel versions: 2007, 2010, 2013, 2016, 2019, 2021, 2024, and Excel in Microsoft 365. If you are using an earlier version (Excel 2003 or earlier), this tip may not work for you. For a version of this tip written specifically for earlier versions of Excel, click here:
Comments