Please Note: This article is written for users of the following Microsoft Excel versions: 2007, 2010, 2013, 2016, 2019, 2021, 2024, and Excel in Microsoft 365. If you are using an earlier version (Excel 2003 or earlier), this tip may not work for you. For a version of this tip written specifically for earlier versions of Excel, click here: Zooming In On Your Worksheet.
When you are working with your data, you may want to enlarge what you see on the screen without actually changing the font size used by Excel. For instance, you may have formatted your text so that it uses a small font. (This is often necessary to get all your information on a printout.) When working in the worksheet, however, the font is difficult to read because it is so small.
The solution to this problem is to use the zooming capabilities of Excel to enlarge just what is displayed on the screen. Excel provides two primary methods to zoom in on your data. First, you can use the Zoom control at the bottom-right of the Excel window, at the very right-hand side of the status bar. Just drag the control to the left or to the right and Excel adjusts the size of what you see on the screen.
You can also see a selection of different zooming options by displaying the Zoom dialog box. There are two ways you can display the dialog box:
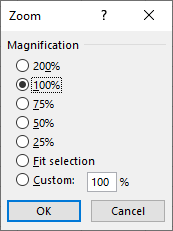
Figure 1. The Zoom dialog box.
Note that the Zoom dialog box includes six predefined zoom settings, plus a way you can specify any magnification level you want, between 10% and 400%. When you are done with your selection, just click on OK.
It is helpful to note that the Zoom group, on the View tab of the ribbon, includes two tools in addition to the Zoom tool. These two zooming tools will be very helpful to many people because they allow you to zoom in on whatever cells you have selected on the screen (Zoom to Selection tool) and to return to a normal display (100% tool).
ExcelTips is your source for cost-effective Microsoft Excel training. This tip (9093) applies to Microsoft Excel 2007, 2010, 2013, 2016, 2019, 2021, 2024, and Excel in Microsoft 365. You can find a version of this tip for the older menu interface of Excel here: Zooming In On Your Worksheet.

Dive Deep into Macros! Make Excel do things you thought were impossible, discover techniques you won't find anywhere else, and create powerful automated reports. Bill Jelen and Tracy Syrstad help you instantly visualize information to make it actionable. You�ll find step-by-step instructions, real-world case studies, and 50 workbooks packed with examples and solutions. Check out Microsoft Excel 2019 VBA and Macros today!
Tired of shared workbooks opening at some strange zoom factor that makes viewing your data difficult? Here's how to make ...
Discover MoreIf you are using a mouse that has a center wheel, you can use the wheel to zoom in and out of your work. This tip shows ...
Discover MoreExcel doesn't provide a keyboard shortcut that allows you to zoom in or out on your workbook. It is easy, however, to ...
Discover MoreFREE SERVICE: Get tips like this every week in ExcelTips, a free productivity newsletter. Enter your address and click "Subscribe."
There are currently no comments for this tip. (Be the first to leave your comment—just use the simple form above!)
Got a version of Excel that uses the ribbon interface (Excel 2007 or later)? This site is for you! If you use an earlier version of Excel, visit our ExcelTips site focusing on the menu interface.
FREE SERVICE: Get tips like this every week in ExcelTips, a free productivity newsletter. Enter your address and click "Subscribe."
Copyright © 2026 Sharon Parq Associates, Inc.
 Please Note:
This article is written for users of the following Microsoft Excel versions: 2007, 2010, 2013, 2016, 2019, 2021, 2024, and Excel in Microsoft 365. If you are using an earlier version (Excel 2003 or earlier), this tip may not work for you. For a version of this tip written specifically for earlier versions of Excel, click here:
Please Note:
This article is written for users of the following Microsoft Excel versions: 2007, 2010, 2013, 2016, 2019, 2021, 2024, and Excel in Microsoft 365. If you are using an earlier version (Excel 2003 or earlier), this tip may not work for you. For a version of this tip written specifically for earlier versions of Excel, click here:
Comments