Please Note: This article is written for users of the following Microsoft Excel versions: 2007, 2010, 2013, 2016, 2019, and 2021. If you are using an earlier version (Excel 2003 or earlier), this tip may not work for you. For a version of this tip written specifically for earlier versions of Excel, click here: Deleting Blank Columns.
When importing information from an external source, it is possible that the data will contain blank columns—columns with nothing in them. If you import a lot of data, then deleting these columns can be a bother. There are a couple of ways you can approach how to delete these columns.
The first approach works very well if your data is sorted by column. In other words, the data that you import is in ascending order, or you want it in sorted order. In this case, follow these steps:
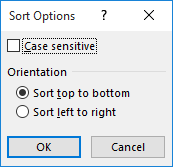
Figure 1. The Sort Options dialog box.
When sorting in this manner, all the empty columns end up "pushed" to the right, and your data is in a sorted order.
If you don't want your data sorted, then you can use a nifty macro that will check for blank columns in a selected range and then delete those columns. The following macro will do the trick:
Sub DeleteEmptyColumns()
    first = Selection.Column
    last = Selection.Columns(Selection.Columns.Count).Column
    For i = last To first Step -1
        If WorksheetFunction.CountBlank(ActiveSheet.Columns(i)) _
          = ActiveSheet.Rows.Count Then
            Columns(i).Delete
        End If
    Next i
End Sub
To use the macro, select the range of columns in which you want blank columns deleted. The macro steps through the columns and if the column is truly blank, it is deleted. You should note that this macro will delete only columns that are truly empty. If cells within a column include a formula that returns a zero value (and you have the display of zeros values turned off) or that returns an empty string, then the column isn't empty—it contains formulas. In this case, the column won't be deleted.
Note:
ExcelTips is your source for cost-effective Microsoft Excel training. This tip (6149) applies to Microsoft Excel 2007, 2010, 2013, 2016, 2019, and 2021. You can find a version of this tip for the older menu interface of Excel here: Deleting Blank Columns.

Professional Development Guidance! Four world-class developers offer start-to-finish guidance for building powerful, robust, and secure applications with Excel. The authors show how to consistently make the right design decisions and make the most of Excel's powerful features. Check out Professional Excel Development today!
You can freeze information in rows or columns using one of the built-in features of Excel. As you move up or down in the ...
Discover MoreWant an easy way to insert a new row in a worksheet and copy everything from the row above? (You end up with two ...
Discover MoreExcel provides a few ways that you can freeze or split what you see in your worksheet. The appropriateness of these tools ...
Discover MoreFREE SERVICE: Get tips like this every week in ExcelTips, a free productivity newsletter. Enter your address and click "Subscribe."
2021-04-11 04:35:45
JohnT
I often do this, import text into Excel and then want to clean it up by deleting unwanted rows (or columns) .Often the unwanted ones have something specific to identify them (a value in a given cell) or it could the that the wanted ones have that marker.
So to delete unwanted rows, I add a column usually to the left. Sequence the cells (1 in A1, =A1+1 in A2 and copy it all the way down. Make it fixed (Ctl-A to select all, Ctl-C to copy all, then paste special values.
Now we're set up.
Sort the spread sheet by the column with the markers and quickly delete unwanted rows..
Finally resort by column 1 (with the sequences) and then delete column 1
It's actually a lot easier than it sounds.
2021-04-10 08:17:18
Mark
If you do this import often I'd suggest using Power Query (PQ). Not only can you very easily discard the empty columns you can also perform any other data preparation functions you might need.
I'll admit that as of now it's not trivial to set-up PQ for variable file names but there are some good tips in other web-sites on how to make it more flexible.
One such source is: https://www.excelguru.ca/blog/2014/11/26/building-a-parameter-table-for-power-query/
Thanks
Got a version of Excel that uses the ribbon interface (Excel 2007 or later)? This site is for you! If you use an earlier version of Excel, visit our ExcelTips site focusing on the menu interface.
FREE SERVICE: Get tips like this every week in ExcelTips, a free productivity newsletter. Enter your address and click "Subscribe."
Copyright © 2026 Sharon Parq Associates, Inc.
 Please Note:
This article is written for users of the following Microsoft Excel versions: 2007, 2010, 2013, 2016, 2019, and 2021. If you are using an earlier version (Excel 2003 or earlier), this tip may not work for you. For a version of this tip written specifically for earlier versions of Excel, click here:
Please Note:
This article is written for users of the following Microsoft Excel versions: 2007, 2010, 2013, 2016, 2019, and 2021. If you are using an earlier version (Excel 2003 or earlier), this tip may not work for you. For a version of this tip written specifically for earlier versions of Excel, click here:
Comments