Please Note: This article is written for users of the following Microsoft Excel versions: 2007, 2010, 2013, 2016, 2019, 2021, and Excel in Microsoft 365. If you are using an earlier version (Excel 2003 or earlier), this tip may not work for you. For a version of this tip written specifically for earlier versions of Excel, click here: Understanding Views.
A view is a pattern for what information within a worksheet should look like. This pattern can be given a name and saved within Excel. The named view can later be recalled quickly. In some ways a view is similar to a scenario. (Scenarios are discussed in other issues of ExcelTips.) They differ, however, in that a scenario deals with the content (the values) stored in a worksheet, while a view is concerned with how the worksheet appears.
A view can contain information such as which rows and columns are visible, row height, column width, formatting characteristics, and window size and position. You can define and store several views of data in a worksheet. For instance, one view could show the entire worksheet, while another could show a condensed (or summary) view of the information. Still another could be used to show the full worksheet on the screen at one time.
To create a view, follow these steps:
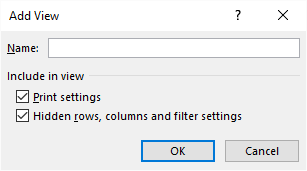
Figure 1. The Add View dialog box.
You can now proceed to adjust the formatting and display of your worksheet so it reflects what you want saved as the next view. Repeat this process to store the new view.
You should know that if your worksheet contains a defined data table (a range of cells specifically designated as a data table), then you won't be able to use custom views. If you try, you'll note that the Custom Views tool (step 3 in the above steps) is grayed out and cannot be selected.
ExcelTips is your source for cost-effective Microsoft Excel training. This tip (7217) applies to Microsoft Excel 2007, 2010, 2013, 2016, 2019, 2021, and Excel in Microsoft 365. You can find a version of this tip for the older menu interface of Excel here: Understanding Views.

Create Custom Apps with VBA! Discover how to extend the capabilities of Office 365 applications with VBA programming. Written in clear terms and understandable language, the book includes systematic tutorials and contains both intermediate and advanced content for experienced VB developers. Designed to be comprehensive, the book addresses not just one Office application, but the entire Office suite. Check out Mastering VBA for Microsoft Office 365 today!
Synchronous scrolling can be a real help when you are working with worksheets that are similar in layout. If your ...
Discover MoreAfter creating different views of your worksheet data, you can display those views by simply selecting which one you want ...
Discover MoreWhen you no longer need a view, you can get rid of it by deleting it. Deleting unnecessary views is a good idea because ...
Discover MoreFREE SERVICE: Get tips like this every week in ExcelTips, a free productivity newsletter. Enter your address and click "Subscribe."
2022-09-25 12:04:34
J. Woolley
My Excel Toolbox includes the following dynamic array function to list the workbook's custom views:
=ListCustomViews()
Three columns are displayed for each custom view: Name, PrintSettings (True/False), and RowColSettings (True/False).
In older versions of Excel that do not support dynamic arrays, you can use ListCustomViews with the SpillArray function described in UseSpillArray.pdf.
See https://sites.google.com/view/MyExcelToolbox/
Got a version of Excel that uses the ribbon interface (Excel 2007 or later)? This site is for you! If you use an earlier version of Excel, visit our ExcelTips site focusing on the menu interface.
FREE SERVICE: Get tips like this every week in ExcelTips, a free productivity newsletter. Enter your address and click "Subscribe."
Copyright © 2026 Sharon Parq Associates, Inc.
 Please Note:
This article is written for users of the following Microsoft Excel versions: 2007, 2010, 2013, 2016, 2019, 2021, and Excel in Microsoft 365. If you are using an earlier version (Excel 2003 or earlier), this tip may not work for you. For a version of this tip written specifically for earlier versions of Excel, click here:
Please Note:
This article is written for users of the following Microsoft Excel versions: 2007, 2010, 2013, 2016, 2019, 2021, and Excel in Microsoft 365. If you are using an earlier version (Excel 2003 or earlier), this tip may not work for you. For a version of this tip written specifically for earlier versions of Excel, click here:
Comments