Written by Allen Wyatt (last updated June 22, 2024)
This tip applies to Excel 2007, 2010, 2013, 2016, 2019, 2021, and Excel in Microsoft 365
Raymond has a small number of Excel workbooks that he works with every month, and these workbooks include macros. It is a real pain for him to enable the macros to run when he opens the workbooks, and sometimes he hits the wrong button and doesn't get the macros enabled. He wonders if there is a way to always open these particular workbooks with enabled macros. He doesn't want all workbooks to be automatically enabled, just these particular workbooks.
The "enable macros?" message you see when you open a macro-enabled workbook is generated by Excel based on the settings you've made in the Trust Center. You can see the Trust Center by displaying the Developer tab of the ribbon and, in the Code group, clicking the Macro Security tool. (See Figure 1.)
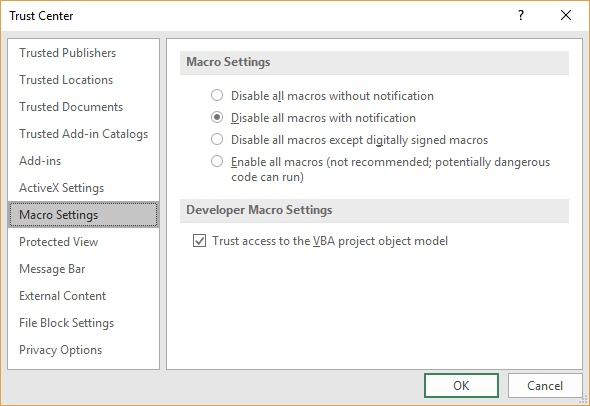
Figure 1. The Trust Center dialog box.
I generally suggest that the second option (Disable All Macros with Notification) be the security level used, and I suspect that this is the same level that Raymond has selected. (Were it not so, Raymond would not see an "enable macros?" notification when opening the workbook.)
It is possible to choose a more permissive security level in the Trust Center, but Raymond specifically said he did not want to do that.
There are two ways around this issue. The first is that you can store your macro-enabled workbook (the one you want to open without the message) in what is called a trusted location. Note that at the left of the Trust Center dialog box there is a Trusted Locations option. Click that, and you can see what locations Excel believes are trusted. (See Figure 2.)
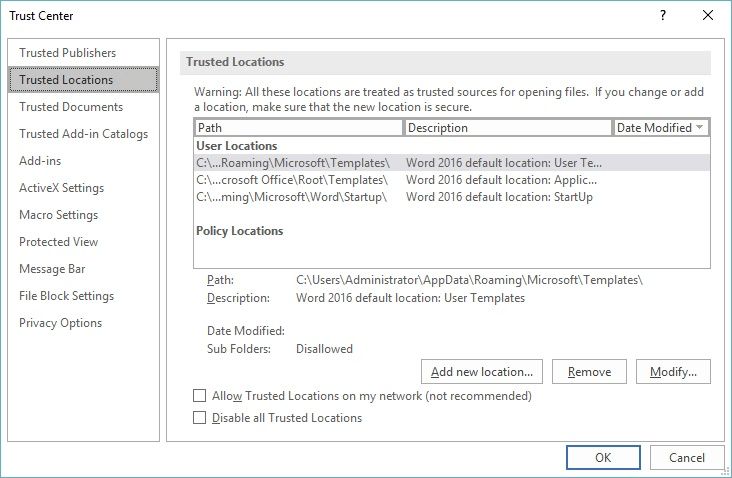
Figure 2. The Trusted Locations portion of the Trust Center.
Check out what folders are currently set up as trusted locations, as you can always store your workbook in one of those. If you'd like, you could always use the controls in the dialog box to add another trusted location and then store your workbook in that folder. Anything stored in a trusted location "bypasses" (so to speak) the Trust Center checks, so you won't see the "enable macros?" notice. You can find more information about making modifications to trusted locations at this website:
https://support.office.com/en-us/article/add-remove-or-change-a-trusted-location-7ee1cdc2-483e-4cbb-bcb3-4e7c67147fb4
Using trusted locations is great on your own system, and will thus probably help out with Raymond's issue. If you are creating macro-enabled workbooks you want to run seamlessly on other people's systems, then you should think strongly about digitally signing your VBA project. This is more involved than simply changing trusted locations, though. You can find more information about digital signatures at this page:
https://support.office.com/en-us/article/Digitally-sign-your-macro-project-956e9cc8-bbf6-4365-8bfa-98505ecd1c01
ExcelTips is your source for cost-effective Microsoft Excel training. This tip (8265) applies to Microsoft Excel 2007, 2010, 2013, 2016, 2019, 2021, and Excel in Microsoft 365.

Best-Selling VBA Tutorial for Beginners Take your Excel knowledge to the next level. With a little background in VBA programming, you can go well beyond basic spreadsheets and functions. Use macros to reduce errors, save time, and integrate with other Microsoft applications. Fully updated for the latest version of Office 365. Check out Microsoft 365 Excel VBA Programming For Dummies today!
Besides the regular way of displaying formulas, Excel can also display them using what is called R1C1 format. If you are ...
Discover MoreMacros are stored as part of a workbook so that they are always available when you have the workbook open. If you want to ...
Discover MoreIf you've got a list of potential words, and you want to know which of those potential words are real, you'll appreciate ...
Discover MoreFREE SERVICE: Get tips like this every week in ExcelTips, a free productivity newsletter. Enter your address and click "Subscribe."
2024-06-22 11:26:05
R. A. Williams
PLEASE STOP THE GOOGLE ADS!!!
In general, the ads you have had on your site have been innocuous, but Google ads are THE WORST! They take more time to try to dismiss, but the space they occupy never goes away! There were at least five of them in this email, mostly duplicates.
I hope your income from these ads compensates for the angry messages you must be getting from your faithful subscribers. Love your tips, hate your Google ads!
Sincerely,
Bob Williams, a long-time subscriber
Got a version of Excel that uses the ribbon interface (Excel 2007 or later)? This site is for you! If you use an earlier version of Excel, visit our ExcelTips site focusing on the menu interface.
FREE SERVICE: Get tips like this every week in ExcelTips, a free productivity newsletter. Enter your address and click "Subscribe."
Copyright © 2026 Sharon Parq Associates, Inc.
Comments