Please Note: This article is written for users of the following Microsoft Excel versions: 2007, 2010, 2013, 2016, 2019, and 2021. If you are using an earlier version (Excel 2003 or earlier), this tip may not work for you. For a version of this tip written specifically for earlier versions of Excel, click here: Editing Macros.
Taking a look at the programming code used in a macro (either ones you have recorded or macros created by others) is a great way to help you understand how the macro is put together and how it works. You can do this examination, and make changes to your macros, by editing them. To edit a macro you first need to display the Macro dialog box. The easiest way to do this is to simply press Alt+F8. (See Figure 1.)
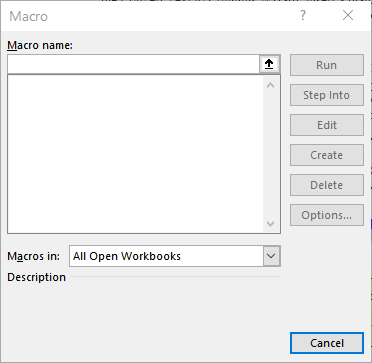
Figure 1. The Macro dialog box.
In the list of available macros you should choose the macro you want to edit. When you have selected one, you can click on the Edit button and the VBA Editor is displayed with the selected macro loaded and ready to edit.
Once your macro is displayed, you can make changes to it as desired. You use many of the same editing functions you use when making changes to a regular worksheet. Unless you fully understand the consequences of your changes, it is typically best to stick to recording simple macros. If you feel adventurous, however, there is nothing wrong with making changes to your macros to see what they will do. If you do so, it is a good idea to keep these tips in mind:
If you keep these tips in mind, there is very little chance that you will hurt anything. In fact, your chances of learning more about Excel and macro programming are much greater than the risk of damaging any data. Give it a try!
When you have finished making changes to your macro, you should close the VBA Editor. Closing the VBA Editor is done in the same manner as when you close any other Windows program—simply click on the Close icon in the upper-right corner of the window.
Note:
ExcelTips is your source for cost-effective Microsoft Excel training. This tip (9753) applies to Microsoft Excel 2007, 2010, 2013, 2016, 2019, and 2021. You can find a version of this tip for the older menu interface of Excel here: Editing Macros.

Best-Selling VBA Tutorial for Beginners Take your Excel knowledge to the next level. With a little background in VBA programming, you can go well beyond basic spreadsheets and functions. Use macros to reduce errors, save time, and integrate with other Microsoft applications. Fully updated for the latest version of Office 365. Check out Microsoft 365 Excel VBA Programming For Dummies today!
When developing a macro, it is often necessary to step through the various code lines so you can see what is happening on ...
Discover MoreMacros are stored as part of a workbook so that they are always available when you have the workbook open. If you want to ...
Discover MoreThe data stored in a worksheet can often correspond to information external to that worksheet. For instance, you might ...
Discover MoreFREE SERVICE: Get tips like this every week in ExcelTips, a free productivity newsletter. Enter your address and click "Subscribe."
There are currently no comments for this tip. (Be the first to leave your comment—just use the simple form above!)
Got a version of Excel that uses the ribbon interface (Excel 2007 or later)? This site is for you! If you use an earlier version of Excel, visit our ExcelTips site focusing on the menu interface.
FREE SERVICE: Get tips like this every week in ExcelTips, a free productivity newsletter. Enter your address and click "Subscribe."
Copyright © 2026 Sharon Parq Associates, Inc.
 Please Note:
This article is written for users of the following Microsoft Excel versions: 2007, 2010, 2013, 2016, 2019, and 2021. If you are using an earlier version (Excel 2003 or earlier), this tip may not work for you. For a version of this tip written specifically for earlier versions of Excel, click here:
Please Note:
This article is written for users of the following Microsoft Excel versions: 2007, 2010, 2013, 2016, 2019, and 2021. If you are using an earlier version (Excel 2003 or earlier), this tip may not work for you. For a version of this tip written specifically for earlier versions of Excel, click here:
Comments