When Ulises filters information in a table, Excel allows him to filter by date. However, the list of available dates (obviously pulled from the information in the table) is quite long. This makes it cumbersome to locate and choose from those dates. Ulises wonders if there is a way to enter a date in a filter without using the check boxes.
Yes, there is. When you first click the Filter tool on the Data tab of the ribbon, Excel adds filter drop-down arrows at the top of each column in your data. If you click the down-arrow at the top of your date column, you'll see some filtering options. (See Figure 1.)
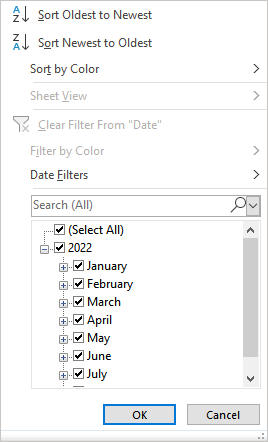
Figure 1. Selecting filtering parameters.
It is the checkboxes at the bottom of this options box that Ulises is referring to. If your data has many, many dates, then drilling down to a specific date can be cumbersome, at best.
A better approach would be to hover the mouse pointer over the Date Filters option in the box. This causes Excel to display a plethora of ways you can filter based on dates. (See Figure 2.)
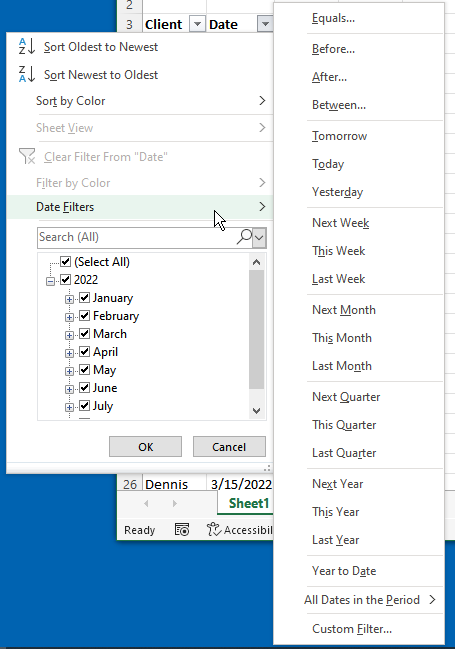
Figure 2. Date filtering options.
Each of these options displays, when chosen, the Custom AutoFilter dialog box. The only difference is what settings are shown in the dialog box; they are set, initially, based on the option you chose. For this reason, I'll often skip to the chase and just choose the Custom Filter option, at the bottom of those offered. (See Figure 3.)
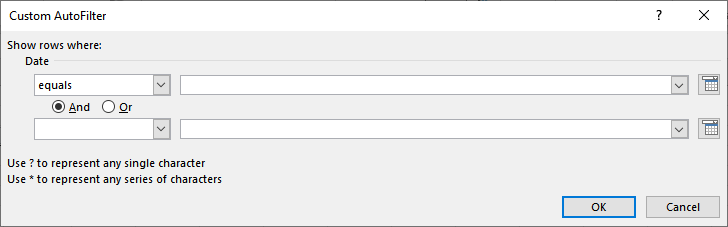
Figure 3. The Custom AutoFilter dialog box.
Using the controls in the Custom AutoFilter dialog box, you can specify exactly what you want to use in your filter. I find it quite handy to use the date picker tools, at the right side of the dialog box, to select the dates I want used in the filter. When you click on OK, then your data is filtered, without the need to use the check boxes you first see.
ExcelTips is your source for cost-effective Microsoft Excel training. This tip (12940) applies to Microsoft Excel 2007, 2010, 2013, 2016, 2019, 2021, and Excel in Microsoft 365.

Professional Development Guidance! Four world-class developers offer start-to-finish guidance for building powerful, robust, and secure applications with Excel. The authors show how to consistently make the right design decisions and make the most of Excel's powerful features. Check out Professional Excel Development today!
Need to remove filters and display all rows and columns in all your worksheets? It is not easy to do manually, but with a ...
Discover MoreThe filtering tools provided in Excel make it easy to filter a data list so that only certain rows are displayed. What if ...
Discover MoreFiltering can be a powerful way to work with large amounts of data in a worksheet. If you use filtering quite a bit, you ...
Discover MoreFREE SERVICE: Get tips like this every week in ExcelTips, a free productivity newsletter. Enter your address and click "Subscribe."
There are currently no comments for this tip. (Be the first to leave your comment—just use the simple form above!)
Got a version of Excel that uses the ribbon interface (Excel 2007 or later)? This site is for you! If you use an earlier version of Excel, visit our ExcelTips site focusing on the menu interface.
FREE SERVICE: Get tips like this every week in ExcelTips, a free productivity newsletter. Enter your address and click "Subscribe."
Copyright © 2026 Sharon Parq Associates, Inc.
Comments