Written by Allen Wyatt (last updated January 26, 2026)
This tip applies to Excel 2007, 2010, 2013, 2016, 2019, and 2021
Gary has a worksheet that contains a lot of information pasted from other sources. Sometimes cells will contain unwanted characters, and deleting all the unwanted characters cell by cell can be tedious. Gary can tell that all the unwanted characters always end in, say, a sequence such as "x27g," though the number of characters before this sequence can vary from cell to cell. He wonders if there a way to use Find and Replace to delete not only the sequence but everything before the sequence from all the cells in a worksheet.
At first blush, this may seem like the type of task that is best suited to a macro. This is not the case, however. You can actually accomplish the task using Find and Replace with wildcards. Testing shows that this will work just fine:
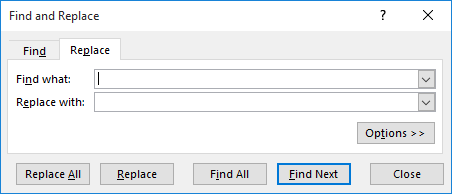
Figure 1. The Replace tab of the Find and Replace dialog box.
If that doesn't work for you, it is possible that there are some of the Find and Replace options set incorrectly. You can display the Replace tab of the Find and Replace dialog box again, but this time click the Options button. This results in an expanded dialog box. Make sure that no formatting is set, that the Look In drop-down list is set to Formulas, and that the Match Entire Cell Contents check box is cleared.
If, for some reason, you prefer to use a macro to do the replacements, the following will work just fine.
Sub DeleteBefore()
    Dim rCell As Range
    Dim sFind As String
    Dim iLen As Integer
    Dim iFind As Integer

    sFind = "x27g" 'Change as desired
    iLen = Len(sFind)
    For Each rCell In Selection
       iFind = InStr(rCell, sFind)
       If iFind > 0 Then
           rCell.Value = Mid(rCell, iFind + iLen)
       End If
    Next
End Sub
This is a simple macro that looks at each cell in whatever range you've selected. If the cell contains your ending sequence (specified in the sFind variable), then everything up through that sequence is deleted.
Note:
ExcelTips is your source for cost-effective Microsoft Excel training. This tip (13828) applies to Microsoft Excel 2007, 2010, 2013, 2016, 2019, and 2021.

Professional Development Guidance! Four world-class developers offer start-to-finish guidance for building powerful, robust, and secure applications with Excel. The authors show how to consistently make the right design decisions and make the most of Excel's powerful features. Check out Professional Excel Development today!
If you use a worksheet that contains dates, you might want to search for those dates at some point. This isn't as simple ...
Discover MoreWhen you search for information in a worksheet, you expect Excel to return results that make sense. If you don't get a ...
Discover MoreMacros are great for processing large amounts of data quickly. This tip examines several ways you can remove specific ...
Discover MoreFREE SERVICE: Get tips like this every week in ExcelTips, a free productivity newsletter. Enter your address and click "Subscribe."
2021-03-01 06:49:44
Mike D.
I was thinking the macro method as well. I started to work on a solution for this but life has a funny way of getting in the way.
I keep forgetting that we can use wild cards in the Find Box.
I guess I look for the complicated solution first and then look for the easy way out. Must be the engineer in me.
2021-02-28 02:40:42
Rinku
Find and replace all option does'nt work well. I cross checked the options formatting ,that is set correctly, still.
Got a version of Excel that uses the ribbon interface (Excel 2007 or later)? This site is for you! If you use an earlier version of Excel, visit our ExcelTips site focusing on the menu interface.
FREE SERVICE: Get tips like this every week in ExcelTips, a free productivity newsletter. Enter your address and click "Subscribe."
Copyright © 2026 Sharon Parq Associates, Inc.
Comments