Please Note: This article is written for users of the following Microsoft Excel versions: 2007, 2010, 2013, 2016, 2019, and 2021. If you are using an earlier version (Excel 2003 or earlier), this tip may not work for you. For a version of this tip written specifically for earlier versions of Excel, click here: Easily Adding Blank Rows.
There may be a time when you are working with a table and you want to insert a blank row between each existing row in the table. There are several easy ways to do this. If you don't want to use a macro, you can follow these steps:
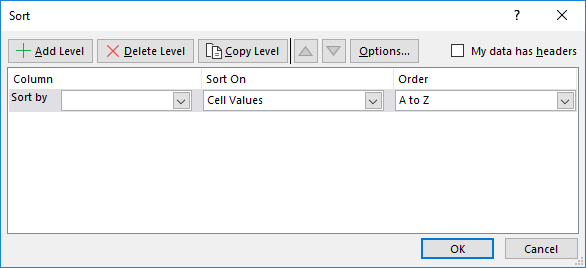
Figure 1. The Sort dialog box.
The above steps work because of the way in which Excel does its sorting. If, for some reason, you end up with two blank rows next to each other (in other words, the sorting does not work exactly as it should have), then you can modify the process slightly. In step 2, enter the numbers 1 and 3 in the top two cells. This results in odd numbers being filled down the new column. Instead of doing steps 4 and 5, you would simply fill a like area with even cells (simply fill the first cell with 2 and the second one with 4). When you then sort in steps 6 through 10, the resulting table has the rows interleaved in the proper order.
If you are not averse to using macros, inserting the blank rows is even easier. Simply select the rows you want to affect, and then execute this macro:
Sub AddBlankRows1()
    Dim J As Integer
    Dim MySelection As Range

    If TypeName(Selection) <> "Range" Then Exit Sub
    Set MySelection = Selection
    Application.ScreenUpdating = False
    For J = MySelection.Rows.Count To 1 Step –1
        MySelection.Rows(J).EntireRow.Insert
    Next J
    Application.ScreenUpdating = True
End Sub
A somewhat shorter variation on the same macro is this:
Sub AddBlankRows2()
    FR = Selection.Rows.Row
    LR = Selection.Rows.Count + FR - 1
    For R = LR To FR + 1 Step -1
        Rows(R).Insert
    Next
End Sub
Of course, you should remember that if your only purpose in adding rows is to "space out" your information, you can achieve the same thing by simply increasing the height of each row in the table. You should only physically add blank rows if you need those rows in order to insert additional information in your data table.
Note:
ExcelTips is your source for cost-effective Microsoft Excel training. This tip (9667) applies to Microsoft Excel 2007, 2010, 2013, 2016, 2019, and 2021. You can find a version of this tip for the older menu interface of Excel here: Easily Adding Blank Rows.

Professional Development Guidance! Four world-class developers offer start-to-finish guidance for building powerful, robust, and secure applications with Excel. The authors show how to consistently make the right design decisions and make the most of Excel's powerful features. Check out Professional Excel Development today!
Want a quick way to tell how may rows and columns you've selected? Here's what I do when I need to know that information.
Discover MoreNeed to edit the data within a cell? There are any number of ways you can perform the edit; this tip documents them all.
Discover MoreImporting data into Excel that was generated in other programs can have some interesting side effects. For instance, you ...
Discover MoreFREE SERVICE: Get tips like this every week in ExcelTips, a free productivity newsletter. Enter your address and click "Subscribe."
There are currently no comments for this tip. (Be the first to leave your comment—just use the simple form above!)
Got a version of Excel that uses the ribbon interface (Excel 2007 or later)? This site is for you! If you use an earlier version of Excel, visit our ExcelTips site focusing on the menu interface.
FREE SERVICE: Get tips like this every week in ExcelTips, a free productivity newsletter. Enter your address and click "Subscribe."
Copyright © 2026 Sharon Parq Associates, Inc.
 Please Note:
This article is written for users of the following Microsoft Excel versions: 2007, 2010, 2013, 2016, 2019, and 2021. If you are using an earlier version (Excel 2003 or earlier), this tip may not work for you. For a version of this tip written specifically for earlier versions of Excel, click here:
Please Note:
This article is written for users of the following Microsoft Excel versions: 2007, 2010, 2013, 2016, 2019, and 2021. If you are using an earlier version (Excel 2003 or earlier), this tip may not work for you. For a version of this tip written specifically for earlier versions of Excel, click here:
Comments