Please Note: This article is written for users of the following Microsoft Excel versions: 2007, 2010, 2013, 2016, 2019, 2021, and Excel in Microsoft 365. If you are using an earlier version (Excel 2003 or earlier), this tip may not work for you. For a version of this tip written specifically for earlier versions of Excel, click here: Printing Multiple Selections.
Written by Allen Wyatt (last updated August 27, 2022)
This tip applies to Excel 2007, 2010, 2013, 2016, 2019, 2021, and Excel in Microsoft 365
You may have a need at times to print out a group of selections from different worksheets and have them appear on a single sheet of paper. Perhaps the easiest way to do this is to simply set up a "consolidation" worksheet that you would actually use for your printing. Follow these general directions:
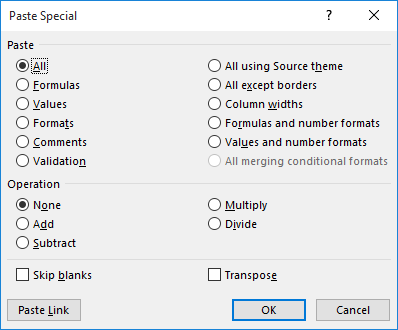
Figure 1. The Paste Special dialog box.
The one big drawback to this approach is that if the worksheets from which you are copying have radically different formatting, you may not be able to merge them into a consolidated worksheet satisfactorily. (You will need to adjust the formatting in the consolidation sheet after pasting the different ranges.) In this case you may need to adjust formatting to get exactly the effect you desire.
ExcelTips is your source for cost-effective Microsoft Excel training. This tip (12204) applies to Microsoft Excel 2007, 2010, 2013, 2016, 2019, 2021, and Excel in Microsoft 365. You can find a version of this tip for the older menu interface of Excel here: Printing Multiple Selections.

Program Successfully in Excel! This guide will provide you with all the information you need to automate any task in Excel and save time and effort. Learn how to extend Excel's functionality with VBA to create solutions not possible with the standard features. Includes latest information for Excel 2024 and Microsoft 365. Check out Mastering Excel VBA Programming today!
Print areas are a great way to define what, exactly, you want to print from a worksheet. When you copy worksheets, the ...
Discover MoreYou can define, in your worksheet, an area that you want printed. If you want this print area to be dynamic, based on the ...
Discover MoreExcel allows you to specify an area of your worksheet that should be printed. Here's how to "lock" that area so it cannot ...
Discover MoreFREE SERVICE: Get tips like this every week in ExcelTips, a free productivity newsletter. Enter your address and click "Subscribe."
2022-08-27 10:24:01
J. Woolley
My Excel Toolbox includes the DynamicImage macro, which is similar to the Camera Tool or Home > Paste > Linked Picture (Alt+H+V+I) but is NOT the same as Home > Paste > Paste Special > Paste Link as described in the Tip. The DynamicImage macro copies a range of cells and pastes it as a dynamic image in any sheet of any workbook. Several images can be copied to a sheet. Cell values retain their original format. Each image includes visible portions of shapes or charts from the copied range. Any changes in a copied range will be reproduced in its dynamic image. The result is a simple dashboard, which can be printed in the usual way.
See https://sites.google.com/view/MyExcelToolbox
and https://trumpexcel.com/excel-camera-tool/
Got a version of Excel that uses the ribbon interface (Excel 2007 or later)? This site is for you! If you use an earlier version of Excel, visit our ExcelTips site focusing on the menu interface.
FREE SERVICE: Get tips like this every week in ExcelTips, a free productivity newsletter. Enter your address and click "Subscribe."
Copyright © 2025 Sharon Parq Associates, Inc.
 Please Note:
This article is written for users of the following Microsoft Excel versions: 2007, 2010, 2013, 2016, 2019, 2021, and Excel in Microsoft 365. If you are using an earlier version (Excel 2003 or earlier), this tip may not work for you. For a version of this tip written specifically for earlier versions of Excel, click here:
Please Note:
This article is written for users of the following Microsoft Excel versions: 2007, 2010, 2013, 2016, 2019, 2021, and Excel in Microsoft 365. If you are using an earlier version (Excel 2003 or earlier), this tip may not work for you. For a version of this tip written specifically for earlier versions of Excel, click here:
Comments