Please Note: This article is written for users of the following Microsoft Excel versions: 2007, 2010, 2013, 2016, 2019, and 2021. If you are using an earlier version (Excel 2003 or earlier), this tip may not work for you. For a version of this tip written specifically for earlier versions of Excel, click here: Copying Print Areas when Copying Worksheets.
Michael often copies worksheets within a workbook. This allows him to maintain the original worksheet and do his work on the newly copied worksheet. The one thing that doesn't copy from the source worksheet to the target worksheet is the print area. Michael would like a way to have the print area set in the newly copied worksheet after the copy is complete.
The answer depends on what you mean when you talk about copying worksheets. Let's say that you copy a worksheet in this manner:
This copies the contents of the source worksheet to the target worksheet, but it won't copy page settings, such as headers/footers, margins, and print areas. If you want to actually copy these items, you need to make sure you perform your copy using some variation of this procedure:
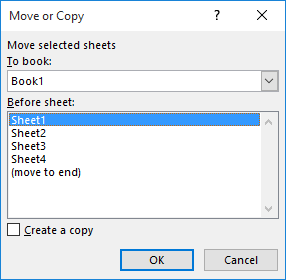
Figure 1. The Move or Copy dialog box.
The resulting copy of your worksheet includes any page settings, including any print areas defined in the worksheet.
ExcelTips is your source for cost-effective Microsoft Excel training. This tip (12100) applies to Microsoft Excel 2007, 2010, 2013, 2016, 2019, and 2021. You can find a version of this tip for the older menu interface of Excel here: Copying Print Areas when Copying Worksheets.

Solve Real Business Problems Master business modeling and analysis techniques with Excel and transform data into bottom-line results. This hands-on, scenario-focused guide shows you how to use the latest Excel tools to integrate data from multiple tables. Check out Microsoft Excel Data Analysis and Business Modeling today!
Need to print several portions of a worksheet all on a single piece of paper? Here's an easy way you can get what you ...
Discover MoreNeed the same print range set for different worksheets in the same workbook? It can't be done in one step manually, but ...
Discover MoreYou can define, in your worksheet, an area that you want printed. If you want this print area to be dynamic, based on the ...
Discover MoreFREE SERVICE: Get tips like this every week in ExcelTips, a free productivity newsletter. Enter your address and click "Subscribe."
2025-07-02 04:04:28
Kiwerry
@Tomek: Thanks for letting me know - good to know that the comment was useful.
2025-07-01 11:22:10
Tomek
@kiwerry
I was just wondering if this approach would work.
Thanks for answering my unasked question.
2025-06-18 05:20:58
Kiwerry
You can also copy a sheet, including its print area, by pressing the left mouse button on the sheet's tab (a small down arrow appears slightly above the tab), then holding the Ctrl Key down (a small + appears) and dragging the tab to where you want the copy to be inserted, and dropping it there. If you were to omit the Ctrl key, the sheet is moved, not copied.
This is easy to remember because it's very similar to the useful method of moving or copying a cell or range with the mouse: select the cell or range, then hover the arrow above the border thereof so that the cursor changes to a four pointed arrow. Press and drag and drop to move the cell or range, and hold the Ctrl key down while doing so to create a copy.
These methods of moving or copying do not use the clipboard.
2022-09-15 16:37:27
J. Woolley
Assume you open a workbook on a network and it is NOT read-only. If you want to copy the print area from Sheet1 to Sheet2, this might work:
1. Press Alt+F11 to open the VBA Editor (VBE).
2. Press Ctrl+G to open the VBE's Immediate window.
3. Type the following in the VBE's Immediate window, then press Enter:
Worksheets("Sheet2").PageSetup.PrintArea=Worksheets("Sheet1").PageSetup.PrintArea
This assumes both sheets are in the active workbook. Adjust sheet names if necessary.
If the sheets are in different workbooks with Sheet1 in Book1.xlsx and Sheet2 in Book2.xlsx, use this:
Workbooks("Book2.xlsx").Worksheets("Sheet2").PageSetup.PrintArea=Workbooks("Book1.xlsx").Worksheets("Sheet1").PageSetup.PrintArea
Adjust book and sheet names if necessary. If you do this often, prepare a macro.
2022-09-14 10:43:07
sylvain
Thanks for all these tips Allen!
How about if the file is shared (over a network, the old way)? it will not work...
Trying to figure out a way of copying the printing area
Got a version of Excel that uses the ribbon interface (Excel 2007 or later)? This site is for you! If you use an earlier version of Excel, visit our ExcelTips site focusing on the menu interface.
FREE SERVICE: Get tips like this every week in ExcelTips, a free productivity newsletter. Enter your address and click "Subscribe."
Copyright © 2026 Sharon Parq Associates, Inc.
 Please Note:
This article is written for users of the following Microsoft Excel versions: 2007, 2010, 2013, 2016, 2019, and 2021. If you are using an earlier version (Excel 2003 or earlier), this tip may not work for you. For a version of this tip written specifically for earlier versions of Excel, click here:
Please Note:
This article is written for users of the following Microsoft Excel versions: 2007, 2010, 2013, 2016, 2019, and 2021. If you are using an earlier version (Excel 2003 or earlier), this tip may not work for you. For a version of this tip written specifically for earlier versions of Excel, click here:
Comments