Written by Allen Wyatt (last updated July 18, 2023)
This tip applies to Excel 2007, 2010, 2013, 2016, 2019, 2021, and Excel in Microsoft 365
Sam password protected an Excel workbook. He no longer wants that protection and he has tried the obvious (to him) options to remove that protection. When he closes the workbook, however, Excel still requires a password to open the workbook again. Sam wonders how to completely remove the protection from a workbook he previously protected.
There are two caveats to note here, before looking at ways to address the issue. First, Sam is talking about removing workbook protection, not about adjusting worksheet protection. Second, Sam already has the password to the workbook and can get into it—he simply wants to save the workbook so that the password is not needed again. (It isn't his desire to open a workbook file for which he doesn't have the password.)
First, you should remove any in-workbook protection. You do that by first displaying the Review tab of the ribbon. What you then do depends on your version of Excel.
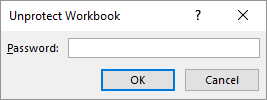
Click the tool, and either the workbook is immediately unprotected (if there was no password associated with the protection) or you'll see the Unprotect Workbook dialog box. (See Figure 1.)

Figure 1. The Unprotect Workbook dialog box.
If prompted, enter the password and click on OK.
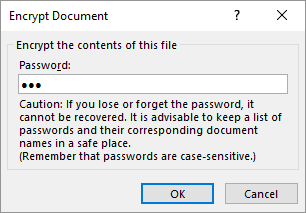
Next, you need to remove any workbook-level protection. There are several ways you can do this. One way is to follow these steps:

Figure 2. The Encrypt Document dialog box.
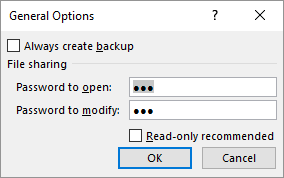
The above steps only remove the password required to open the workbook. It is very possible there is another password associated with the workbook. Removing that password brings us to the third approach; it involves saving your workbook anew. Follow these steps:

Figure 3. The General Options dialog box.
If you still encounter problems opening the file, it is possible (though not probable) that the workbook is somehow protected within Windows itself. This most often is the case if the file is stored on a network drive to which your administrator has applied security permissions.
ExcelTips is your source for cost-effective Microsoft Excel training. This tip (73) applies to Microsoft Excel 2007, 2010, 2013, 2016, 2019, 2021, and Excel in Microsoft 365.

Program Successfully in Excel! This guide will provide you with all the information you need to automate any task in Excel and save time and effort. Learn how to extend Excel's functionality with VBA to create solutions not possible with the standard features. Includes latest information for Excel 2024 and Microsoft 365. Check out Mastering Excel VBA Programming today!
When working with sensitive information, you always need to be concerned that your data doesn't fall into unwanted hands. ...
Discover MoreIf you cannot add a worksheet to your workbook, it could be because the workbook is protected. This tip shows how to ...
Discover MoreNeed to protect the data in your workbook so that others can't get at it? Here are some ideas on how you can approach the ...
Discover MoreFREE SERVICE: Get tips like this every week in ExcelTips, a free productivity newsletter. Enter your address and click "Subscribe."
There are currently no comments for this tip. (Be the first to leave your comment—just use the simple form above!)
Got a version of Excel that uses the ribbon interface (Excel 2007 or later)? This site is for you! If you use an earlier version of Excel, visit our ExcelTips site focusing on the menu interface.
FREE SERVICE: Get tips like this every week in ExcelTips, a free productivity newsletter. Enter your address and click "Subscribe."
Copyright © 2026 Sharon Parq Associates, Inc.
Comments