Bob has a column of data that contains dates (mm/dd/yyyy). He would like to split these into three columns for the month, day, and year. However, when he uses the Text to Columns Wizard, it doesn't recognize the slash (/) as a delimiter. Bob wonders how he can get the date split out into components like he wants.
Depending on your version of Excel, you may or may not be able to use the Text to Column Wizard with dates. If you run through the whole wizard and nothing gets "split out" into separate columns, then that simply means your version of Excel won't allow the wizard to work with dates.
That being said, the Text to Columns Wizard probably isn't the best tool to use with dates anyway. Assuming that the dates really are dates in your worksheet, then the easiest way is to use some handy worksheet functions that Excel provides just for this purpose. Let's say that your date is in column A1. If you want the month in cell B1, you could use the following:
=MONTH(A1)
This returns a numeric value, 1 through 12, that represents the month number of the date. If you want the day in cell C1, then you can use the following:
=DAY(A1)
Finally, the year is derived in cell D1 using this formula:
=YEAR(A1)
If you are bound and determined to use the Text to Columns Wizard (and your version of Excel supports such use), you can split out your dates in this way:
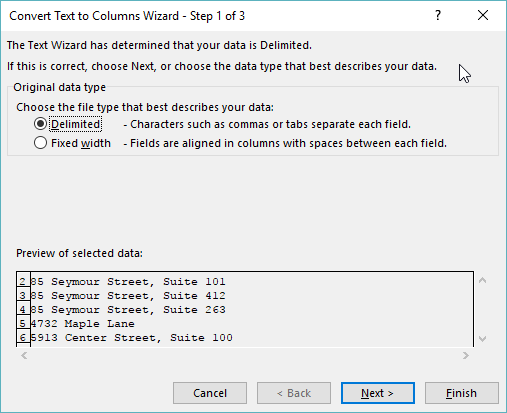
Figure 1. The first step of the Convert Text to Columns Wizard.
If you don't see the dates split apart, it means your version of Excel doesn't support this usage of the Text to Columns Wizard and you'll need to use the workbook functions already mentioned. If the dates do split apart, you will probably need to change the formatting on the first column. This occurs because that column will still be formatted as "Date," and you will want to format it as something different so your month numbers display properly.
Finally, remember that if you use the Text to Columns Wizard and the source column contains formulas, then those formulas could get split apart based on the presence of any slashes in the formula. In that case you'll definitely want to use the worksheet functions mentioned earlier.
ExcelTips is your source for cost-effective Microsoft Excel training. This tip (10216) applies to Microsoft Excel 2007, 2010, 2013, 2016, 2019, and 2021.

Program Successfully in Excel! This guide will provide you with all the information you need to automate any task in Excel and save time and effort. Learn how to extend Excel's functionality with VBA to create solutions not possible with the standard features. Includes latest information for Excel 2024 and Microsoft 365. Check out Mastering Excel VBA Programming today!
Delete a cell or a range of cells, and Excel needs to figure out how to rearrange the void left by the deletion. You can ...
Discover MoreWant to use the maximum space possible for displaying information on screen? You'll want to learn how to use the ...
Discover MoreGot too much information in a single cell? Here's how you can use a macro to pull apart that information and put it into ...
Discover MoreFREE SERVICE: Get tips like this every week in ExcelTips, a free productivity newsletter. Enter your address and click "Subscribe."
2025-04-09 05:40:15
Kiwerry
Thanks, Allen. The following may be of interest:
A quick trial in Excel 365, using the procedure you suggested and leaving the data format at "General" in Step 3 (see Figure 1 below) of the process resulted in a split on the /.
The day and month were saved as text (preceded by '), and the year as a number.
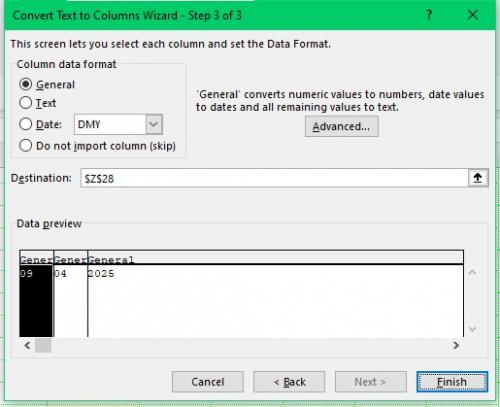
Figure 1.
Got a version of Excel that uses the ribbon interface (Excel 2007 or later)? This site is for you! If you use an earlier version of Excel, visit our ExcelTips site focusing on the menu interface.
FREE SERVICE: Get tips like this every week in ExcelTips, a free productivity newsletter. Enter your address and click "Subscribe."
Copyright © 2026 Sharon Parq Associates, Inc.
Comments