Kathy uses several Excel workbooks daily. In some, she wants the cursor to move down after entering the data and in others she wants the cursor to move right. She wonders if there is a way to save the cursor direction with each individual workbook.
The direction in which the selected cell moves after you press Enter is determined on an application level by following these steps:
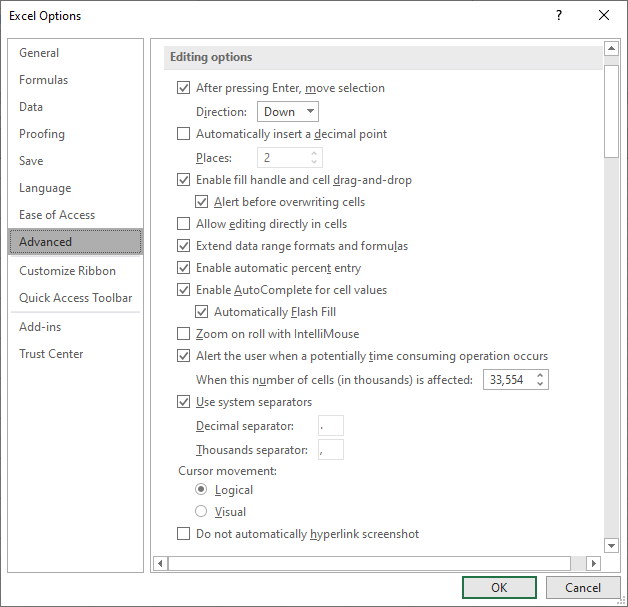
Figure 1. The Advanced options of the Excel Options dialog box.
Since it is handled at an application level, the setting is not stored with individual workbooks. You can, however, create a macro that can be stored with the workbook, and the macro can modify the direction. Ideally, the macro would modify the direction when a workbook was activated and restore the direction when the workbook was deactivated—meaning, when a different workbook was activated, or the program exited.
Public MouseDirection As Long

Private Sub Workbook_Activate()
    MouseDirection = Application.MoveAfterReturnDirection
    Application.MoveAfterReturnDirection = xlToRight
End Sub
Private Sub Workbook_Deactivate()
    Application.MoveAfterReturnDirection = MouseDirection
End Sub
These are actually two macros and they should be added to the ThisWorkbook object in the VBA Editor. As shown, theWorkbook_Activate macro sets the direction to be towards the right after Enter is pressed. If you prefer, you could replace xlToRight with any of these: xlDown, xlUp, or xlToLeft.
Note:
ExcelTips is your source for cost-effective Microsoft Excel training. This tip (13073) applies to Microsoft Excel 2007, 2010, 2013, 2016, 2019, 2021, 2024, and Excel in Microsoft 365.

Excel Smarts for Beginners! Featuring the friendly and trusted For Dummies style, this popular guide shows beginners how to get up and running with Excel while also helping more experienced users get comfortable with the newest features. Check out Excel 2019 For Dummies today!
Moving between to adjacent worksheets is easy; Excel provides a shortcut key to do the trick. If you want to move between ...
Discover MoreFunction keys are used to perform common tasks in Excel. If you want to disable one of the function keys, it's rather ...
Discover MoreNeed to find out how good you are with Excel? Here are some places you can check out to quiz yourself.
Discover MoreFREE SERVICE: Get tips like this every week in ExcelTips, a free productivity newsletter. Enter your address and click "Subscribe."
There are currently no comments for this tip. (Be the first to leave your comment—just use the simple form above!)
Got a version of Excel that uses the ribbon interface (Excel 2007 or later)? This site is for you! If you use an earlier version of Excel, visit our ExcelTips site focusing on the menu interface.
FREE SERVICE: Get tips like this every week in ExcelTips, a free productivity newsletter. Enter your address and click "Subscribe."
Copyright © 2026 Sharon Parq Associates, Inc.
Comments