Patrick wonders if there is a way to have the cell movement move to the right on one worksheet in a workbook and down on another worksheet in the same workbook. The only thing he can find is a global setting for all the worksheets in the workbook.
Patrick is correct; this setting is something that is handled globally in Excel. You can change the setting by following these steps:
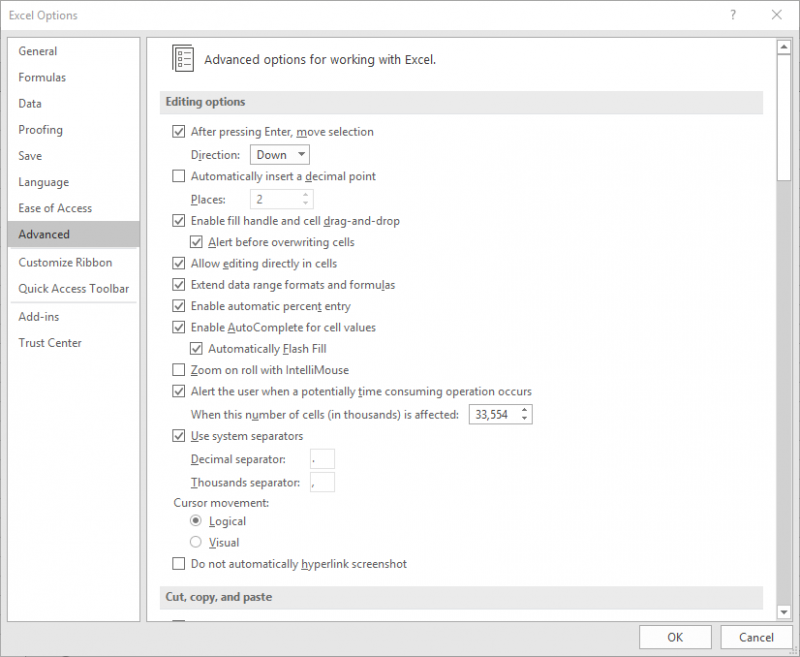
Figure 1. The Advanced options of the Excel Options dialog box.
This changes the direction of movement for all workbooks you open in Excel. If you want the movement to vary for a single worksheet, you can accomplish this through the use of a few event handlers. Two of these are attached to the worksheet you want to be handled differently; just right-click on the worksheet's tab and select Code from the resulting Context menu. You can then paste the following into the Code window:
Private Sub Worksheet_Activate()
    Application.MoveAfterReturnDirection = xlToRight
End Sub
Private Sub Worksheet_Deactivate()
    Application.MoveAfterReturnDirection = xlDown
End Sub
These event handlers are triggered, respectively, when the worksheet is activated and when you deactivate the worksheet by selecting a different worksheet. Note that upon activation, the direction is set to xlToRight, which means that movement will by to the right. When the worksheet is deactivated, the direction is set to xlDown, which is assumed to be the default direction.
You will also need a third event handler; this one should be added to the ThisWorkbook module:
Private Sub Workbook_BeforeClose(Cancel As Boolean)
    Application.MoveAfterReturnDirection = xlDown
End Sub
This is necessary because if you close Excel while the "move right" worksheet is active, then the movement direction remains set to xlToRight. This means that the next time you start Excel, that becomes the default direction. By including the BeforeClose event handler, you ensure that the default is set as it should be.
There is only one small potential gotcha with this approach: When you first open a workbook, the Activate event is not triggered for whatever worksheet is first displayed. This means that if your "move right" worksheet is displayed for the workbook, by default, the movement won't be changed to xlToRight; it will still be set to the default, which is presumably xlDown. To force the event handler to run, you'll need to display a different worksheet in the workbook and then come back to the original worksheet. If you would rather not do this manually, you could add a fourth event handler, this one also in the ThisWorkbook module:
Private Sub Workbook_Open()
    Sheets("Sheet2").Select
    Sheets("Sheet1").Select
End Sub
This macro selects the worksheet named Sheet2 and then immediately selects the one named Sheet1. You should, of course, change the worksheet names to reflect the ones appropriate for your workbook—just make sure that the last worksheet selected is the "move right" worksheet.
Note:
ExcelTips is your source for cost-effective Microsoft Excel training. This tip (13640) applies to Microsoft Excel 2007, 2010, 2013, 2016, 2019, 2021, and Excel in Microsoft 365.

Best-Selling VBA Tutorial for Beginners Take your Excel knowledge to the next level. With a little background in VBA programming, you can go well beyond basic spreadsheets and functions. Use macros to reduce errors, save time, and integrate with other Microsoft applications. Fully updated for the latest version of Office 365. Check out Microsoft 365 Excel VBA Programming For Dummies today!
Paste some information into a worksheet and Excel helpfully displays some options related to the paste operation. If you ...
Discover MoreWhat happens when you press Enter in a cell depends on how you have Excel configured. Here's the way you can control the ...
Discover MoreExcel allows you to save your workbooks in many different places. By default, it helpfully provides all those places. You ...
Discover MoreFREE SERVICE: Get tips like this every week in ExcelTips, a free productivity newsletter. Enter your address and click "Subscribe."
2024-11-09 10:07:42
J. Woolley
For more on this subject, see my comment here:
https://excelribbon.tips.net/T007220#comment-form-hd
Got a version of Excel that uses the ribbon interface (Excel 2007 or later)? This site is for you! If you use an earlier version of Excel, visit our ExcelTips site focusing on the menu interface.
FREE SERVICE: Get tips like this every week in ExcelTips, a free productivity newsletter. Enter your address and click "Subscribe."
Copyright © 2026 Sharon Parq Associates, Inc.
Comments