Tom customized the ribbon, but Excel only holds the customization for the workbook on which he is working. He wonders how he can make sure his ribbon customizations work for all the workbooks on his system.
There are two things that can be customized on the ribbon (well, technically, near the ribbon), and it is possible that Tom is confusing those two things. In order to cover all the bases, however, I'll address both areas.
Changes to the Quick Access Toolbar
The Quick Access Toolbar, or QAT, generally appears right above the ribbon, so many people think it is actually a part of the ribbon. You can make changes to the QAT in the following manner:
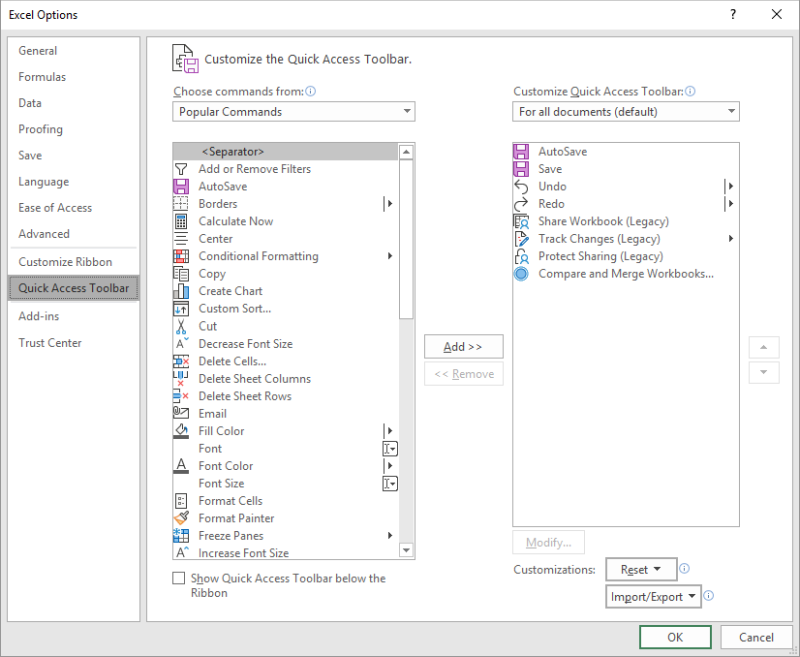
Figure 1. The Quick Access Toolbar option in the Excel Options dialog box.
Before you make any changes, note the Customize Quick Access Toolbar drop-down list at the upper-right corner of the dialog box. In order to have your QAT changes be available in all workbooks on your system, you want to make sure that this drop-down list is set to For All Documents. It should be set to this, by default, but if it is set to a specific workbook (for any reason), then the QAT customizations will be available only in that single workbook.
Changes to the Ribbon Itself
If you are using Excel 2010 or a later version of the program, you can display the customization area for the ribbon itself in much the same way as you do for the Quick Access Toolbar. Only the last step is different:
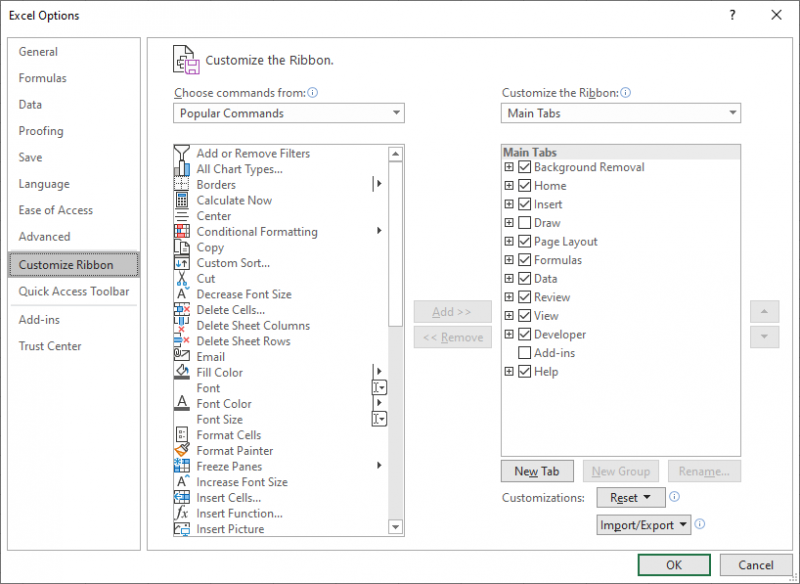
Figure 2. The Customize Ribbon option in the Excel Options dialog box.
There is one huge difference between this dialog box and the dialog box for customizing the QAT—there is no drop-down list at the upper-right corner of the dialog box. This means that, by default, all the customizations you make to the ribbon should be available for all your workbooks.
There is one possible exception to this. If your ribbon customizations include assigning macros to your new ribbon options, then it is possible that those customizations won't work properly if the macros aren't in the Personal workbook. Why? Because if the workbook containing the macros isn't open and you try to click a ribbon button that tries to access that macro, it will fail if it cannot locate that macro.
Moving macros from a specific workbook to the Personal workbook is beyond the scope of this tip, but it isn't particularly difficult using the Visual Basic Editor. Here's a page on one of Microsoft's sites that may be of help in this regard:
https://support.office.com/en-us/article/copy-your-macros-to-a-personal-macro-workbook-aa439b90-f836-4381-97f0-6e4c3f5ee566
Remember that if you do move your macros to the Personal workbook, you'll want to double-check your ribbon customizations to make sure that they point to the proper macro in its new home.
ExcelTips is your source for cost-effective Microsoft Excel training. This tip (13684) applies to Microsoft Excel 2007, 2010, 2013, 2016, 2019, 2021, 2024, and Excel in Microsoft 365.

Program Successfully in Excel! This guide will provide you with all the information you need to automate any task in Excel and save time and effort. Learn how to extend Excel's functionality with VBA to create solutions not possible with the standard features. Includes latest information for Excel 2024 and Microsoft 365. Check out Mastering Excel VBA Programming today!
Do you work with a group of workbooks all the time in Excel? Windows and Excel both provide a plethora of ways you can ...
Discover MoreWhen you delete items from a workbook, it is natural to think that the workbook's file size should decrease. This may not ...
Discover MoreExcel is always monitoring how you use a workbook and can notify you if it detects a potential problem. One such message ...
Discover MoreFREE SERVICE: Get tips like this every week in ExcelTips, a free productivity newsletter. Enter your address and click "Subscribe."
There are currently no comments for this tip. (Be the first to leave your comment—just use the simple form above!)
Got a version of Excel that uses the ribbon interface (Excel 2007 or later)? This site is for you! If you use an earlier version of Excel, visit our ExcelTips site focusing on the menu interface.
FREE SERVICE: Get tips like this every week in ExcelTips, a free productivity newsletter. Enter your address and click "Subscribe."
Copyright © 2026 Sharon Parq Associates, Inc.
Comments