Steve can use the Border tab on the Format Cells dialog box to set a border around some cells. He would like to make a heavier border than what the Border tab allows, however. In the past he has inserted extra columns and/or rows and filled them with black to make a heavy border. In this case, however, Steve can't add extra rows/columns without messing up some calculations. He's wondering if there is a way to add a very heavy border of which he's not aware.
The Border tab of the Format Cells dialog box offers three thicknesses for a solid border. If the thickest border on the tab is not thick enough for your needs, then the simplest option would be to add a rectangle shape to your worksheet and position it over the cell, as desired. You can add the shape by displaying the Insert tab of the ribbon and then, from the Shapes tool, choose the rectangle shape. You can then click and drag to "draw" the rectangle in the worksheet.
A handy way to get the rectangle the size you want is to hold down the Alt key as you click and drag. This snaps the rectangle to the corners of the cell (or range of cells) over which you drag. Once placed, you can click on the rectangle and format it. You'll want to make sure that the fill color is set to "None" and that the outline width is set as heavy as you desire.
Finally, it is a good idea to set the properties of the shape so that the "Move and Size with Cells" option is selected. This allows your hand-crafted border to adjust to most changes that may affect the location and size of the cell to which you've attached it.
ExcelTips is your source for cost-effective Microsoft Excel training. This tip (13843) applies to Microsoft Excel 2007, 2010, 2013, 2016, 2019, and 2021.

Solve Real Business Problems Master business modeling and analysis techniques with Excel and transform data into bottom-line results. This hands-on, scenario-focused guide shows you how to use the latest Excel tools to integrate data from multiple tables. Check out Microsoft Excel Data Analysis and Business Modeling today!
You can add text to all sorts of drawing shapes, not just text boxes. Here's how easy it is.
Discover MoreExcel provides a couple of different ways that you can quickly duplicate drawing objects in a worksheet. Committing these ...
Discover MoreAdd a drawing object to a worksheet and chances are good you'll need to move it in some way. Here's how to use the mouse ...
Discover MoreFREE SERVICE: Get tips like this every week in ExcelTips, a free productivity newsletter. Enter your address and click "Subscribe."
2025-09-16 07:41:06
Roy
@Brian: For mine (MS365, 2508), there are three thicknesses for solid lines offered in the normal formatting dialog. Ten more borders offered, but they are all "dashed lines" in some respect or another, not solid.
Of course, your listing them as "xl..., xl..., etc." suggests you mean available through VBA. I cannot speak to that as I'm not in a position to experiment or research it at the moment.
Mr. Wyatt's idea of a shape covering the cell offers MANY thicknesses depending upon the dialog one uses to format with. For me that route seems to not play fair in that the borders spill outside the cell, but then so does the normal formatting using the heaviest offered solid line so... can't whine much, conceptually, though it IS a complaint I have in general. However, since I seldom use it now as a long time ago (when changing from the old, beautiful and graceful framework to the child and crayon framework of the last dozen years) they did away with the two line cell border and I weaned myself off borders in general. Now that it is restored, I cannot see getting back on the border train as MS is as bad as Google (well, near to as, though NO ONE is as wicked evil as Google in this regard) in offering a thing, waiting until folks get used to it and rely upon it, then killing it saying, in the same press release, both "No one much used it so why keep offering it?" and "It was always an experiment and the experiment is over."
That said...
Using the shape and "No Fill", in 2508, I can click in the cell as if the shape were not there and I can edit the cell in any normal manner with, again, the chosen formatting and content fully visible.
2025-09-15 10:06:47
Brian
Surely there are 4 thicknesses for border weights not 3: xlHairline, xlThin, xlMedium and xlThick. I appreciate that this doesn't help Steve if xlThick isn't thick enough for his purposes, but in the interest of pedantry....
2021-04-12 06:58:15
Mike D.
@Tomek
F5, I always forget about that one, thank you for reminding me.
Most often I am not working with large worksheets so what I need is usually within view.
The CTRL key is my biggest friend in Excel.
2021-04-09 03:12:46
Roy
Some others as well.
1) If you make a Named Range for the cell, it will show up in the box ot the left of the Formula Editor and can be selected, whereupon you are in the cell and ready to roll.
2) Speaking of that box, it is like a mini-GoTo. Just click in it, type a cell reference and press Enter. Boom, you are in the cell, ready to roll.
3) Just pick an empty cell and enter in it the formula "=(Cell Address for the cell you want to edit)"... so, say it is F5, just enter "=F5"... Then double click the cell you entered it in and boom, you are in the cell you want to be in. This one, by the way, has some pretty far-reaching capabilities. It will open files for you if you enter an address in a closed file. (Or, more likely, already have it entered!) And in a cell with a more complicated formula, double clicking selects all the cells addressed in it with the first one addressed being the "starting cell" of the selected (likley) discontiguous range.
I suggest using a Named Range for selecting such ranges for, say, editing on a screen form (i.e.: NOT a "real" form, just material laid out on the screen, probably arranged like, perhaps, an invoice, in which a few, or mor ethan a few, cells need to be navigated to in order to allow the user to edit only the desired cells. But without any heavy lifting by the author (you)). However, one could simply place a cell with a simple formula, perhaps adding all the cells, listing them in the order one desires them navigated, or better, concatenated in either of the old styles that required each cell to be listed, though if a range in the order Excel will takes its address is acceptable, then using CONCAT() could be good too, and perhaps formatted number-wise with:
;;;"Click to select data cells"
(Has to use a formula resulting in text. If numbers could result, the cell will be blank instead.)
To be more "inclusive", enter the text string for all four parameters in a number format. (Interestingly, if you do, and you used addition, not concatenation, when you apply the format, if the cell width is still the default width, Excel will expand its width to fit your text. It does not do that when it is the string shown above. Must be triggered by the return of a number, much like entering a long number in a fresh column. If the addition returns an error because one of the cells had text in it, there is no column widening.)
Speaking of errors returned by that formula you use, one could wrap it in an IFERROR() returning "" so it returns text instead and your helpful label remains.
4) Select a cell, same row, left or right of it and use the appropriate arrow key to Ctrl-Arrow over to it. Same idea, but use the same column, select a cell above or below. Of course, it would only work if that would work if the graphic were not there. Various other navigation key combos (Mr. Wyatt has addressed a few oddballls) ought to work similarly, if they too would work without the graphic in place.
5) VBA. Either a dedicated macro, fearsome thought that, talk about "If you only have a pile driver, everything looks like a nail." But easy enough to do. Though one hopes you only need one, 'cause one would like a shortcut key combo for something like this and having 20 border graphics to get under might stress one's imagination and recollection in building and using them.
6) VBA but not a macro: Use the "Immediate Window"... it is remarkably easy and you don't have a .XLSM file. Not easier than Goto!!! Just listing it for completeness and to "raise everyone's conciousness" concerning all the awesome things one can do via the Immediate Window.
7) Highlight a region just a bit larger than the border graphic but that includes the cell it is laid upon. Make sure that cell is the "lower right corner" (or the "upper left corner"). Then use Ctrl-End (or Ctrl-Home, if "upper left corner") and you're in the cell.
Personally, I'll say I think the box to the left of the Formula Editor seems easiest if your hand is on the mouse as one simply clicks, types the address, and presses Enter. If your hand is off the mouse, "F5-type the address-press Enter" is the easiest. If you don't know or want to know the address one of the Arrow Key approaches seems easiest.
Naturally, that'd be modified by your version of Excel not supporting one or more of the thoughts folks have presented. But F5 (GoTo) and that box I mention are in all versions I can imagine, though I've not personally seen the online version which is said to lack many things (though to lack a simple to access GoTo seems just impossibly unlikely, even if it does lack the box I like). So, they ought to be reliable "go to" choices. (I could resist the sort of punning there.
The above said, and the prior comments said, who wants to bet someone knows or can figure out more ways?
2021-04-08 09:32:27
Tomek
@Alec, @Mike, @ Roy: There is another way to get to a cell under a shape, if you can't click on it - use F5 (goto) and specify the cell's addres ;-)
2021-04-06 06:43:20
Mike D.
@Alec, @Roy: Roy's advice works perfectly and is the only way I have found that works if you use a text box to cover a cell.
However; if you use a shape (rectangle, circle) you can set the shape properties to 'No Fill' , this will allow you to click through the shape into the cell. It is like the shape is not there. If you need to format the shape you will need to click on the border to select the shape.
You can also add text to the shape and it will lay on top of anything in the cell.
This is how my Excel works, hope it helps you.
2021-04-05 17:24:32
Alec Whatmough
@Mike D. Interesting - what you and Roy suggest is exactly what I have done and submitted same as an answer last week. And it works fine on the PC I am using right now, yet on another machine, I find I cannot click into a cell covered by a shape, fill or not. Maybe a system fault on the other PC??
Anyway, it is pretty clear that big, bright borders can be easily achieved, so Steve should be a happy camper. :)
2021-04-05 07:28:01
Mike D.
@Alec, @Roy: Roy's advice works perfectly and is the only way I have found that works if you use a text box to cover a cell.
However; if you use a shape (rectangle, circle) you can set the shape properties to 'No Fill' , this will allow you to click through the shape into the cell. It is like the shape is not there. If you need to format the shape you will need to click on the border to select the shape.
You can also add text to the shape and it will lay on top of anything in the cell.
This is how my Excel works, hope it helps you.
2021-04-05 03:39:40
Roy
@Alec: It covers the cell, and makes the mouse no good for selecting the cell, but select a cell outside the border (solid color or gradient) and arrow into the cell. You slip right under the shape and can edit the cell as you please.
2021-04-03 15:14:42
Alec Whatmough
@Tomek - you learn something new every day! Thanks for that. I’ve always used shapes, but of course that blocks editing the cell.
2021-04-03 11:05:18
Tomek
You can also create colourful borders by formatting the border as gradient line.
I am attaching a screenshot of two examples below (see Figure 1 below) :
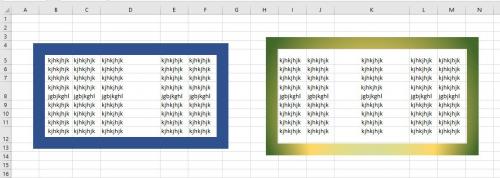
Figure 1.
Got a version of Excel that uses the ribbon interface (Excel 2007 or later)? This site is for you! If you use an earlier version of Excel, visit our ExcelTips site focusing on the menu interface.
FREE SERVICE: Get tips like this every week in ExcelTips, a free productivity newsletter. Enter your address and click "Subscribe."
Copyright © 2026 Sharon Parq Associates, Inc.
Comments