Please Note: This article is written for users of the following Microsoft Excel versions: 2007, 2010, 2013, 2016, 2019, and 2021. If you are using an earlier version (Excel 2003 or earlier), this tip may not work for you. For a version of this tip written specifically for earlier versions of Excel, click here: Automatic Selection of Portrait or Landscape.
Written by Allen Wyatt (last updated April 24, 2021)
This tip applies to Excel 2007, 2010, 2013, 2016, 2019, and 2021
Barbara has a worksheet that she needs to print out periodically. Sometimes she needs to only print three columns of data and other times she needs to print more. When she prints only three columns they fit very nicely on a page printed in portrait orientation. When she prints more columns then she needs to print in landscape orientation. Barbara wonders if there is a way she can set up Excel so that it automatically switches from portrait to landscape based upon the number of columns she wants to print.
Perhaps the easiest way to handle this type of printing is to add a little macro that runs just before printing. If the print area is set so that it contains 1, 2, or 3, columns, then the printout is done in portrait orientation. Any other number of columns and landscape orientation is used. Here is the macro; you should add it to the ThisWorkbook module:
Private Sub Workbook_BeforePrint(Cancel As Boolean)
    With ActiveSheet.PageSetup
        If Range(.PrintArea).Columns.Count > 3 Then
            .Orientation = xlLandscape
        Else
            .Orientation = xlPortrait
        End If
    End With
End Sub
Of course, it may be more beneficial (and flexible) if you simply use the Custom Views feature of Excel. You can specify a view that includes your three columns or any number of columns you want. You can even have the view include print settings, so the orientation of the page would be included in the view. Follow these steps to set up the views:
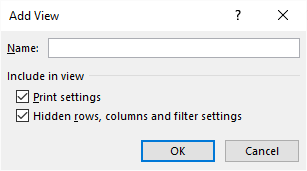
Figure 1. The Add View dialog box.
Now, whenever you want to print different ways, you just call up the view you want and choose to print—everything else is already set for you.
Note:
ExcelTips is your source for cost-effective Microsoft Excel training. This tip (10365) applies to Microsoft Excel 2007, 2010, 2013, 2016, 2019, and 2021. You can find a version of this tip for the older menu interface of Excel here: Automatic Selection of Portrait or Landscape.

Solve Real Business Problems Master business modeling and analysis techniques with Excel and transform data into bottom-line results. This hands-on, scenario-focused guide shows you how to use the latest Excel tools to integrate data from multiple tables. Check out Microsoft Excel Data Analysis and Business Modeling today!
Want to print your worksheets to their own PDF? This can be quite manually intensive, unless you put the macro in this ...
Discover MoreEver printed out a worksheet only to find that you have text only at the left side of each page? You can use more of each ...
Discover MoreIf you need to make what Excel prints be based upon conditions in a worksheet, you'll love the information in this tip. ...
Discover MoreFREE SERVICE: Get tips like this every week in ExcelTips, a free productivity newsletter. Enter your address and click "Subscribe."
There are currently no comments for this tip. (Be the first to leave your comment—just use the simple form above!)
Got a version of Excel that uses the ribbon interface (Excel 2007 or later)? This site is for you! If you use an earlier version of Excel, visit our ExcelTips site focusing on the menu interface.
FREE SERVICE: Get tips like this every week in ExcelTips, a free productivity newsletter. Enter your address and click "Subscribe."
Copyright © 2025 Sharon Parq Associates, Inc.
 Please Note:
This article is written for users of the following Microsoft Excel versions: 2007, 2010, 2013, 2016, 2019, and 2021. If you are using an earlier version (Excel 2003 or earlier), this tip may not work for you. For a version of this tip written specifically for earlier versions of Excel, click here:
Please Note:
This article is written for users of the following Microsoft Excel versions: 2007, 2010, 2013, 2016, 2019, and 2021. If you are using an earlier version (Excel 2003 or earlier), this tip may not work for you. For a version of this tip written specifically for earlier versions of Excel, click here:
Comments