Nancy creates a lot of PivotTables and likes the old layout better than the default set up in Excel 2010 and later versions. Every time she creates a PivotTable she has to go to PivotTableOptions | Display | Classic PivotTable Layout. Nancy wonders if there is a way she can make the classic display the default.
For most versions of Excel there is no way to set this default, but it is possible to make the process a bit less painful. I created a PivotTable and left it empty, with nothing defined in the various sections of the PivotTable. With the PivotTable sheet visible, I turned on the macro recorder and recorded just the steps that Nancy mentioned, above. Here's what was recorded:
Sub Macro1()
'
' Macro1 Macro
'

'
    With ActiveSheet.PivotTables("PivotTable1")
        .InGridDropZones = True
        .RowAxisLayout xlTabularRow
    End With
End Sub
As you can see, there isn't much (programmatically) to changing back to classic layout—all you need to do is issue two statements that affect the PivotTable. This macro can be improved just a bit, however, by making it more "universal."
Sub PivotTableClassic()
    Dim pt As PivotTable

    For Each pt In ActiveSheet.PivotTables
        pt.InGridDropZones = True
        pt.RowAxisLayout xlTabularRow
    Next pt
End Sub
This version of the macro steps through each of the PivotTables on the current worksheet (if any) and applies those two statements that set them to classic layout.
The best idea we've been able to come up with is to assign this macro to the Quick Access Toolbar or to a shortcut key. Immediately after creating the macro, you can click the QAT button or press the shortcut key and Excel makes all the PivotTables on the sheet classic.
Notice, just a bit earlier that I said "for most versions of Excel" that you couldn't set the default. In late 2017 or early 2018, Microsoft actually added a way that you can set the default. This ability was "pushed out" to those who subscribe to Microsoft 365. This means that it is available to not just those using Microsoft 365, but to those using Excel 2019 and Excel 2021.
To see if you can set this default, start by displaying the File tab of the ribbon, and then click on Options. This displays, of course, the Excel Options dialog box. (See Figure 1.)
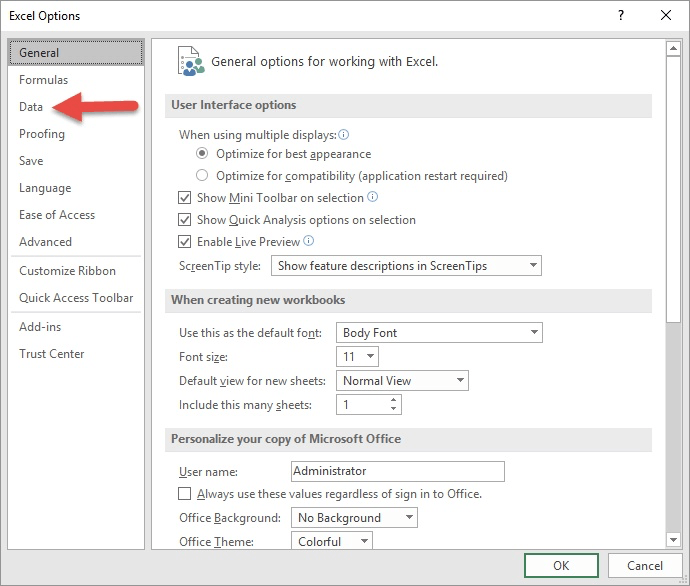
Figure 1. The Excel Options dialog box.
Notice that near the upper-right corner of the dialog box there is a Data option. This option isn't available on all versions of Excel; it was the option added in that update that I mentioned.
Assuming your version of Excel has that option available, follow these steps from this point:

Figure 2. The Display tab of the PivotTable Options dialog box.
You are now set—classic design layout will be the default as you create your new PivotTables. It won't affect any PivotTables previously created, but at least you are good to go from here on out.
Note:
ExcelTips is your source for cost-effective Microsoft Excel training. This tip (3576) applies to Microsoft Excel 2007, 2010, 2013, 2016, 2019, 2021, and Excel in Microsoft 365.

Dive Deep into Macros! Make Excel do things you thought were impossible, discover techniques you won't find anywhere else, and create powerful automated reports. Bill Jelen and Tracy Syrstad help you instantly visualize information to make it actionable. You�ll find step-by-step instructions, real-world case studies, and 50 workbooks packed with examples and solutions. Check out Microsoft Excel 2019 VBA and Macros today!
PivotTables are great for digesting and analyzing huge amounts of data. But what if you want part of that data excluded, ...
Discover MoreWhen you want to include specific records from a source table into a PivotTable, you need to employ some sort of ...
Discover MoreIf you are using a data set that includes a number of zero values, you may not want those values to appear in a ...
Discover MoreFREE SERVICE: Get tips like this every week in ExcelTips, a free productivity newsletter. Enter your address and click "Subscribe."
2024-08-03 11:15:16
Brian Lair
Thanks for this great tip. Like Nancy, I much prefer the Classic layout, so this will save me some time & aggravation.
Got a version of Excel that uses the ribbon interface (Excel 2007 or later)? This site is for you! If you use an earlier version of Excel, visit our ExcelTips site focusing on the menu interface.
FREE SERVICE: Get tips like this every week in ExcelTips, a free productivity newsletter. Enter your address and click "Subscribe."
Copyright © 2026 Sharon Parq Associates, Inc.
Comments