Please Note: This article is written for users of the following Microsoft Excel versions: 2007, 2010, 2013, 2016, 2019, 2021, 2024, and Excel in Microsoft 365. If you are using an earlier version (Excel 2003 or earlier), this tip may not work for you. For a version of this tip written specifically for earlier versions of Excel, click here: Saving Common Formulas.
Sometimes, creating just the formula you want can be a victory all in itself. Once created, formulas become valuable, and you may need to use them over and over again in different worksheets you use. Wouldn't it be great to have a way to paste commonly used formulas in a workbook, the same way you can paste clip art or other common objects?
Unfortunately, such a capability is not resident within Excel. There are a couple of things you can do to make your formulas more accessible, however. One thing you can do is keep a text document (a Notepad document) on your desktop and store your commonly used formulas in it. You can even provide extensive notes about any of the formulas you place in the text document. With Excel open, you can open the text document, copy the desired formula to the Clipboard, and quickly paste it in the desired cell of the workbook.
You might also create an Excel workbook or worksheet that you use for formulas. You can add formulas into a cell, but precede them with an apostrophe. In that way, Excel assumes they are text. You can then, at a later point, select the cell and select all the text it contains, exept for the leading apostrophe. Copy the text and then paste it into a desired cell where you want it actually used as a formula.
Another possible solution is to assign names to your formulas.
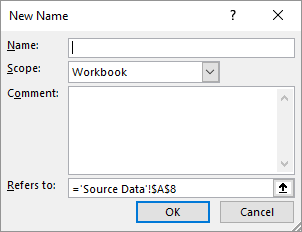
Figure 1. The New Name dialog box.
Now, whenever you want to use the formula, you simply enter an equal sign and the name you gave to the formula in step 8. Even though the name shows in the cell, the formula assigned to the name is actually used in doing the calculation. Since the formula used relative references (you got rid of the dollar signs), it is always relative to where you use the name in the worksheet.
Another approach works great if you are comfortable with macros and with the VB Editor. This approach involves making your common formulas part of your Personal macro workbook. This workbook is opened whenever you start Excel and is designed primarily for macros and customizations that you want available whenever you use Excel. But there is no reason it cannot be used for common formulas, as well.
Assuming you haven't yet created a Personal macro workbook, follow these steps:
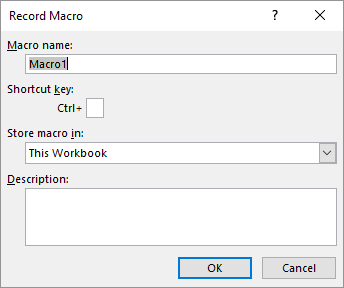
Figure 2. The Record Macro dialog box.
The macro you recorded is now stored in your newly created Personal macro workbook. To see the code that you created, open the VB Editor (Alt+F11). In the upper-left corner of the editor is the Project Explorer; it lists all the various pieces and parts accessible through the editor. One of the items in the Project Explorer should be PERSONAL.XLSB. If you expand this object (click the small plus sign to the left of the project name), you should see a Modules folder. Expand the Modules folder, and it contains Module1. If you double-click on this module you see the macro you just recorded; it looks something like this:
Sub Macro1()

' Macro1 Macro
'

'
    Range("A4").Select
End Sub
You can now select this code and delete it, since you don't need it anymore. You can then place other macros or user-defined functions in the module so they will be available.
What about formulas? Copy them to the Clipboard and paste them in the module, outside of any procedures defined therein. All you need to do is make sure you preface the formula with an apostrophe, so that the VB Editor thinks you are entering a comment. When you need the formulas at a later time, just go to the VB Editor, open the module, copy the formula, and paste it into the workbook where you need it.
Finally, you could also place your common formulas into AutoCorrect entries. Follow these steps:

Figure 3. The AutoCorrect dialog box.
You can now use your formula as you would any other AutoCorrect entry. Just type whatever you used in step 9 and then press Enter. The name is replaced with the full formula.
As you can tell, there are lots of ideas in this tip. Which approach should you use? The one that seems easiest and most flexible to you, of course. There is no "right answer," only ideas that can be adapted to your specific needs.
Note:
ExcelTips is your source for cost-effective Microsoft Excel training. This tip (6135) applies to Microsoft Excel 2007, 2010, 2013, 2016, 2019, 2021, 2024, and Excel in Microsoft 365. You can find a version of this tip for the older menu interface of Excel here: Saving Common Formulas.

Dive Deep into Macros! Make Excel do things you thought were impossible, discover techniques you won't find anywhere else, and create powerful automated reports. Bill Jelen and Tracy Syrstad help you instantly visualize information to make it actionable. You�ll find step-by-step instructions, real-world case studies, and 50 workbooks packed with examples and solutions. Check out Microsoft Excel 2019 VBA and Macros today!
If you are keeping track of people or things within Excel, you may want to devise unique ID numbers you can use for those ...
Discover MoreThe primary way you signify that you are entering a formula is to start a cell entry with an equal sign. The equal sign ...
Discover MoreWhen converting between measurement systems, you might want to use two cells for each type of measurement. Make a change ...
Discover MoreFREE SERVICE: Get tips like this every week in ExcelTips, a free productivity newsletter. Enter your address and click "Subscribe."
2025-12-13 10:22:05
J. Woolley
Also, consider Excel 2024's LAMBDA function.
2025-12-13 08:46:51
Mark
There's an Excel add-in called Monkey Tools that's available that can provide this capability and much much more. Though the Pro version isn't free, the free version includes this functionality. Go to their website: monkeytools . ca, select the Features page and look at section 2.1 Biblio Monkey.
No Financial Interest (NFI) though I have taken classes that the author (Ken Puls also known as ExcelGuru) offers through his excellent training company, SkillWave.
Got a version of Excel that uses the ribbon interface (Excel 2007 or later)? This site is for you! If you use an earlier version of Excel, visit our ExcelTips site focusing on the menu interface.
FREE SERVICE: Get tips like this every week in ExcelTips, a free productivity newsletter. Enter your address and click "Subscribe."
Copyright © 2026 Sharon Parq Associates, Inc.
 Please Note:
This article is written for users of the following Microsoft Excel versions: 2007, 2010, 2013, 2016, 2019, 2021, 2024, and Excel in Microsoft 365. If you are using an earlier version (Excel 2003 or earlier), this tip may not work for you. For a version of this tip written specifically for earlier versions of Excel, click here:
Please Note:
This article is written for users of the following Microsoft Excel versions: 2007, 2010, 2013, 2016, 2019, 2021, 2024, and Excel in Microsoft 365. If you are using an earlier version (Excel 2003 or earlier), this tip may not work for you. For a version of this tip written specifically for earlier versions of Excel, click here:
Comments