Please Note: This article is written for users of the following Microsoft Excel versions: 2007, 2010, 2013, 2016, 2019, 2021, and Excel in Microsoft 365. If you are using an earlier version (Excel 2003 or earlier), this tip may not work for you. For a version of this tip written specifically for earlier versions of Excel, click here: Using Multiple Print Settings.
If you have multiple areas that you print in a worksheet, you may get tired of repeatedly specifying what area you want to print and then printing it. Such a task is well suited to being done with a macro. The macro can take care of specifying a print area and then actually printing the information.
For instance, let's assume that you have two print ranges defined in your worksheet: Range1 and Range2. Further, Range1 should be printed in portrait orientation and Range2 should be printed in landscape orientation. The following macros can be used to print each of the print ranges:
Sub PrintRange1()
    ActiveSheet.PageSetup.PrintArea = Range("range1").Address
    ActiveSheet.PageSetup.Orientation = xlPortrait
    ActiveWindow.SelectedSheets.PrintOut
End Sub
Sub PrintRange2()
    ActiveSheet.PageSetup.PrintArea = Range("range2").Address
    ActiveSheet.PageSetup.Orientation = xlLandscape
    ActiveWindow.SelectedSheets.PrintOut
End Sub
These are very simple macros, but you get the idea—all you need to do is set up the print job in the macro, and then print from the macro itself. You could even attach the macros to the Quick Access Toolbar or to a shortcut key, as described in other issues of ExcelTips.
If you prefer to not use macros, you could also use the custom views feature of Excel. (Understand, though, that custom views won't work if you have defined tables in your worksheet.) Simply set the print area, orientation, margins, and other settings desired. Then define this as a custom view. To define a custom view, follow these steps:
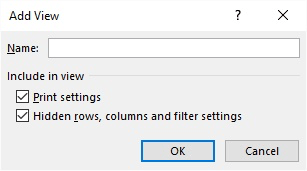
Figure 1. The Add View dialog box.
You can continue to define and save additional views, as desired. Your custom views are saved with your workbook, and you can later use them to print what you want. (Just display the custom view and then print your worksheet.)
Note:
ExcelTips is your source for cost-effective Microsoft Excel training. This tip (6751) applies to Microsoft Excel 2007, 2010, 2013, 2016, 2019, 2021, and Excel in Microsoft 365. You can find a version of this tip for the older menu interface of Excel here: Using Multiple Print Settings.

Dive Deep into Macros! Make Excel do things you thought were impossible, discover techniques you won't find anywhere else, and create powerful automated reports. Bill Jelen and Tracy Syrstad help you instantly visualize information to make it actionable. You�ll find step-by-step instructions, real-world case studies, and 50 workbooks packed with examples and solutions. Check out Microsoft Excel 2019 VBA and Macros today!
The Analysis ToolPak is used to add some very handy capabilities to Excel. If you don't have it installed, and you can't ...
Discover MoreThe primary way to extend what Excel can do is through the use of add-ins. This tip explains what they are and the ...
Discover MoreThe Track Changes tool in Excel can be helpful, but it can also be aggravating because it doesn't allow you to use it on ...
Discover MoreFREE SERVICE: Get tips like this every week in ExcelTips, a free productivity newsletter. Enter your address and click "Subscribe."
2023-02-27 09:53:58
J. Woolley
@Joachim
Did you read this in the Tip? "(Understand, though, that custom views won't work if you have defined tables in your worksheet.)" Perhaps the parentheses confused you.
2023-02-27 03:08:21
Joachim
Hi Allen,
i can't define a custom view. The button is greyed out.
After googling i found that first i have to use convert my table with the button "Convert to Range".
After doing this I can define custom views.
You should mention this in your article.
Best regards
Joe
Got a version of Excel that uses the ribbon interface (Excel 2007 or later)? This site is for you! If you use an earlier version of Excel, visit our ExcelTips site focusing on the menu interface.
FREE SERVICE: Get tips like this every week in ExcelTips, a free productivity newsletter. Enter your address and click "Subscribe."
Copyright © 2026 Sharon Parq Associates, Inc.
 Please Note:
This article is written for users of the following Microsoft Excel versions: 2007, 2010, 2013, 2016, 2019, 2021, and Excel in Microsoft 365. If you are using an earlier version (Excel 2003 or earlier), this tip may not work for you. For a version of this tip written specifically for earlier versions of Excel, click here:
Please Note:
This article is written for users of the following Microsoft Excel versions: 2007, 2010, 2013, 2016, 2019, 2021, and Excel in Microsoft 365. If you are using an earlier version (Excel 2003 or earlier), this tip may not work for you. For a version of this tip written specifically for earlier versions of Excel, click here:
Comments