Please Note: This article is written for users of the following Microsoft Excel versions: 2007, 2010, 2013, 2016, 2019, 2021, 2024, and Excel in Microsoft 365. If you are using an earlier version (Excel 2003 or earlier), this tip may not work for you. For a version of this tip written specifically for earlier versions of Excel, click here: Creating Add-Ins.
Any Excel workbook can be converted to an add-in. The steps you need to follow to create an add-in are very precise, and may seem a bit overwhelming (particularly the first couple of times you do it). To create a protected add-in file, you need to do a little work in the VBA Editor and in Excel itself. First, here are the steps to follow to get the settings correct in the VBA Editor:
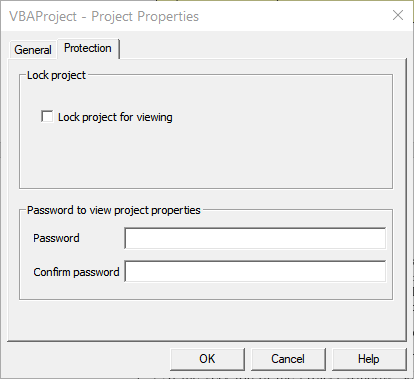
Figure 1. The Protection tab of the project�s Properties dialog box.
Now it is time to do a little work in Excel. Follow these steps if you are using Excel 2010 or a later version:
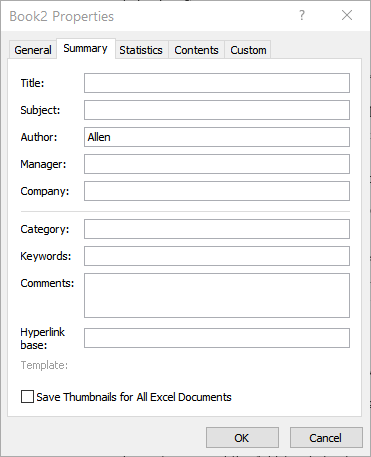
Figure 2. The Summary tab of the workbook�s Properties dialog box.
The steps are slightly different in Excel 2007:
Note:
ExcelTips is your source for cost-effective Microsoft Excel training. This tip (8528) applies to Microsoft Excel 2007, 2010, 2013, 2016, 2019, 2021, 2024, and Excel in Microsoft 365. You can find a version of this tip for the older menu interface of Excel here: Creating Add-Ins.

Solve Real Business Problems Master business modeling and analysis techniques with Excel and transform data into bottom-line results. This hands-on, scenario-focused guide shows you how to use the latest Excel tools to integrate data from multiple tables. Check out Microsoft Excel Data Analysis and Business Modeling today!
Excel provides some great tools that can help you see the relationships between the formulas in your worksheets. These ...
Discover MoreWhen importing text into your worksheet, Excel defaults to using a comma as a delimiter. If you would prefer a different ...
Discover MoreWhen you add subtotals to a worksheet, Excel typically places them in the same column that you are subtotaling. If you ...
Discover MoreFREE SERVICE: Get tips like this every week in ExcelTips, a free productivity newsletter. Enter your address and click "Subscribe."
2026-06-21 10:32:00
J. Woolley
The Tip's first 9 steps apply protection. This is not necessary, especially if you don't intend to distribute your add-in. If you create an add-in strictly for your own use, I recommend leaving it unprotected because it is easier to maintain.
Like Personal.xlsb, your custom add-in's procedures can be used in multiple workbooks, but first your add-in must be installed; the Tip does not address that part.
My Excel Toolbox references these five articles about creating, installing, and updating a custom Excel add-in:
https://www.myonlinetraininghub.com/create-an-excel-add-in-for-user-defined-functions-udfs
https://bettersolutions.com/excel/add-ins/creating.htm
https://bettersolutions.com/excel/add-ins/installing.htm
https://support.microsoft.com/en-us/Search/?query=Excel+add-in
https://www.thevbahelp.com/post/installing-and-updating-add-ins
My Excel Toolbox's unprotected add-in file is distributed via download.
See https://sites.google.com/view/MyExcelToolbox/
Got a version of Excel that uses the ribbon interface (Excel 2007 or later)? This site is for you! If you use an earlier version of Excel, visit our ExcelTips site focusing on the menu interface.
FREE SERVICE: Get tips like this every week in ExcelTips, a free productivity newsletter. Enter your address and click "Subscribe."
Copyright © 2026 Sharon Parq Associates, Inc.
 Please Note:
This article is written for users of the following Microsoft Excel versions: 2007, 2010, 2013, 2016, 2019, 2021, 2024, and Excel in Microsoft 365. If you are using an earlier version (Excel 2003 or earlier), this tip may not work for you. For a version of this tip written specifically for earlier versions of Excel, click here:
Please Note:
This article is written for users of the following Microsoft Excel versions: 2007, 2010, 2013, 2016, 2019, 2021, 2024, and Excel in Microsoft 365. If you are using an earlier version (Excel 2003 or earlier), this tip may not work for you. For a version of this tip written specifically for earlier versions of Excel, click here:
Comments