Please Note: This article is written for users of the following Microsoft Excel versions: 2007, 2010, 2013, 2016, 2019, 2021, and Excel in Microsoft 365. If you are using an earlier version (Excel 2003 or earlier), this tip may not work for you. For a version of this tip written specifically for earlier versions of Excel, click here: Adding a File Path and Filename.
Margo wants to insert a file path and filename in an Excel worksheet. She wants to be able to insert the information in either a cell or into the header/footer. This is rather easy to do in Excel.
To insert the file path and filename into a cell, you use the CELL worksheet function in the following manner:
=CELL("filename")
This formula returns the entire path, filename, and tab name of the current worksheet, like this:
E:\My Data\Excel\[Budget.xlsx]Sheet1
If you want to strip out the brackets and the sheet name, you can use the following variation on the formula:
=SUBSTITUTE(LEFT(CELL("filename"),FIND("]",CELL("filename"))-1),"[","")
The LEFT function gets rid of everything from the right bracket to the end of the string, while the SUBSTITUTE function gets rid of the left bracket.
If you are using Excel 2021 or the version of Excel in Microsoft 365, you could also use this formula to get the stripped-down workbook name:
=TEXTAFTER(TEXTBEFORE(CELL("filename"),"]"),"[")
Putting a path and filename into a header or footer is easy:
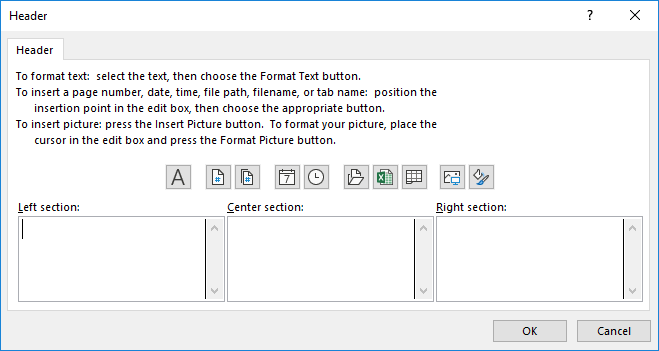
Figure 1. The Header dialog box.
&[Path]&[File]
When you print the worksheet, Excel replaces the codes in step 5 with the path name and the file name of the workbook, respectively.
ExcelTips is your source for cost-effective Microsoft Excel training. This tip (11356) applies to Microsoft Excel 2007, 2010, 2013, 2016, 2019, 2021, and Excel in Microsoft 365. You can find a version of this tip for the older menu interface of Excel here: Adding a File Path and Filename.

Solve Real Business Problems Master business modeling and analysis techniques with Excel and transform data into bottom-line results. This hands-on, scenario-focused guide shows you how to use the latest Excel tools to integrate data from multiple tables. Check out Microsoft Excel Data Analysis and Business Modeling today!
Keeping tabs on the size of a workbook can be important when using Excel. You have a couple of options that will allow ...
Discover MoreIt is often necessary to import information from other programs into Excel. Sometimes this can lead to challenges, such ...
Discover MoreWhen dealing with files containing comma-separated values, you want to make sure that what gets imported into Excel ...
Discover MoreFREE SERVICE: Get tips like this every week in ExcelTips, a free productivity newsletter. Enter your address and click "Subscribe."
2024-05-29 11:18:31
J. Woolley
The Tip includes this formula to return the workbook's name (minus path and sheet)
=TEXTAFTER(TEXTBEFORE(CELL("filename"), "]"), "[")
but it requires Excel 2021+.
My Excel Toolbox includes the following function to return the substring of Text between two substrings BeginAfter and EndBefore:
=Between(Text, BeginAfter, EndBefore, [CaseSensitive], [Direction])
If Direction is -1, the search is right-to-left for both BeginAfter and EndBefore; therefore, this formula returns the workbook's name
=Between(CELL("filename"), "[", "]", , -1)
and this formula returns the workbook's parent folder
=Between(CELL("filename"), "\", "\[", , -1)
and this formula returns the workbook's path
=Between(CELL("filename"), "", "\[", , -1)
Since the three previous formulas search right-to-left, they compensate for a path that might have [ and/or ] brackets in a folder's name; the Tip's formulas do not.
My Excel Toolbox includes two more functions that are useful for this subject:
=FindRev(FindText, WithinText, [StartNum], [CaseSensitive])
=NameOf([This], [Target])
Unlike Excel's FIND function, FindRev searches in reverse (right-to-left) to return the location of FindText in WithinText.
NameOf is described in the following two references:
My 2022-04-06 comment: https://excelribbon.tips.net/T007850
My Jul 19, 2019 article: https://wellsr.com/vba/2019/excel/vba-udf-to-enhance-excel-cell-and-info-functions/
NameOf("book") returns the formula cell's workbook name; NameOf("path") returns its path.
Notice CELL("filename") does not always update when switching between two open workbooks. (Press F9 to update.) The NameOf function is Volatile, so that is not a problem.
See https://sites.google.com/view/MyExcelToolbox
Got a version of Excel that uses the ribbon interface (Excel 2007 or later)? This site is for you! If you use an earlier version of Excel, visit our ExcelTips site focusing on the menu interface.
FREE SERVICE: Get tips like this every week in ExcelTips, a free productivity newsletter. Enter your address and click "Subscribe."
Copyright © 2026 Sharon Parq Associates, Inc.
 Please Note:
This article is written for users of the following Microsoft Excel versions: 2007, 2010, 2013, 2016, 2019, 2021, and Excel in Microsoft 365. If you are using an earlier version (Excel 2003 or earlier), this tip may not work for you. For a version of this tip written specifically for earlier versions of Excel, click here:
Please Note:
This article is written for users of the following Microsoft Excel versions: 2007, 2010, 2013, 2016, 2019, 2021, and Excel in Microsoft 365. If you are using an earlier version (Excel 2003 or earlier), this tip may not work for you. For a version of this tip written specifically for earlier versions of Excel, click here:
Comments