Please Note: This article is written for users of the following Microsoft Excel versions: 2007, 2010, 2013, 2016, 2019, 2021, and Excel in Microsoft 365. If you are using an earlier version (Excel 2003 or earlier), this tip may not work for you. For a version of this tip written specifically for earlier versions of Excel, click here: Automatically Loading Add-ins.
Michael asked if there is a way to selectively load add-ins for specific worksheets. There is a way to do this, but it involves the use of macros attached to the Workbook module for the specific worksheets. Follow these general steps:
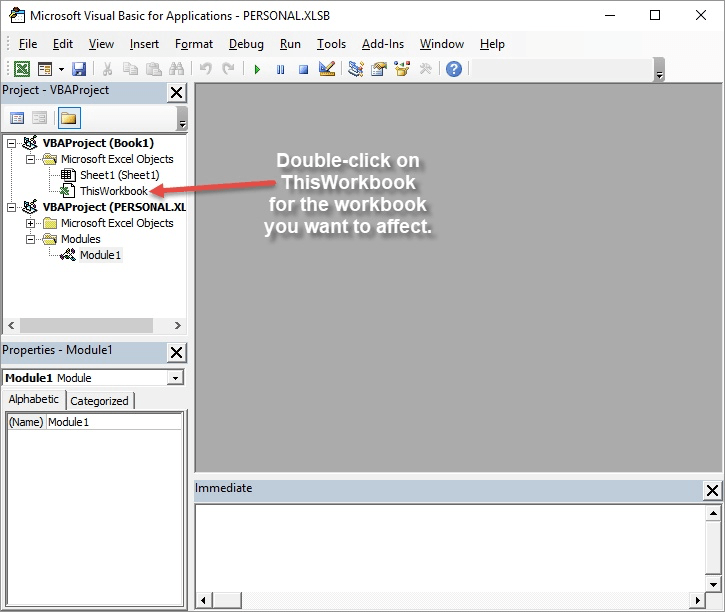
Figure 1. Double-click the ThisWorkbook object in the Project Explorer.
Private Sub Workbook_BeforeClose(Cancel As Boolean)
    AddIns("Add-In Name").Installed = False
End Sub
Private Sub Workbook_Open()
    AddIns("Add-In Name").Installed = True
End Sub
If you are not sure of the correct name for a particular add-in (see step 5), you can use the macro recorder to record the process of activating an add-in. That will show you the exact name you should use in the above macros.
Note:
ExcelTips is your source for cost-effective Microsoft Excel training. This tip (11788) applies to Microsoft Excel 2007, 2010, 2013, 2016, 2019, 2021, and Excel in Microsoft 365. You can find a version of this tip for the older menu interface of Excel here: Automatically Loading Add-ins.

Solve Real Business Problems Master business modeling and analysis techniques with Excel and transform data into bottom-line results. This hands-on, scenario-focused guide shows you how to use the latest Excel tools to integrate data from multiple tables. Check out Microsoft Excel Data Analysis and Business Modeling today!
By default, Excel shows row numbers at the left side of your program window. If you cannot see the row numbers, there are ...
Discover MoreSome people prefer to have what is displayed on the screen in Excel be the precision at which the program works. If you ...
Discover MoreThe mouse wheel, by default, controls scrolling vertically through your worksheet. If you don't want the wheel to control ...
Discover MoreFREE SERVICE: Get tips like this every week in ExcelTips, a free productivity newsletter. Enter your address and click "Subscribe."
There are currently no comments for this tip. (Be the first to leave your comment—just use the simple form above!)
Got a version of Excel that uses the ribbon interface (Excel 2007 or later)? This site is for you! If you use an earlier version of Excel, visit our ExcelTips site focusing on the menu interface.
FREE SERVICE: Get tips like this every week in ExcelTips, a free productivity newsletter. Enter your address and click "Subscribe."
Copyright © 2026 Sharon Parq Associates, Inc.
 Please Note:
This article is written for users of the following Microsoft Excel versions: 2007, 2010, 2013, 2016, 2019, 2021, and Excel in Microsoft 365. If you are using an earlier version (Excel 2003 or earlier), this tip may not work for you. For a version of this tip written specifically for earlier versions of Excel, click here:
Please Note:
This article is written for users of the following Microsoft Excel versions: 2007, 2010, 2013, 2016, 2019, 2021, and Excel in Microsoft 365. If you are using an earlier version (Excel 2003 or earlier), this tip may not work for you. For a version of this tip written specifically for earlier versions of Excel, click here:
Comments