Loretta wants to set a default row height with word wrap, but she also wants automatic row height to play into it. She doesn't want some "skinny" rows to appear. The default row height in her worksheet seems to be 12.75 but she'd like that to be, perhaps, 25 and then auto-adjust for any rows that need to have more height. She wonders how to make the default work this way.
There are two ways you can specify row height in a worksheet: explicitly or implicitly. You specify an explicit row height by using the tools on the ribbon to specify the exact height you want used for a particular row or rows. When you do so, you are "locking" the row height so that it is always what you specified.
Implicit height is calculated by Excel based on the size of the largest font used in the row. The default font for Excel is 10-point Calibri, so the row height is calculated to be 12.75. There seems to be no rhyme or reason on how this calculation occurs. For instance, if you change from 10-point Calibri to 20-point Calibri, you would expect the row height to double—but it doesn't. Instead, the row height becomes 26.25. If you change the font from Calibri to Arial, but leave it at 20 points, the row height automatically changes to 25.5.
Loretta wants the row height to be 25 and adjust larger, if necessary, and she wants it to be done automatically. There are no settings to do this. If you change the row height for a workbook to 25, explicitly, it won't adjust larger automatically. That means you need to leave the row height set to implicitly adjust (done by choosing AutoFit as the row height) and, somehow, get it to go no lower than 25.
The only way we've been able to determine to do this as Loretta envisions is to change the font and/or font size for the worksheet. As already noted, you could specify a default 20-point Arial font, and your row height would be 25.5—pretty close to Loretta's desire. This is a rather large font, but you could change the size of the font in individual columns (or cells) within a row and not have it affect the row height. This is true as long as at least one cell in the row is formatted to use a 20-point Arial font.
To change the default font used by Excel, follow these steps:
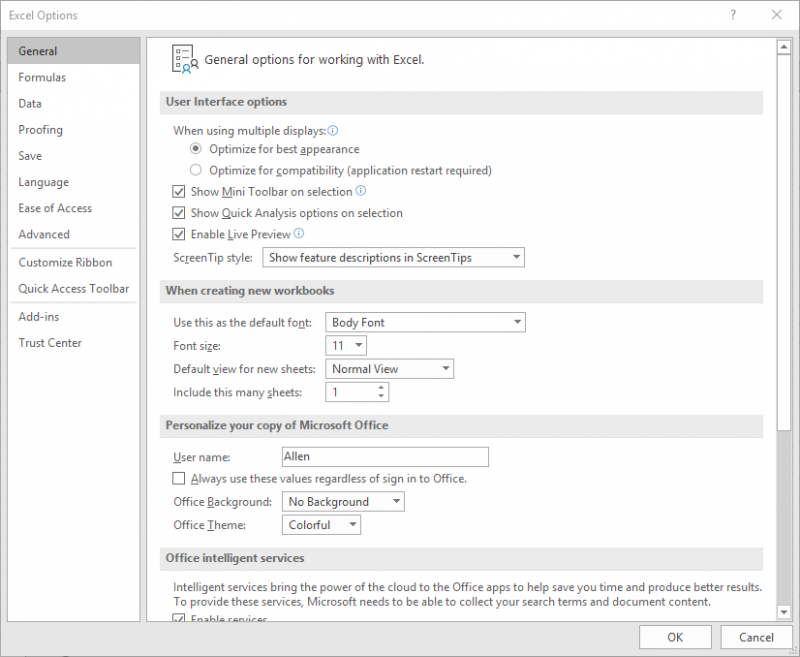
Figure 1. The General options of the Excel Options dialog box.
Another approach is to adjust a column's font after you create a new workbook. For instance, let's say you open a new workbook, and you know that the data you enter will occupy rows in columns A through M. You could select column N (one column past where you will be working) and change the font for that single column to 20-point Arial. Excel automatically adjusts the row height in all the rows to 20.5 based on the new implicit row-height calculation for column N. There doesn't have to be any data in column N; you just need to adjust the font and/or font size for the column.
ExcelTips is your source for cost-effective Microsoft Excel training. This tip (5663) applies to Microsoft Excel 2007, 2010, 2013, 2016, 2019, and 2021.

Best-Selling VBA Tutorial for Beginners Take your Excel knowledge to the next level. With a little background in VBA programming, you can go well beyond basic spreadsheets and functions. Use macros to reduce errors, save time, and integrate with other Microsoft applications. Fully updated for the latest version of Office 365. Check out Microsoft 365 Excel VBA Programming For Dummies today!
When building a worksheet, you may need to hide some of the rows or unhide other, previously hidden, rows. It's easy to ...
Discover MoreNeed to hide a large number of rows? It's easy to do if you combine a few keyboard shortcuts. Here are several techniques ...
Discover MoreWant to set the width and height of a row and column by specifying a number of inches? It's not quite as straightforward ...
Discover MoreFREE SERVICE: Get tips like this every week in ExcelTips, a free productivity newsletter. Enter your address and click "Subscribe."
2024-09-02 16:43:22
J. Woolley
@Eric
You can make a template file:
1. Open a new blank workbook.
2. Press Ctrl+A to select all cells.
3. With all cells selected:
Format with 10pt Arial font
Press Alt+O+H to set row height
Press Alt+O+W to set column width
4. Click File > Save As and pick Excel Template (*.xltx).
Use this template when you open a new workbook. You might want to make it your default workbook template and/or default worksheet template; see "Automatically open a workbook template or worksheet template..." here: https://support.microsoft.com/en-us/office/customize-how-excel-starts-6509b9af-2cc8-4fb6-9ef5-cf5f1d292c19
2024-08-28 09:34:36
Eric
So I set the default font/size to what I want 10pt Arial. This makes the cells default height to be 12.75pt (17px) I would like the default height to be 15pt (20px). I would also like the default width to be 10.71 (80px). It doesn't seem like this is possible with built in options. Can you confirm or deny?
2023-09-23 16:26:28
J. Woolley
This macro will set all used (non-null) cells of the active worksheet to wrap text with AutoFit and minimum 25 point row height:
Sub FixRowHeight()
Const MinH = 25 'adjust as required
Dim row As Range
If TypeName(ActiveSheet) <> "Worksheet" Then Exit Sub
For Each row In ActiveSheet.UsedRange.Rows
With row
.WrapText = True
.AutoFit
If .RowHeight < MinH Then .RowHeight = MinH
End With
Next row
End Sub
Using the row header, if you click the border of a row with 25 point height the number displayed is rounded to a whole number of pixels. Windows assumes 96/72 pixels per point, so 25 points corresponds to 33.33 pixels. When you click the row header border, the number displayed is 24.75 (33 pixels).
2023-09-23 10:45:48
J. Woolley
There are a couple of typos in this Tip:
1. In step 3: "Use the Use This as..." should be "Use this as..."
2. In the last paragraph: "Excel automatically adjusts the row height in all the rows to 20.5..." should have 25.5 instead of 20.5.
Got a version of Excel that uses the ribbon interface (Excel 2007 or later)? This site is for you! If you use an earlier version of Excel, visit our ExcelTips site focusing on the menu interface.
FREE SERVICE: Get tips like this every week in ExcelTips, a free productivity newsletter. Enter your address and click "Subscribe."
Copyright © 2026 Sharon Parq Associates, Inc.
Comments