Please Note: This article is written for users of the following Microsoft Excel versions: 2007, 2010, 2013, 2016, 2019, 2021, and Excel in Microsoft 365. If you are using an earlier version (Excel 2003 or earlier), this tip may not work for you. For a version of this tip written specifically for earlier versions of Excel, click here: Deleting Graphics when Deleting a Row.
Sethuraman has a worksheet where column A contains names, column B contains addresses, and column C contains a photo of the person. If he deletes the row, the photo remains. He wonders how the photo can be deleted at the same time the row is deleted.
This happens because of the way that the properties for the graphics are set up. If the only graphics in the worksheet are those for the people, then start by selecting all the graphics. (Press F5, click Special, select Objects, click OK.) Then, follow these steps to set the properties for all the selected graphics if you are using Excel 2007 or Excel 2010:
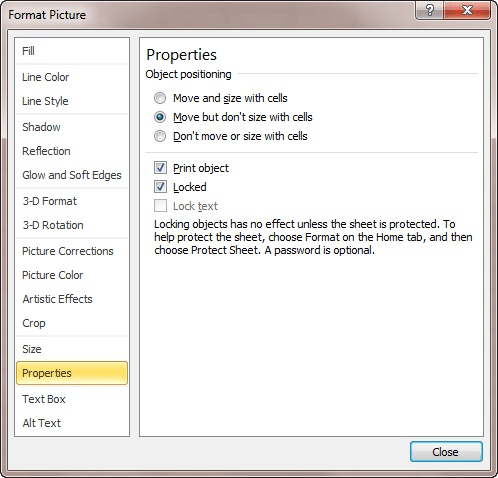
Figure 1. The Properties tab of the Format Picture dialog box.
If you are using Excel 2013 or a later version, use the following steps instead:
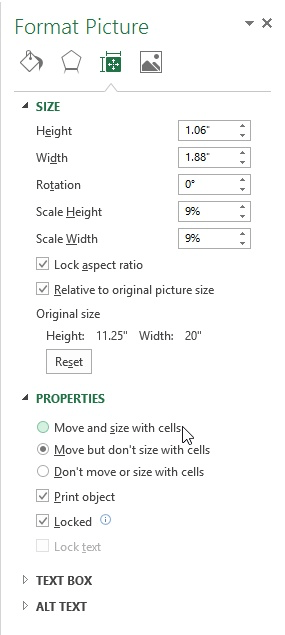
Figure 2. The Properties option of the Format Picture task pane.
ExcelTips is your source for cost-effective Microsoft Excel training. This tip (12258) applies to Microsoft Excel 2007, 2010, 2013, 2016, 2019, 2021, and Excel in Microsoft 365. You can find a version of this tip for the older menu interface of Excel here: Deleting Graphics when Deleting a Row.

Excel Smarts for Beginners! Featuring the friendly and trusted For Dummies style, this popular guide shows beginners how to get up and running with Excel while also helping more experienced users get comfortable with the newest features. Check out Excel 2019 For Dummies today!
A picture is worth a thousand words, but getting the picture, particularly a screen shot, into a workbook may seem ...
Discover MoreIf you want to create a line in your worksheet that is a specific length and slope, there are a couple of ways you can do ...
Discover MoreExcel makes it rather easy to add shapes to your worksheets. If you add a lot of shapes, you quickly discover that it can ...
Discover MoreFREE SERVICE: Get tips like this every week in ExcelTips, a free productivity newsletter. Enter your address and click "Subscribe."
There are currently no comments for this tip. (Be the first to leave your comment—just use the simple form above!)
Got a version of Excel that uses the ribbon interface (Excel 2007 or later)? This site is for you! If you use an earlier version of Excel, visit our ExcelTips site focusing on the menu interface.
FREE SERVICE: Get tips like this every week in ExcelTips, a free productivity newsletter. Enter your address and click "Subscribe."
Copyright © 2026 Sharon Parq Associates, Inc.
 Please Note:
This article is written for users of the following Microsoft Excel versions: 2007, 2010, 2013, 2016, 2019, 2021, and Excel in Microsoft 365. If you are using an earlier version (Excel 2003 or earlier), this tip may not work for you. For a version of this tip written specifically for earlier versions of Excel, click here:
Please Note:
This article is written for users of the following Microsoft Excel versions: 2007, 2010, 2013, 2016, 2019, 2021, and Excel in Microsoft 365. If you are using an earlier version (Excel 2003 or earlier), this tip may not work for you. For a version of this tip written specifically for earlier versions of Excel, click here:
Comments